- Why use Python?
- Why use ButterCMS?
- Tutorial prerequisites
- Tutorial: Building a landing page with Python & ButterCMS
- Building our components within our Python application
- Creating our landing page components in ButterCMS
- Building our landing page with the newly created components and collections
- Fetching the content from ButterCMS
- Closing thoughts
A landing page aims to convert visitors into leads. These leads may be nurtured with more specialized marketing campaigns, such as email drip campaigns, direct mail, or retargeting advertisements before being passed on to your sales team or before they purchase your product.
In this article, we'll learn how to build a business website’s landing page with the Python programming language alongside a lightweight framework called Flask. We’ll also use ButterCMS, which will serve as our backend, where we'll store and fetch our content.
Table of contents
Why use Python?
Python is a general-purpose programming language that can create a wide range of applications. Python was initially designed as a scripting language for the Amoeba operating system. However, it quickly gained popularity as a general-purpose programming language. It has since been used for various tasks, including web development, scientific computing, data analysis, and artificial intelligence.
It is also a solid option for building landing pages because of its:
-
Ease of use: The syntax of Python is simple to learn, focusing on readability and usefulness.
-
Cross-platform compatibility: The Python programming language can run on multiple operating systems, including Windows, macOS, and Linux, with a single codebase.
-
Use of third-party libraries: Python has many third-party libraries and frameworks that can increase its functionality for specific tasks, such as data analysis, web development, and machine learning.
-
High-level language: Python enables developers to operate at a higher degree of abstraction than low-level languages like C or Assembly.
-
Object-oriented programming (OOP): Python offers object-oriented programming (OOP), which enables developers to create modular, reusable programs.
Why use ButterCMS?
ButterCMS is a headless content management system (CMS) that allows you to build applications and websites using any programming language. Its API-first architecture simplifies integrating with any front-end platform or framework and offers strong security capabilities to protect your content and data.
Here are a few other reasons why you'll want to pick ButterCMS over any other CMS:
-
Collections: ButterCMS offers a collection feature that is flexible and extensible and can be used to structure a wide range of content. It makes creating and managing content on our landing page easier.
-
Components: ButterCMS offers components, which are reusable pieces of content that can be added to our landing page to create a consistent layout and design. They can be created once and then used across multiple pages, making it easy to maintain consistency and save time.
-
Page types: We can use page types to build news blogs, SEO landing pages, and knowledge bases.
Try ButterCMS free to follow this tutorial and build performant Python landing pages.
Start free trialTutorial prerequisites
To use Python, you will need the following prerequisites:
-
Basic knowledge of Python3 and Flask
-
An active ButterCMS account
-
Python3 installed
-
A code editor for writing and editing our code (VS Code, preferably)
All the code for this tutorial can be found in this GitHub repo.
Tutorial: Building a landing page with Python & ButterCMS
In this section, we'll use Python and the Flask web framework to build a simple landing page. First, let's begin by setting up our virtual environment.
Setting up the virtual environment
The Python virtual environment setting lets you separate your project's dependencies from the rest of your system. This simplifies managing your project's dependencies and ensures that your project will function as expected, even if other projects on your system have different dependencies.
To set up a virtual environment in Python, We need to install virtualenv, which allows us to create virtual environments. Run the following command:
pip install virtualenv
Then we create a new directory for our project and create an isolated Python environment by running the command below:
mkdir PyButterCMS &&  cd PyButterCMS
python3 -m venv env
Let's run the following command to turn on the virtual environment we just created:
source env/bin/activate
Once the virtual environment is activated, let's install the dependencies for our project using pip:
pip install Flask
In this tutorial, we'll build a landing page containing several sections by using a Python framework called Flask and with ButterCMS as our content backend.
Here's a GIF showing what we'll build in this tutorial:
Here’s what our folder structure will look like. Let's get started creating the files and folders we need.
📦PyButterCMS
 ┣ 📂static
 ┃ ┣ 📂Images
 ┃ ┗ 📜style.css
 ┣ 📂templates
 ┃ ┗ 📜index.html
 ┗ 📜main.py
First, we create a main.py file in our application root folder as well as a static and templates folder.
In main.py, let’s add the following code:
from flask import Flask, render_template

app = Flask(__name__, static_folder='static')

@app.route('/')
def index():
   return render_template('index.html')

if __name__ == '__main__':
   app.run(debug=True)
The "/" route, the only route created by this code, is used in the Flask application. The index function next returns the index.html template. The render_template function is used to render the template and provide the client with the response.
The static folder argument supplied to the Flask constructor specifies the location of static files—including CSS, JavaScript, and pictures—that your application will serve.
The if __name__ == '__main__': block is used to run the application only if the script is run as the main program and not imported as a module. Finally, the app.run(debug=True) line starts the development server and runs the application. The debug=True argument enables debugging mode, which provides detailed error messages and makes it easier to develop and test your application.
Building our components within our Python application
We will be building out the components of our application in the index.html file to see them in the browser. Let's get started.
The Navigation component
In our index.html file, let's begin by writing the basic HTML structure and building our navigation bar. Our navigation bar contains links to other pages, our product logo, and a button.
<!DOCTYPE html>
<html>
  <head>
    <title>My Landing Page</title>
    <meta charset="UTF-8">
    <meta name="viewport" content="width=device-width, initial-scale=1.0">
    <link rel="stylesheet" type="text/css" href="{{ url_for('static',   filename='style.css') }}">
  </head>
  <body>
 <!-- NAVBAR -->
  <div class="nav__container">
     <h1 class="logo">TIMELY</h1>
     <ul class="link_container">
       <li class="links">Product</li>
       <li class="links">Blog</li>
       <li class="links">Careers</li>
     </ul>
   </div>


     </ul>
   </div>
  </body>
</html>
Styling the navigation bar
Here are the styles for our navigation bar section:
.nav__container {
 display: flex;
 align-items: center;
 padding: 0 5rem;
 justify-content: space-between;
}

.link_container {
 display: flex;
 align-items: center;

 list-style: none;
}

.links {
 margin: 0 2rem;
 color: #000;
}
After styling, here’s the result of our navigation bar:

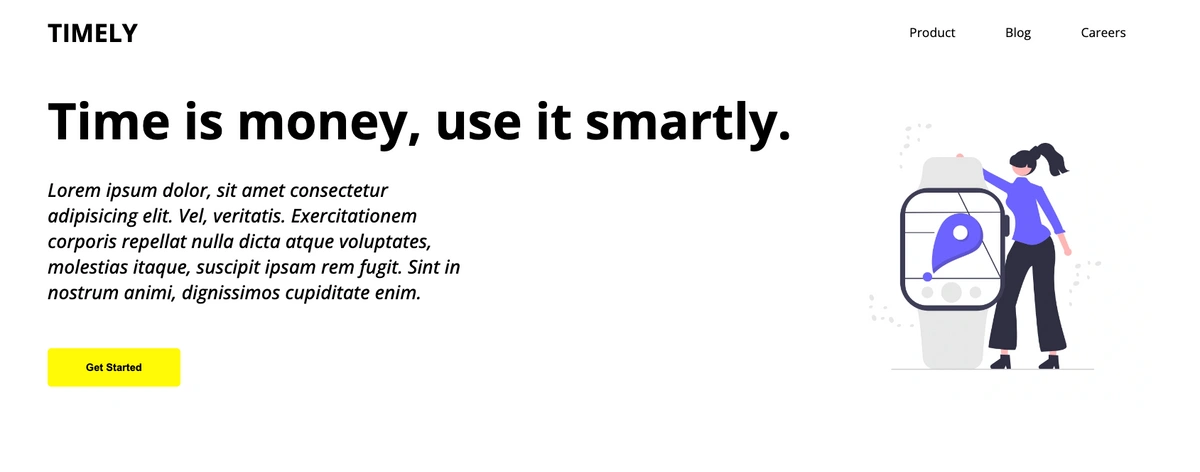
The Hero component
The Hero section has a clear headline, product description, and a call-to-action button. It also includes an image related to the product.
<!-- HERO -->
   <section class="hero_container">
  <div class="subtitle_container">

   <h2 class="hero_title">
       Time is money,

       Use it smartly.
     </h2>
     <div class="subtitle_container">
       <p class="hero_subtitle">
        Lorem ipsum dolor, sit amet consectetur adipisicing elit. Vel,
           veritatis. Exercitationem corporis repellat nulla dicta atque
           voluptates, molestias itaque, suscipit ipsam rem fugit. Sint in
           nostrum animi, dignissimos cupiditate enim.

       </p>
     </div>

     <div class="btn_container">
       <button class="btn btn_hero">Get Started Free</button>
     </div>
</div>

     <div class="img_container">
       <img
         src="../static/Images/undraw_Time_management_re_tk5w.png"
         alt=""
         class="hero_img"
       />
     </div>
   </section>
The section has a class name, "hero_container", starting with a heading that says, "Time is money, use it smartly", followed by a short product description in a paragraph. The section ends with a call-to-action button that says "Get Started" and an image of a clock showing time management.
Styling the Hero component
Here are the styles for our Hero section:
.btn {
 background: yellow;
 color: #fff;
 border: 1px solid yellow;
 border-radius: 5px;
}

.hero_container {
 display: flex;
 padding: 0 5rem;
}
.hero_content {
 display: flex;
 flex-direction: column;
 align-items: flex-start;
 justify-content: center;
}
.btn_container {
 margin: 2rem 0;
}
.hero_title {
 font-size: 4rem;
 text-align: center;
 font-style: normal;

 margin: 0 0 5px 0;
}

.hero_subtitle {
 width: 55%;
 font-size: 1.5rem;
 font-style: italic;
}


.hero_img {
 height: 400px;
 margin: 2rem 0;
 border-radius: 10px;
}
After styling, here’s the result of our hero section:
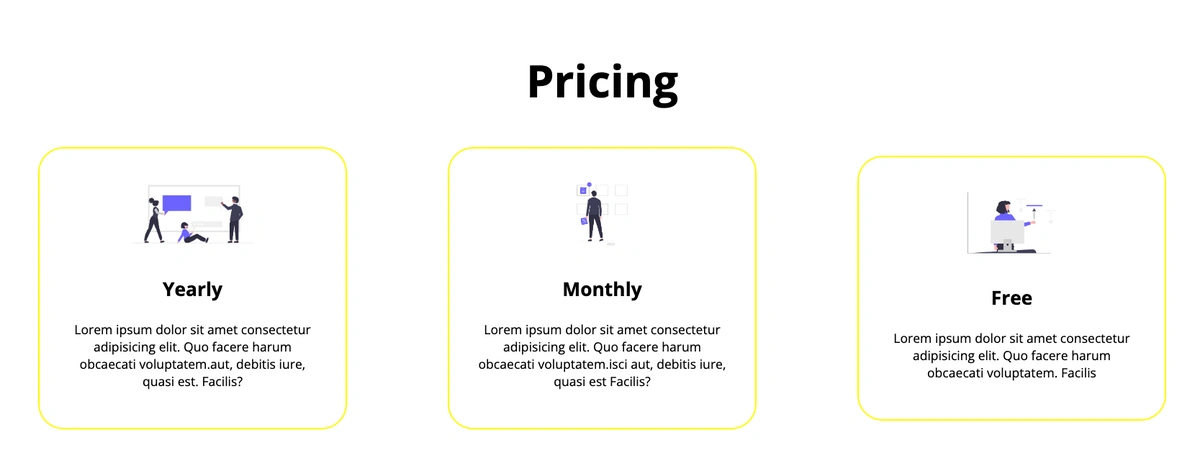
The Pricing Card component
This section shows the price plan of our product on our landing page. It displays different cards which contain images, headings, and a short paragraph.
!-- FEATURES -->

   <section class="features_container">
     <h2 class="features_title">Cool Features</h2>
     <div class="pricing_row">
       <div class="pricing_card">
         <img
           src="../static/Images/undraw_services_re_hu5n.svg"
           alt=""
           class="card_img"
         />
         <h3 class="card_title">Basic</h3>

         <p>
           Lorem ipsum dolor sit amet consectetur adipisicing elit. Quo facere
           harum obcaecati voluptatem. Facilis?
         </p>
       </div>

       <div class="pricing_card">
         <img
           src="../static/Images/undraw_Content_structure_re_ebkv.png"
           alt=""
           class="card_img"
         />
         <h3 class="card_title">Monthly</h3>

         <p>
           Lorem ipsum dolor sit amet consectetur adipisicing elit. Quo facere
           harum obcaecati voluptatem.isci aut, debitis iure, quasi est.
           Facilis?
         </p>
       </div>

       <div class="pricing_card">
         <img
           src="../static/Images/undraw_Development_re_g5hq.png"
           alt=""
           class="card_img"
         />
         <h3 class="card_title">Anually</h3>

         <p>
           Lorem ipsum dolor sit amet consectetur adipisicing elit. Quo facere
           harum obcaecati voluptatem.aut, debitis iure, quasi est. Facilis?
         </p>
       </div>
     </div>
Styling the Pricing component
Here are the styles of our pricing component:
.features_container {
 text-align: center;
 padding: 1rem 0;
 display: flex;
 flex-direction: column;
 align-items: center;
}
.features_title {
 font-size: 3.5rem;
 font-weight: 600;
 color: #000;
}

.pricing_row {
 display: flex;
 justify-content: space-around;
 align-items: center;
}

.pricing_card {
 width: 40%;
 text-align: center;
 padding: 2rem;
 margin: 0 4rem;
 background-color: #fff;
 border-radius: 2rem;
 border: 2px solid yellow;
}

.card_img {
 height: 100px;
}

.card_title {
 font-size: 1.5rem;
 color: #000;
}
Here’s a preview of the Pricing component:
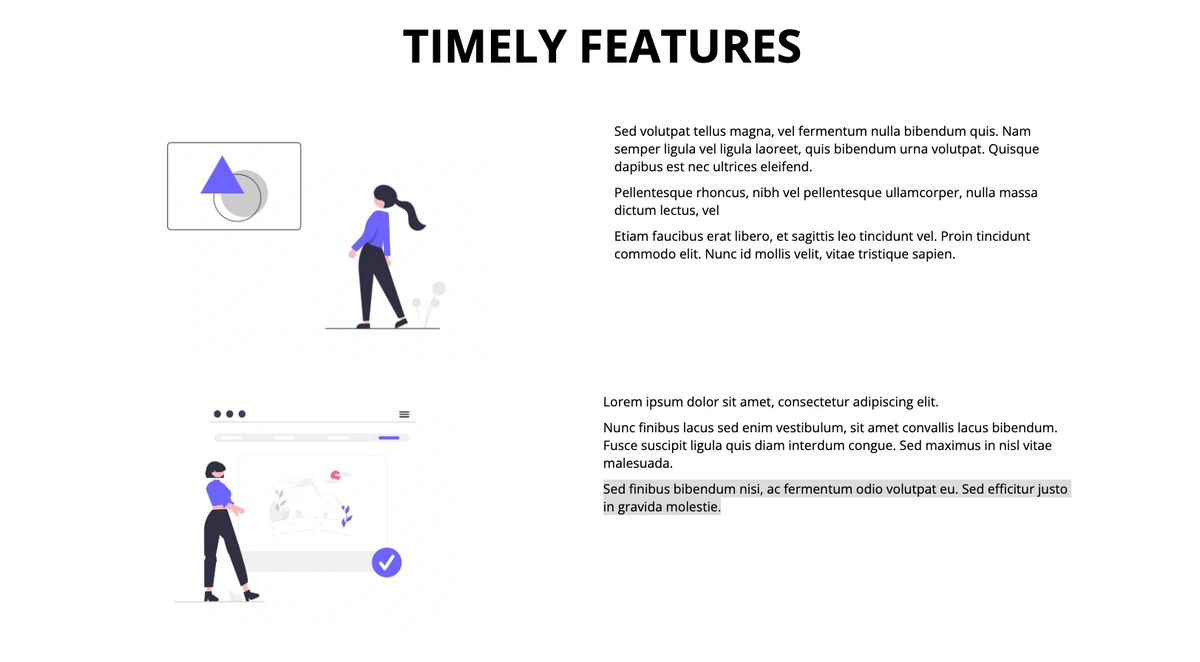
The Features component
The sections contain images, a heading, and unordered lists.
<h2 class="features_title">TIMELY FEATURES</h2>
<div class="features_content">
 <img src="../static/Images/undraw_Image_post_re_25wd.png" alt="" class="features_content_img" />

 <ul>

   <li>Sed volutpat tellus magna, vel fermentum nulla bibendum quis. Nam semper ligula vel ligula laoreet, quis
     bibendum urna volutpat. Quisque dapibus est nec ultrices eleifend.
   </li>
   <li> Pellentesque rhoncus, nibh vel pellentesque ullamcorper, nulla massa dictum lectus, vel

   </li>
   <li> Etiam faucibus erat libero, et sagittis leo tincidunt vel. Proin tincidunt commodo elit. Nunc id mollis velit,
     vitae tristique sapien.
   </li>
 </ul>
</div>

<div class="features_content">
 <img src="../static/Images/undraw_discoverable_xwsc.png" alt="" class="features_content_img" />

 <ul>

   <div class="list_container">

     <li>
       Lorem ipsum dolor sit amet, consectetur adipiscing elit.
     </li>
     <li>
       Nunc finibus lacus sed enim vestibulum, sit amet convallis lacus bibendum. Fusce suscipit ligula quis diam
       interdum congue. Sed maximus in nisl vitae malesuada.

     </li>
     <li>
       Sed finibus bibendum nisi, ac fermentum odio volutpat eu. Sed efficitur justo in gravida molestie.

     </li>
   </div>
 </ul>
</div>
</section>
Styling the Features component
Here are the styles for our features section:
/* FEATURES */
.features_container {
 text-align: center;
 background-color: #f5fbfe;
 padding: 1rem 0;
 display: flex;
 flex-direction: column;
 align-items: center;
}
.features_title {
 font-size: 2.5rem;
 font-weight: 400;
}

.features_row {
 display: flex;
 justify-content: space-around;
 align-items: center;
}

.features_card {
 width: 40%;
 text-align: start;
 padding: 2rem;
 margin: 0 4rem;
 background-color: #fff;
 border-radius: 2rem;
}

.card_img {
 height: 100px;
}

.card_title {
 font-size: 1.5rem;
 color: #a960d1;
}

h5 {
 font-size: 1.5rem;
}
.features_content {
 display: flex;
 text-align: start;
 justify-content: space-around;
 width: 80%;
 margin-bottom: 2rem;
}

.features_content ul {
 margin: 0;
 width: 50%;
}

.features_content_img {
 height: 300px;
}
After styling, here’s the result of our Features section:
Footer component
The Footer component displays our product logo, list of links, and copyright.
<footer>
     <div class="footer_container">
       <h1 class="logo">RESUTABLY</h1>
       <a> Product </a>
       <a> Demo </a>
       <a> Blog</a>
       <a> Careers </a>
       <a>Contacts</a>
     </div>

     <div class="copyright">@copyright 2023</div>
   </footer>
Styling the Footer component
footer {
 padding: 2rem;
}

.footer_container {
 display: flex;
 flex-direction: column;
}

.footer_container a {
 padding: 10px 0;
 text-decoration: underline;
 color: #a960d1;
}

.copyright {
 text-align: center;
}
After styling, here’s the result of our Footer section:

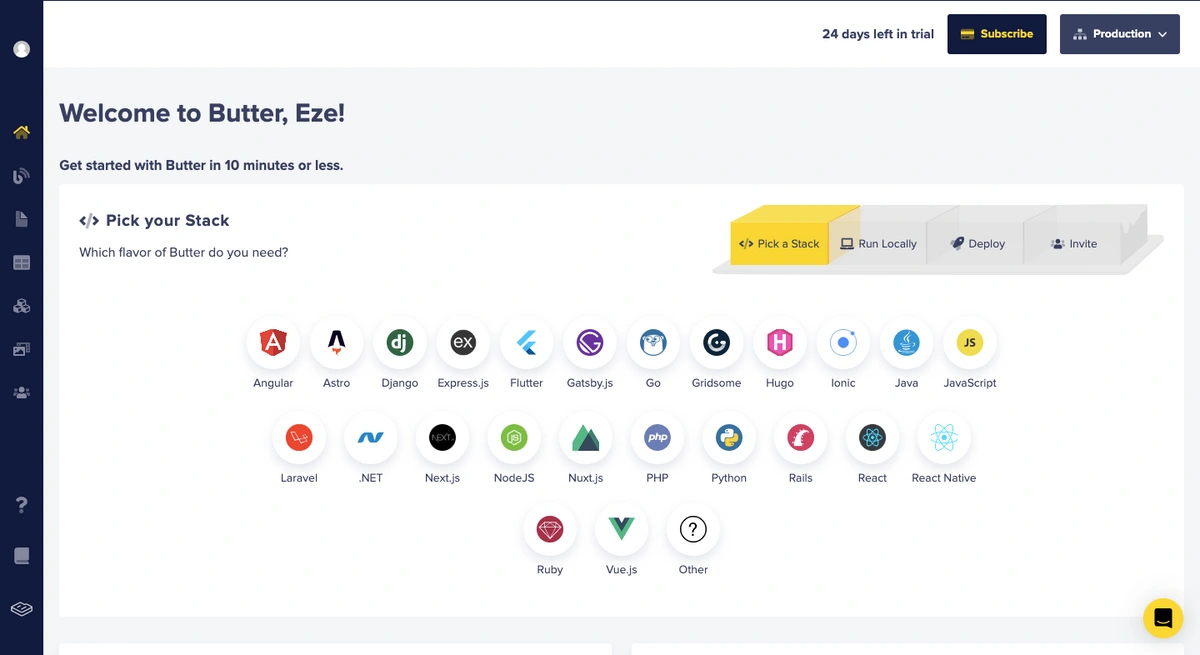
Creating our landing page components in ButterCMS
Let's build up our ButterCMS project and create the data that will be used in our application. To get started, we must create a ButterCMS account, which we can do by visiting the ButterCMS website. After creating a ButterCMS account, your dashboard should appear as shown below.
Building the Hero component
Navigate to the ButterCMS dashboard and navigate to Content Types, then click on Components:
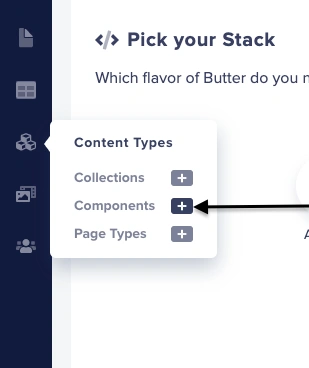
Let’s create our first component, the Hero component. Click on the New Content Type button and select Component from the drop-down menu:

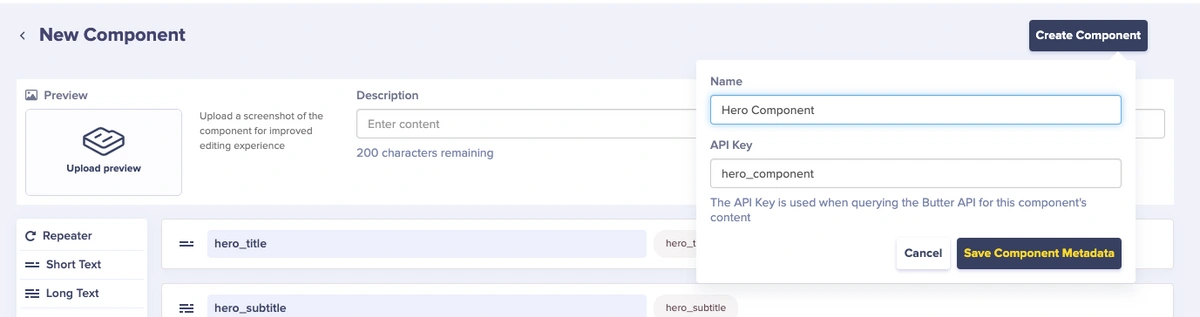
Next, we arrive at the component configuration page for our component. We can make our unique components from here, give the component a name, and specify the fields—like text, photos, and links.

Add the following fields:
-
Short text → hero_title
-
Long text → hero_subtitle
-
Media → hero_img
Save the component's name as Hero Component by clicking the Create Component button at the top of the screen.
Building the Pricing collection
In this section, we will use the ButterCMS collection feature because we plan to loop through and display data in the pricing section of our landing page.
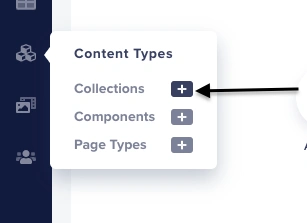
Click the Content Types tab from the menu on the left side, then click the + icon by Collections.
Once you’re on the Collection Configuration page, add the following fields to the collection:
-
Media → pricing_card_img
-
Short text → pricing_card_title
-
Long text → pricing_card_subtitle
-
Number → id
Next, save the collection's name as Pricing Collection by clicking Create Collection at the top of the screen.
Then, click on Save as a Collection.

To create a new item in the Pricing Collection, click on the Collections tab in the side menu, and click Pricing Collection from the drop-down menu.
Next, we populate the data for the Pricing collection and click the Publish button
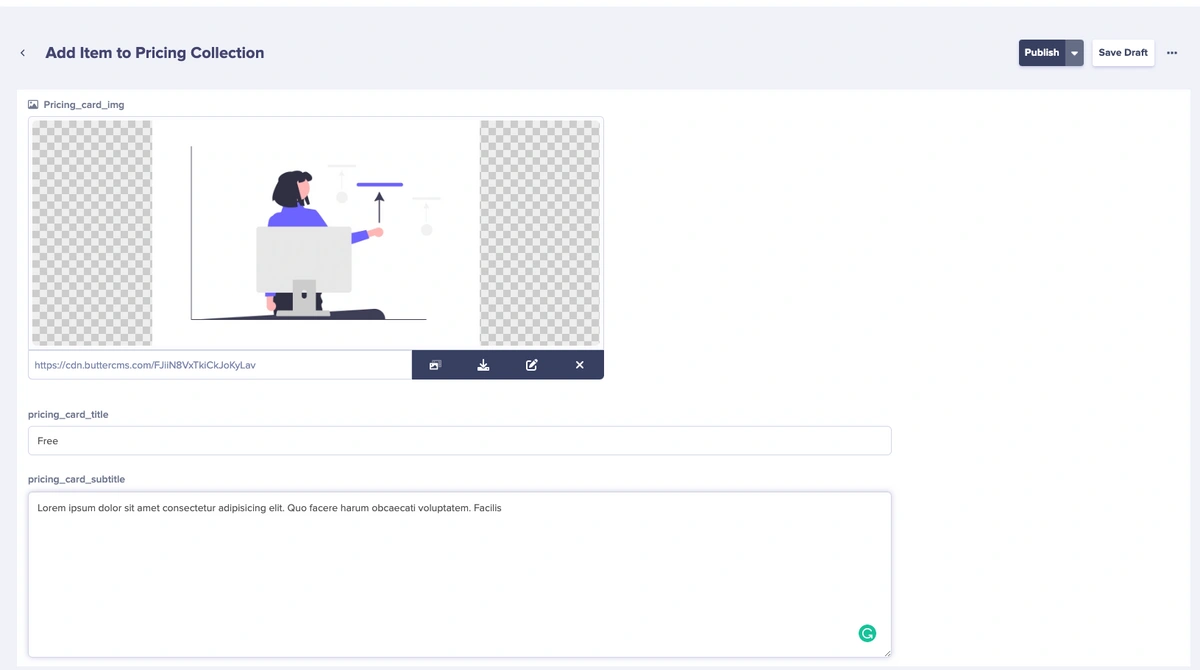
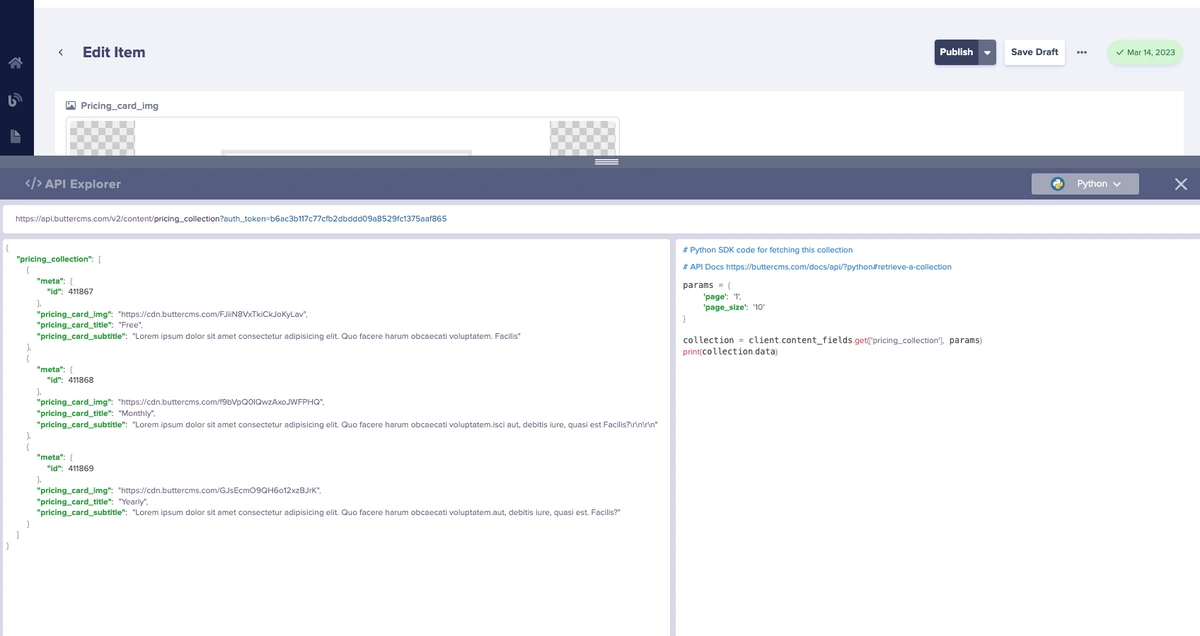
We will create three items using the same procedure for each item (pricing_img, pricing_card_title, and pricing_card_subtitle) using the Pricing section to populate the collection. Press the Publish button as soon as you're done, and then visit the API Explorer to see the data.
Now, let’s create another collection for our Features section.
Building the Features collection
To create the Features section, let’s head over to the Content Types tab and click on the + by Collections as shown below:
Next, on the Collection Configuration page, add the following fields to the collection:
-
Media → features_img
-
Long text → features_subtitle_1
-
Long text → features_subtitle_2
-
Long text → features_subtitle_3
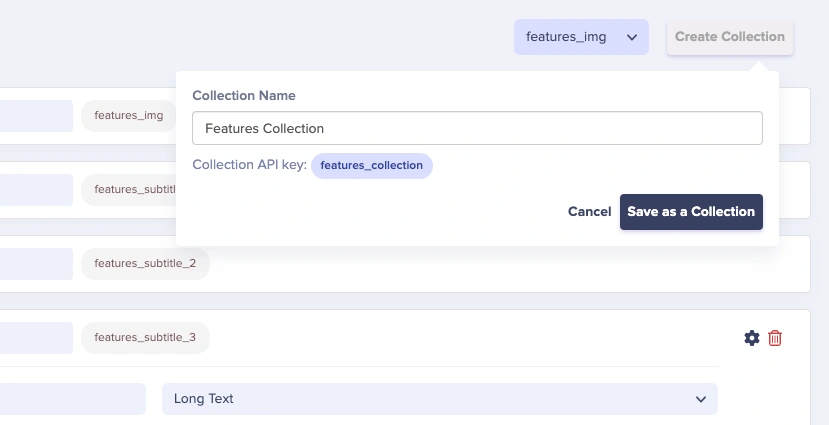
Next, save the collection's name as Features Collection by clicking Create Collection at the top of the screen.
Let’s also create a new Features collection item:
We fill in the data for the Features collection and click the Publish button.
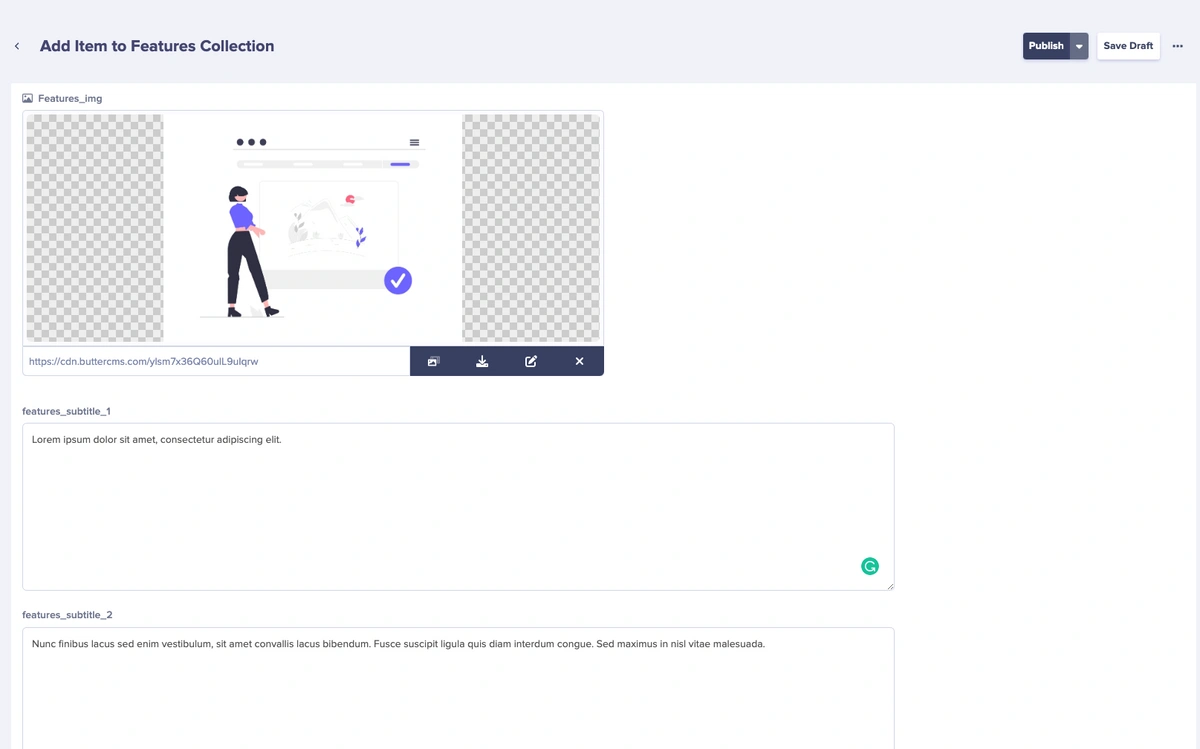
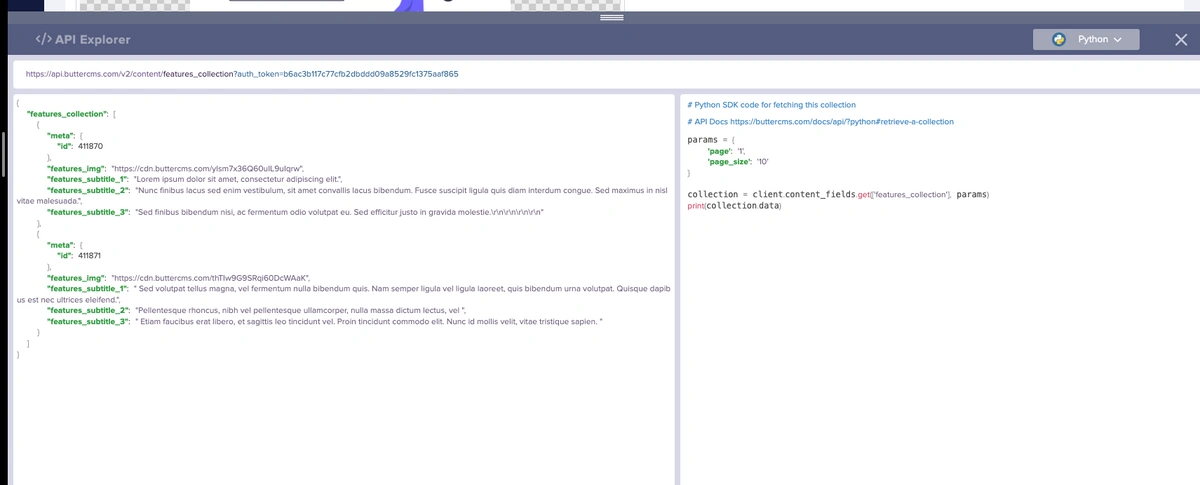
We will add two items to the Features collection, using the same procedure for each item. We then add the content from our Features section. As soon as you're done, press the Publish button and then visit the API Explorer, which is found at the top right corner in the form of a three-dotted icon (...) to view the data.

Next, click the API Explorer.
Building our landing page with the newly created components and collections
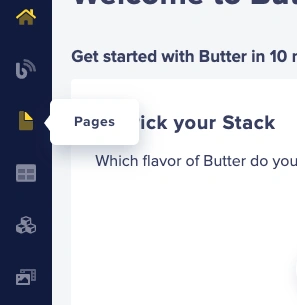
The next step is to create a new page by heading over to the Pages section of the ButterCMS dashboard.
Next, click New Page at the bottom of the drop-down menu and then select Create New Page, and we will be directed to the page schema configuration.
This is where we configure and customize our page with the fields on the left or the components we created. In our case, we will use the components we created.
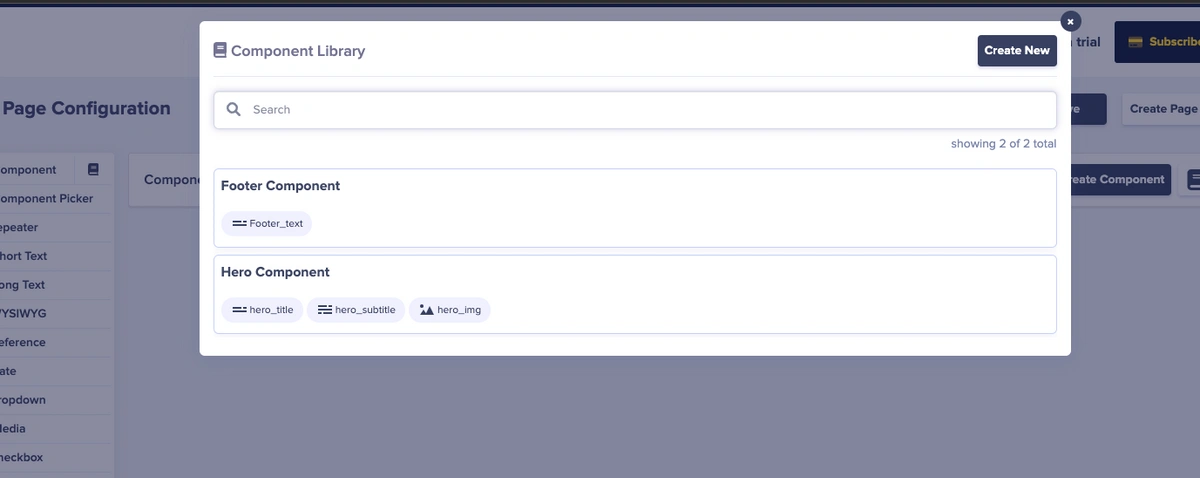
To add our components to the page, click Component and then select Add from Library.
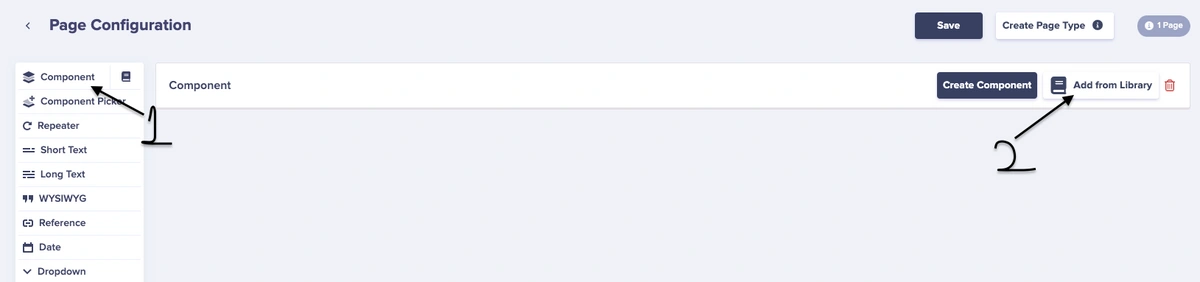
Next, we select the components we created.
To add our collections to our page, we usually do this by utilizing the reference component.
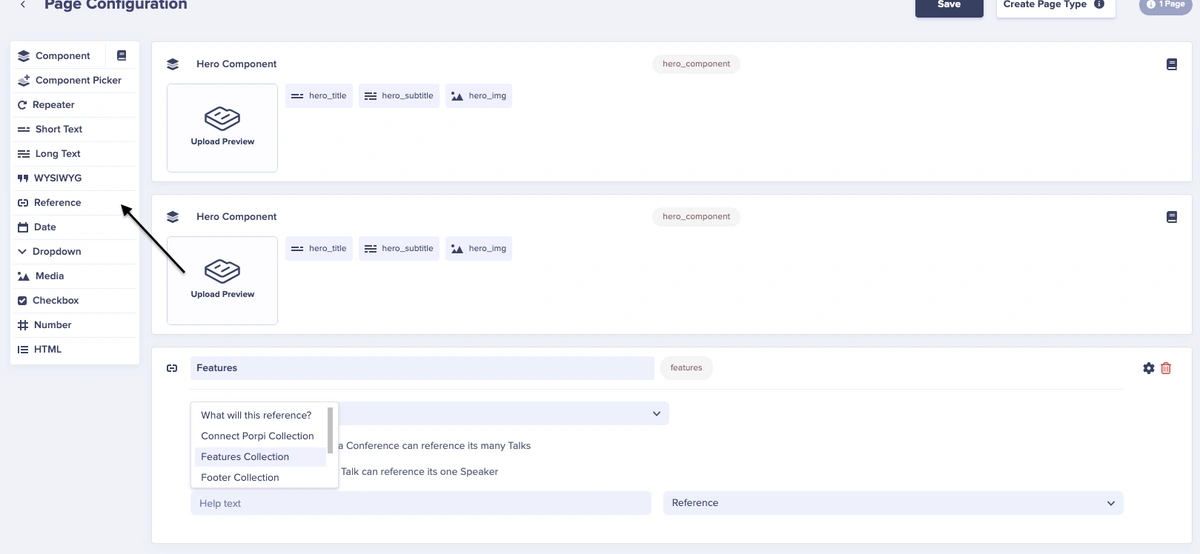
After adding a reference, we give it a name (Features) and then select the particular collection from the dropdown (Features Collection). We will also do the same for the pricing collection.
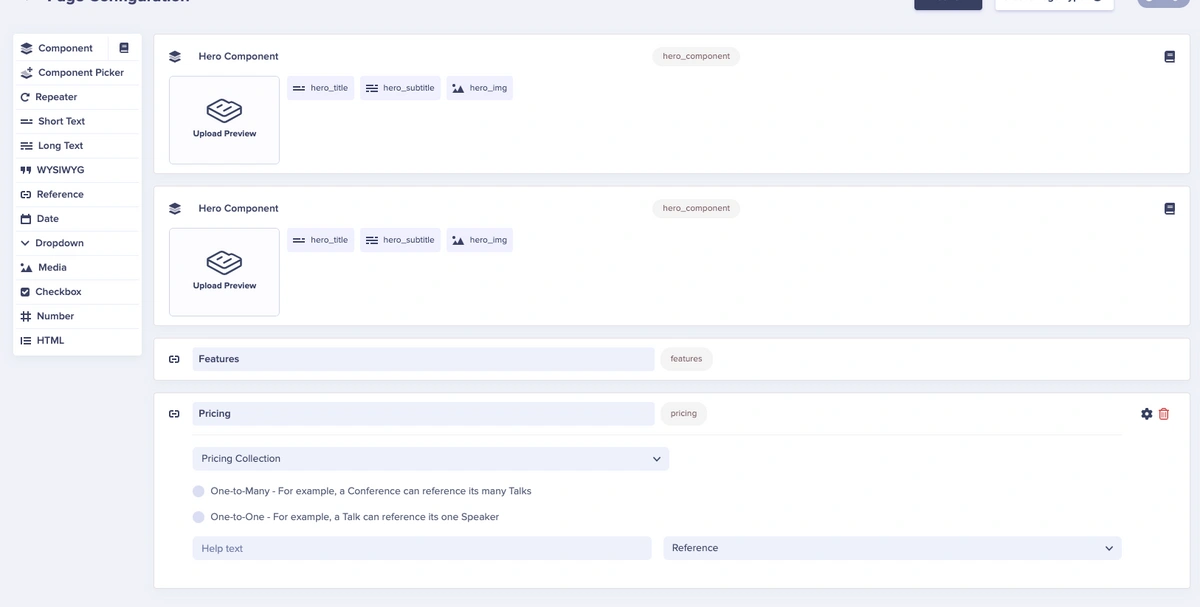
Now, we’ve added our components and collections to our page.
Click the Save button. After doing that, we will be directed to our landing page. Next, we will enter and save the page’s metadata for the Index page.
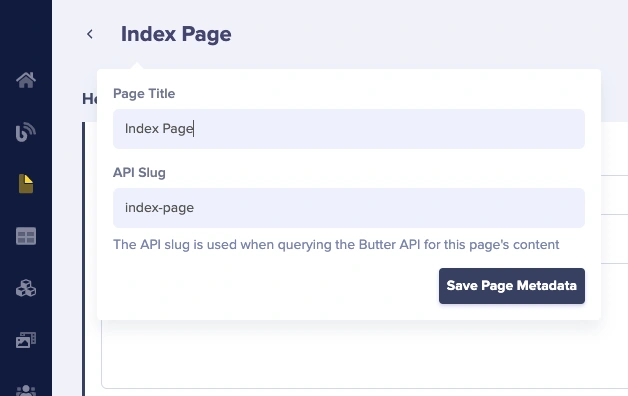
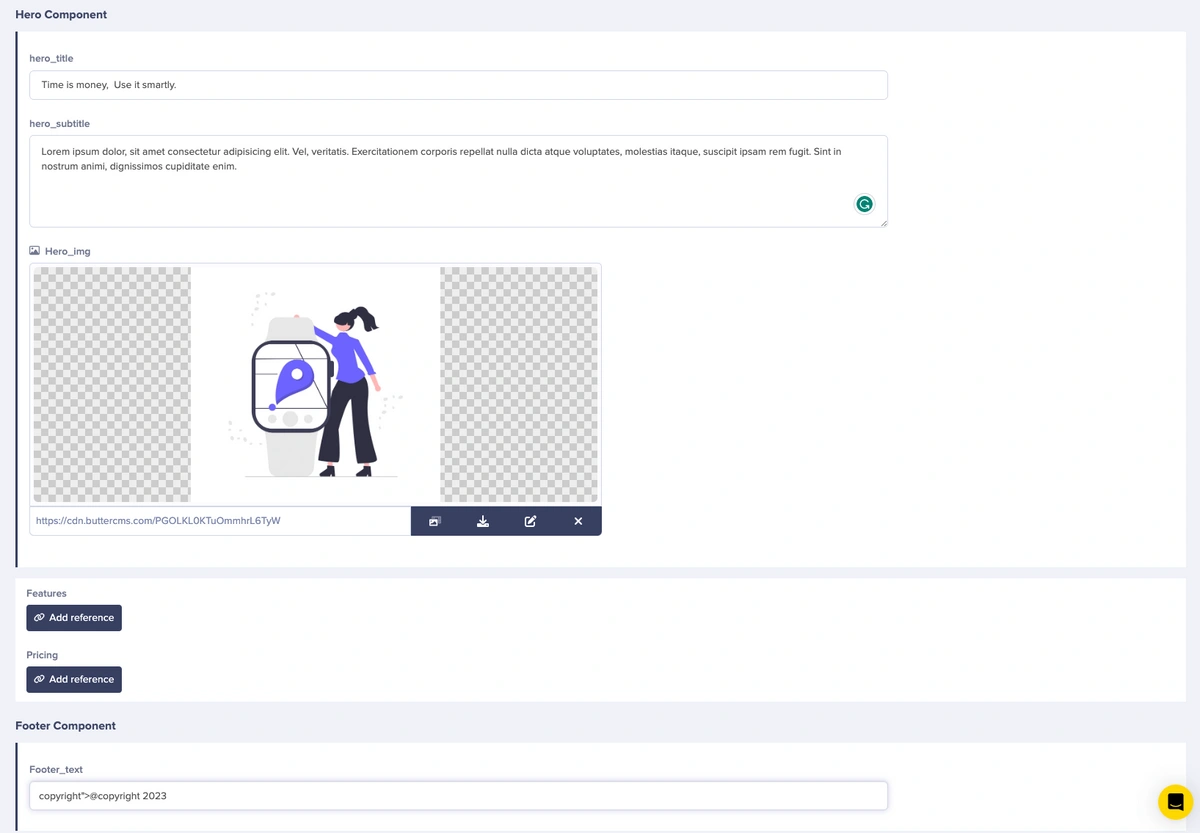
After clicking on the Save Page Metadata button, we will be directed to where we can add data to each of our components and collections.
Here, let’s enter the data for each component into the fields.
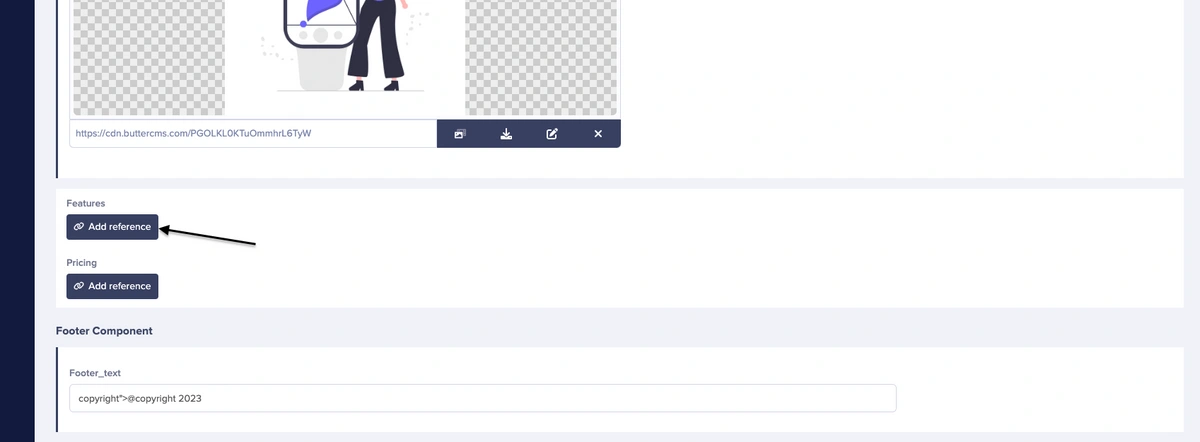
To add our collections to our page, we click the Add Reference button.
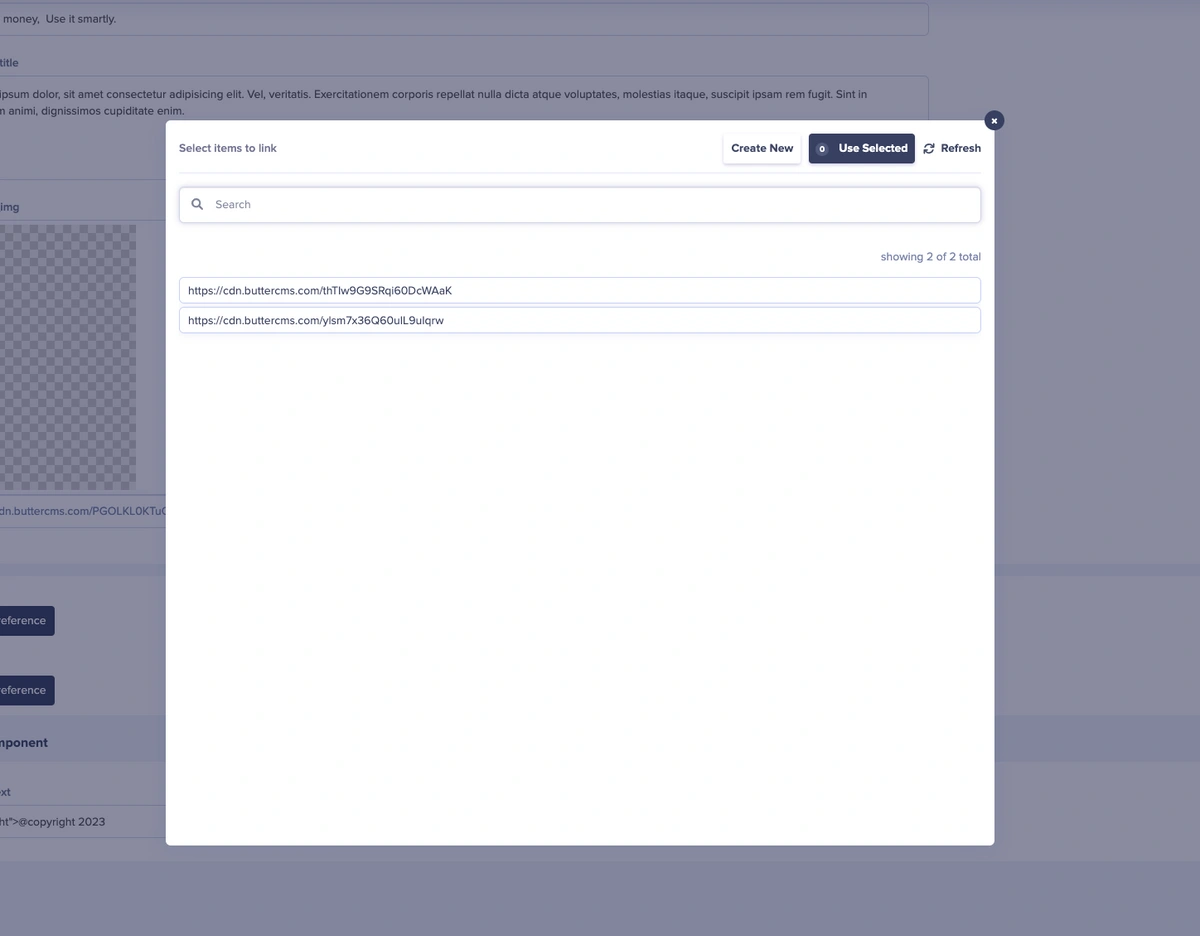
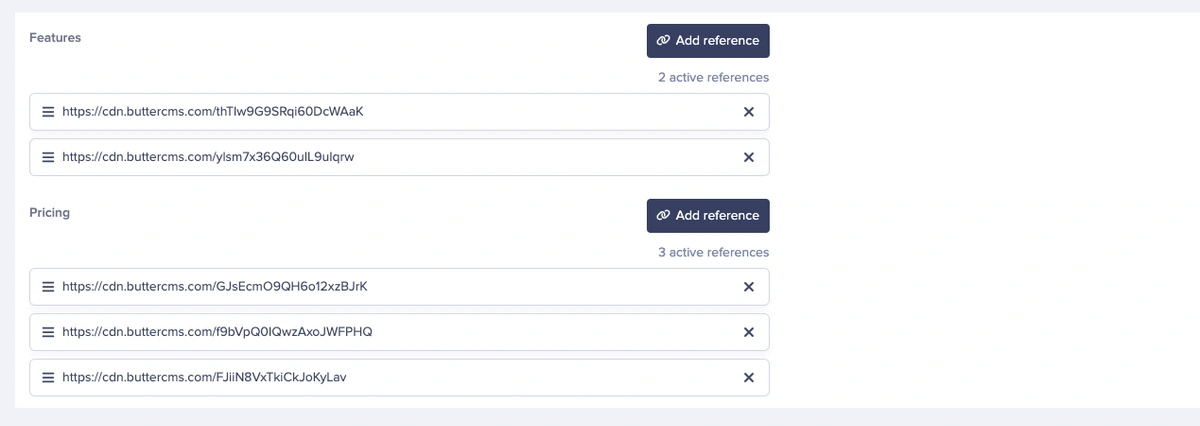
Next, select the data we will use and click the Use Selected button at the top-right corner.
We will also do the same for the pricing section references.
After adding all the content to our page, we will click the Publish button at the top-right corner to publish our page.
Try ButterCMS free to follow this tutorial and build performant Python landing pages.
Start free trialFetching the content from ButterCMS
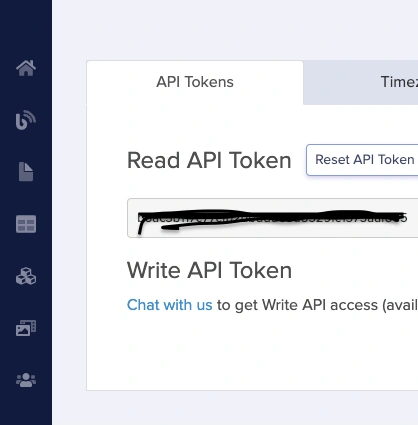
Let's return to our source code and connect our application to ButterCMS. But first, we need a secret token which we can find in our account Settings page.
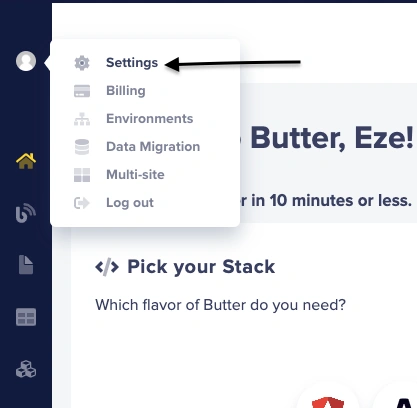
Let’s copy our secret token and keep it for later.
For this tutorial, we'll use Requests, a third-party Python module that provides an easy-to-use interface for making HTTP requests. It abstracts away the complexities of making requests using the standard library's urllib module. It provides a more user-friendly API with many useful features, such as request and response object inspection, automatic decoding of response content, and support for HTTP authentication, cookies, and proxies.
To install Request, use the following command:
python3 -m pip install requests
Next, In our main.py file, let’s create a GET request that will retrieve our data from the CMS:
from flask import Flask, render_template, jsonify
import requests
app = Flask(__name__, static_folder='static')


# set up ButterCMS API credentials
auth_token = 'YOUR API KEY'
api_url = 'https://api.buttercms.com/v2/pages/*/index-page/?auth_token='

# define the API endpoint to fetch content from
endpoint = 'pages/*/index-page/'

# app route


@app.route('/', methods=['GET'])
def index():

   # Make a GET request to the API endpoint
   response = requests.get(api_url + auth_token)
   # Convert the response to JSON format
   data = response.json()['data']['fields']
   hero = data['hero_component']
   pricing = data['pricing']
   features = data['features']
   footer = data['footer_component']

   print('data is', footer)
   return render_template('index.html', hero=hero, pricing=pricing, features=features, footer=footer)


if __name__ == '__main__':
   app.run(debug=True)
In the above snippet, the requests module renders the data to an HTML template using the render_template function from the Flask package.
The code sets up the ButterCMS API credentials with an authentication token and an API URL and then defines the API endpoint to fetch content. It then makes GET requests to the API endpoint using the requests.get function, and converts the response to JSON format using the response.json() function.
The fetched data is then passed to the render_template function along with the name of the HTML template so that it can be rendered in the HTML file. The data fetched includes the hero, pricing, and features components.
Fetching the Hero component
The Hero section of the HTML code uses Jinja2 templating to display the data we retrieved from the ButterCMS API.
 <section class="hero_container">
     <div class="hero_content">
       <h2 class="hero_title">{{hero.hero_title}}</h2>
       <div class="subtitle_container">
         <p class="hero_subtitle">{{hero.hero_subtitle}}</p>
       </div>

       <div class="btn_container">
         <button class="btn btn_hero">Get Started</button>
       </div>
     </div>

     <div class="img_container">
       <img src="{{hero.hero_img}}" alt="" class="hero_img" />
     </div>
   </section>
The data variable is a dictionary of data that is passed from the Flask application to the template. This section uses it to access the hero_component object and its properties, such as hero_title, hero_subtitle, and hero_img.
Fetching the Pricing component
This Jinja2 template code loops through the pricing list and creates a card for each item.
{% for card in pricing %}
       <div class="pricing_card">
         <img src="{{card.pricing_card_img}}" alt="" class="card_img" />
         <h3 class="card_title">{{card.pricing_card_title}}</h3>

         <p>{{card.pricing_card_subtitle}}</p>
       </div>

       {% endfor %}
For each card object in pricing, it creates an HTML div element with a class features_card. The div displays the pricing_card_img, pricing_card_title, and pricing_card_subtitle properties of the card object.
Fetching the Features component
Like displaying the Pricing component, the Features component also uses the Jinja2 template code.
 {% for features in features %}
     <div class="features_content">
       <img
         src="{{features.features_img}}"
         alt=""
         class="features_content_img"
       />

       <ul>
         <div class="list_container">
           <li>{{features.features_subtitle_1}}</li>
           <li>{{features.features_subtitle_2}}</li>
           <li>{{features.features_subtitle_3}}</li>
         </div>
       </ul>
     </div>

     {% endfor %}
It uses a for loop to iterate through each dictionary in features, assigning the current dictionary to the content variable on each iteration. Finally, the loop displays the dictionary's content using the Jinja2 template engine syntax.
The code displays an image from the features_content_img field of the current dictionary using an img HTML tag with the src attribute set to the value of features.features_img. The code also displays a list of text items using a ul HTML tag and the li tag to display the contents of the features_subtitle_1, features_subtitle_2, and features_subtitle_3 fields of the current dictionary.
Here’s a preview of our landing page after fetching our content from ButterCMS:
Closing thoughts
For developers familiar with Python and who like to work with it, building a landing page with ButterCMS can be a great option. You can quickly retrieve content and display it in your Python application using ButterCMS' simple-to-use API. You can also quickly develop a web application with Python and Flask that renders HTML pages using the Jinja2 templating engine. Additionally, without touching any code, you can maintain and change the content of your landing page with ButterCMS. This enables you to concentrate on producing top-notch content and providing a fantastic customer experience.
Thus, combining Python and ButterCMS can be an effective way to quickly and effectively create landing pages. It enables you to take advantage of Python's strengths and versatility, as well as the ButterCMS API while concentrating on the layout and content of your page. To learn more about how you can use Python with ButterCMS, you can visit their blog for additional tutorials.