
Building a blog is an excellent way to share your thoughts, experiences, and knowledge. Whether you want to establish your brand, promote your business, or express your creativity, a blog can help you achieve your goals. But, building a blog from scratch can take time and effort. Fortunately, several resources have emerged to assist in this process.
One such tool is ButterCMS, a headless content management system that stands out among its peers. ButterCMS has a blog engine feature that makes it easier and faster to build and add an SEO-optimized blog to your applications. In this tutorial, we're going to walk through how you can build a blog with Ruby and ButterCMS.
Table of contents
Why use Ruby?
Ruby is a popular, high-level, and dynamically-typed programming language known for its clean, elegant syntax and developer-friendly features.
- Flexibility: Ruby is known for its flexibility, which stems from a combination of language features and design principles that promote ease of use and adaptability. Specific features of Ruby that enable its flexibility includes:
-
Single inheritance with mixins: Ruby supports single inheritance but allows developers to mix in modules. Modules are like classes, but they cannot be instantiated. Instead, they can be mixed into classes, adding the module's methods to the class. This allows developers to reuse code and create more flexible classes.
-
Duck typing: Ruby is a duck-typed language, meaning that the object type is not important. Instead, what matters is whether the object has the needed methods. This makes Ruby a very flexible language and allows developers to work with various objects without worrying about their type.

-
Productivity: When using 3rd party libraries, Ruby can help you quickly develop features due to its concise nature, making it one of the most productive programming languages available. The specific features that make Ruby one of the most productive programming languages include:
-
An active community: Ruby has a large and active community of developers constantly creating new libraries and tools. This makes finding the resources you need to develop your applications easy.
-
-
Convention over configuration: Ruby does not have any XML configuration files. It includes simple programming conventions that can specify the configuration parameters. This makes it easy to start with Ruby and keep your code DRY (Don't Repeat Yourself).
- MVC architecture: The MVC is a design pattern that separates an application's concerns into three interconnected components: the model, view, and controller. The MVC method is unique for building a blog in Ruby because it makes the application more modular and easier to maintain. The model, view, and controller can be developed independently, which makes it easier to add new features or change the existing features. The MVC method also makes testing the application easier because it makes each part of the application tested independently.
Why use ButterCMS?
ButterCMS is a user-friendly, modern headless CMS for efficiently managing content on websites and apps. Its headless design offers adaptability and scalability to fit any project's needs. With the ButterCMS SDKs and APIs, you can integrate with any programming language or framework. This makes it easy for developers to fetch and manage content in their applications or websites.
ButterCMS also provides a blog engine feature, which enables the seamless creation of SEO-enhanced blog posts. In this tutorial, we'll be building a blog by using the ButterCMS blog engine and integrating it into a Ruby framework called Sinatra.
Ruby blog tutorial: Building a blog with Ruby and ButterCMS
Tutorial prerequisites
-
Basic knowledge of Ruby
-
Knowledge of Sinatra
-
An active ButterCMS account
-
A code editor (VS Code, preferably)
Let's start with setting our development environment.
Setting up the development environment
To install Sinatra on our local machine, copy and paste the following code into our command line:
gem install sinatra
Next, let’s create our files and folders in our project directory.
📦ButterCMS-Blog-Ruby
 ┣ 📂public
 ┃ ┣ 📂assets
 ┃ ┃ ┣ 📜bg1.jpg
 ┃ ┃ ┗ 📜logo.png
 ┃ ┗ 📜style.css
 ┣ 📂views
 ┃ ┣ 📜index.erb
 ┃ ┣ 📜blogDetail.erb
 ┃ ┗ 📜searchResults.erb
 ┗ 📜app.rb
Setting up the ButterCMS blog engine
To get started with ButterCMS, we have to create an account or sign in if we already have a valid account. Then, we’ll be directed to our ButterCMS dashboard.
To use the blog engine feature that ButterCMS presents, let’s select Blog Posts on our sidebar.
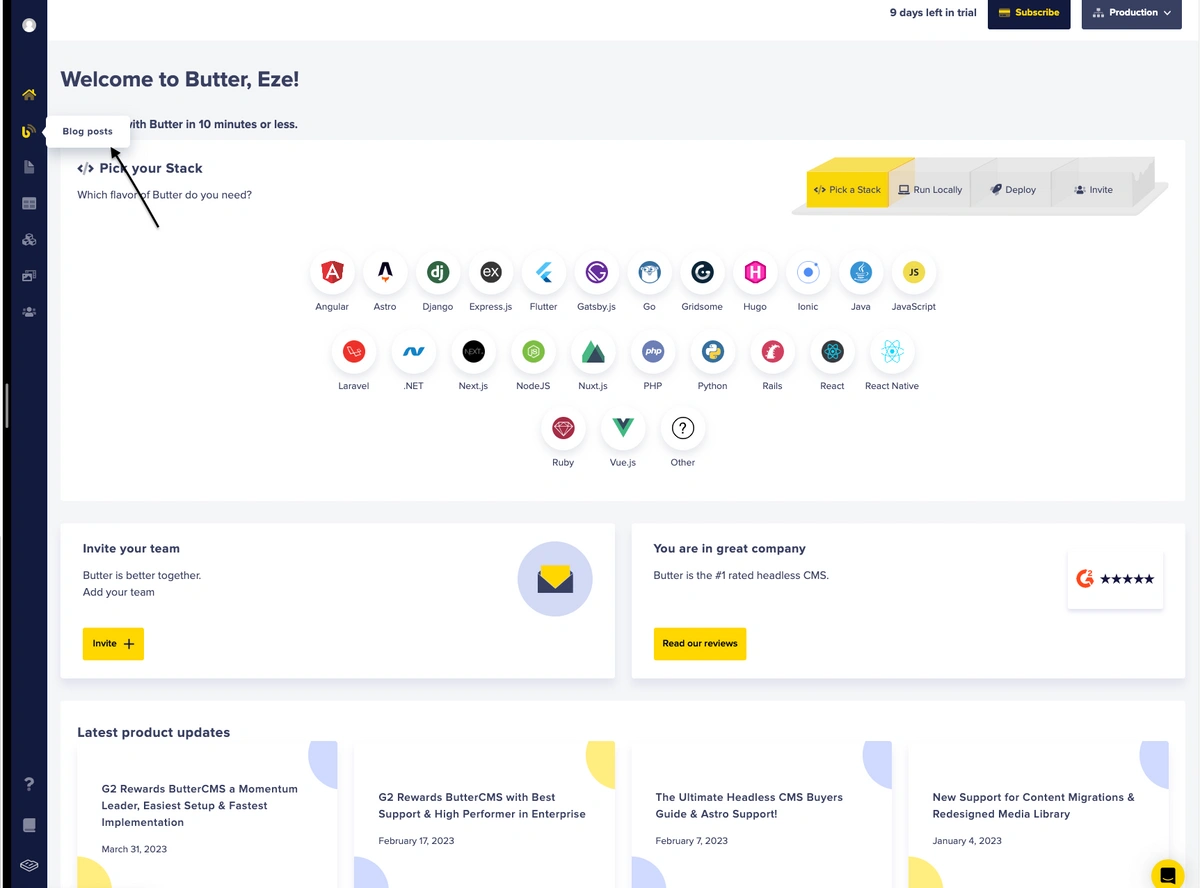
We’ll be directed to a new page with an example blog post created for us. This is your blog dashboard showing all of the published and drafted blog posts you create.
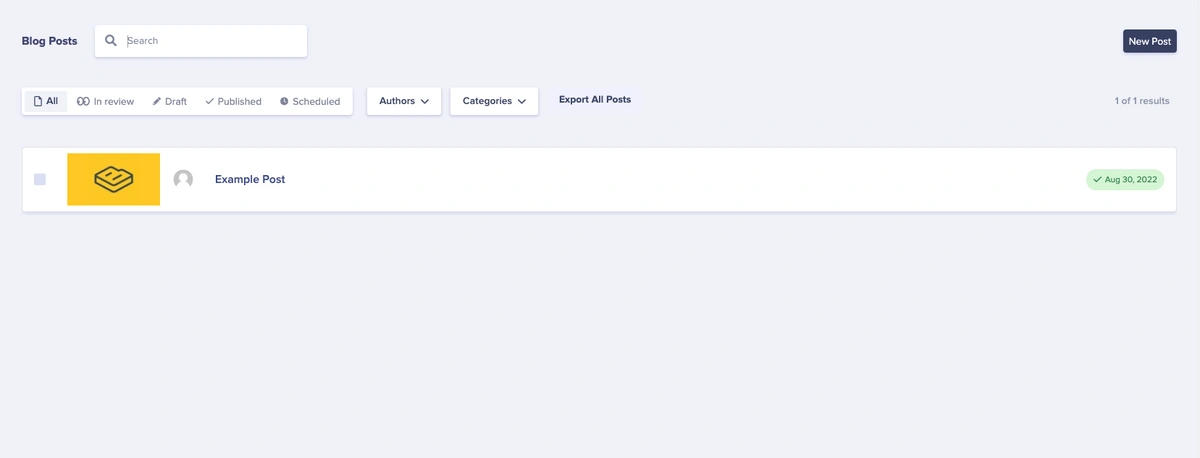
To create a new blog post, click on the New Post button located at the top right of the page.
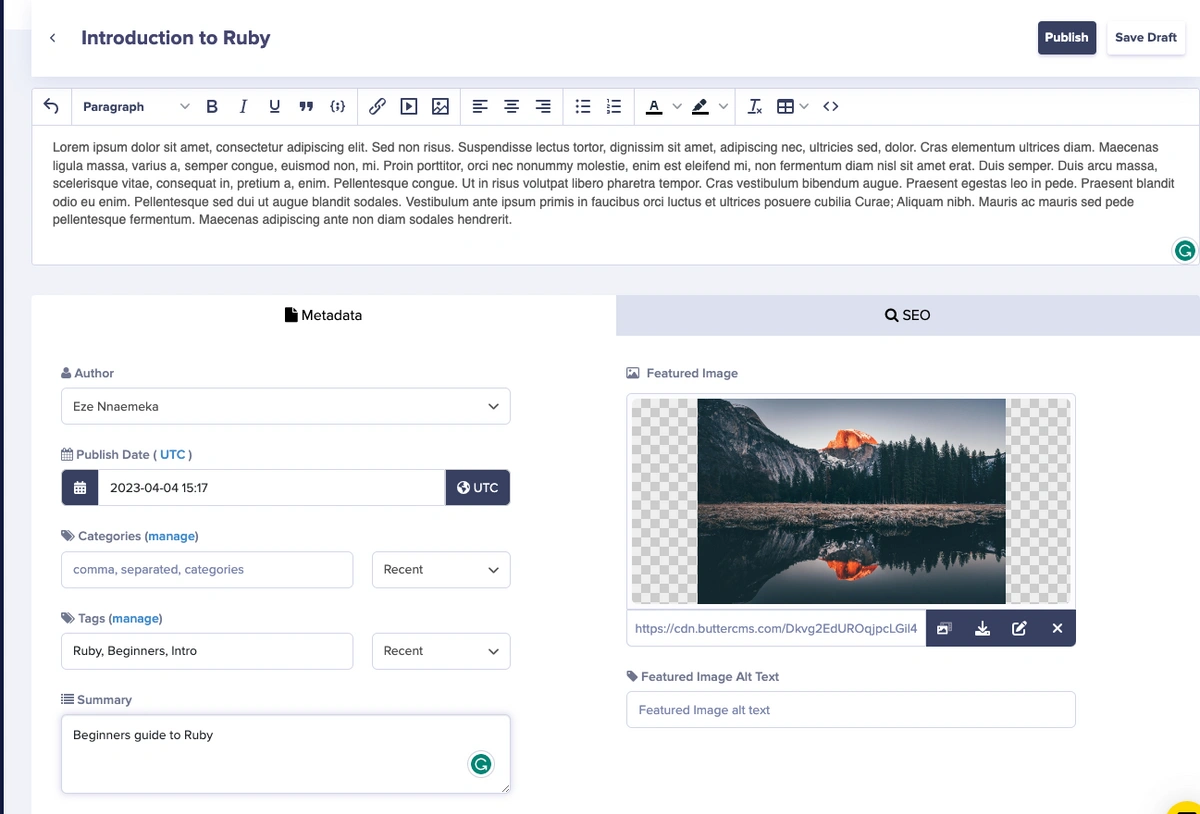
This will take you to the Blog Editor where you can input content for a variety of fields.

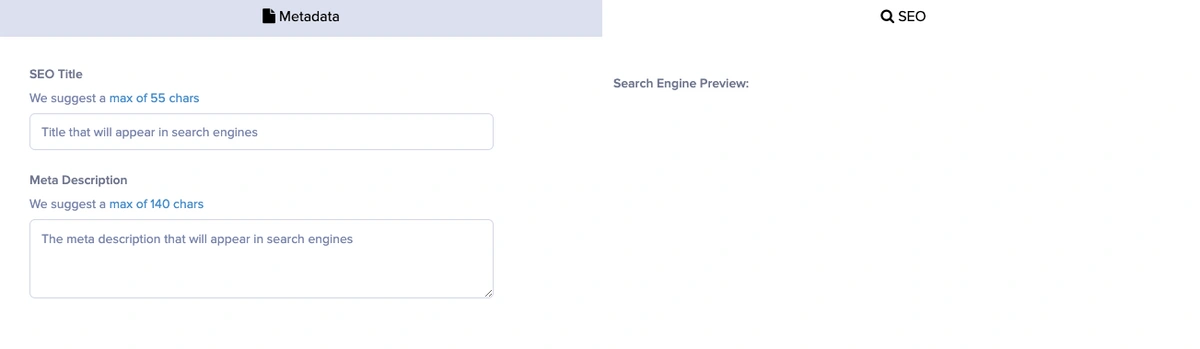
Next, we’re going to fill out the content fields on this page. Most notable are the WYSIWYG editor, built-in author field, category tags, as well as an OG image field. There are also built-in SEO and metadata fields to help your content rank in SERPs.
Metadata and SEO are important for blog posts because they can help you improve your blog's ranking in search results. By using relevant keywords, creating a compelling title, writing a descriptive meta description, optimizing your images, and submitting your blog to search engines, you can make your blog posts more visible to potential readers and improve your blog's overall reach.
After filling in those fields, click on the Publish button.
Here’s the SEO field section that helps improve the blogs visibility and ranking on search engine result pages
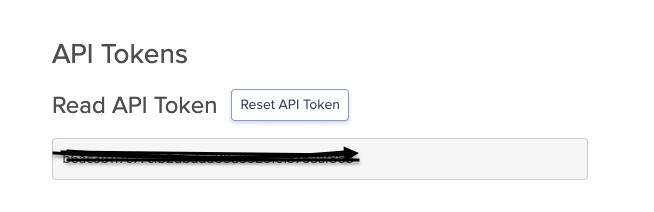
We can now fetch our blog from ButterCMs. But first, we need to get our API key. On the dashboard, head over to Settings on the sidebar.
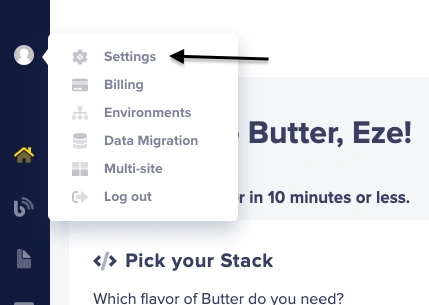
We will be directed to the next page, where we will find our API key.
Creating our blog pages and integrating the ButterCMS API into the blog application
In this section, we will be integrating ButterCMS into our application and retrieving our blog posts from Butter.
Let’s start by fetching and displaying all blog posts in our Ruby application. To do this, head over to the app.rb file at the root directory of our application and import the following libraries:
require 'net/http'
require 'json'
Next, let's create a route that fetches all blog posts:
get '/' do

 uri = URI('YOUR API KEY') # Replace with your API endpoint
 response = Net::HTTP.get(uri)
 data = JSON.parse(response)
 latestPost = data['data'].shift
 erb :index , locals: { data: data, latestPost:latestPost }

end
The above snippet creates a route to fetch all blog posts from the ButterCMS API endpoint. The response data is parsed into a Ruby hash and stored in a variable. We then store the response from ButterCMS in a variable called data and pass it directly to the index template so we can render the blog posts. Also, a variable called latestpost is created to store the latest blog post created in our CMS, which we also passed to the template.
Let’s modify our index page to use the data returned from ButterCMS. Head over to the views/index.erb file and modify it to the following:
    <div class="container">
     <div class="header">
       <div class="logo">
         <h1>Ruby Blog</h1>
         <img
           class="logo-img"
           src="https://res.cloudinary.com/drh4lw1m7/image/upload/v1684406814/logo_vxckog.png"
         />
       </div>
       <div class="navbar">
         <div class="navItem">Stories</div>
         <div class="navItem">Category</div>
         <div class="navItem active">Blog</div>
         <div class="navItem">Contact</div>
       </div>
     </div>

     <div class="title">
       <h2>Want to know more about Ruby ?</h2>
     </div>

     <div class="box">
       <form action="/search" method="get" class="form">
         <input placeholder="Search..." type="text" id="query" name="query" />
         <button type="submit" class="btn">Send</button>
       </form>
     </div>

     <div class="first_card">
       <img src=<%=latestPost['featured_image'] %> />
       <div class="card_content">
         <h2><%= latestPost['title'] %></h2>
         <p>
           <span>Summary: </span>
           <%= latestPost['summary'] %>...
         </p>

         <p />
         <div class="t_ag_container">
           <p>Tags :</p>

           <% latestPost['tags'].each do |tag|%>
           <div class="t_ag"><%= tag['name'] %></div>

           <% end %>
         </div>
       </div>
     </div>
     <div class="body_post">
       <% data['data'].each do |blog|%>

       <a href="/detail/<%= blog['slug'] %>">
         <div class="card">
           <img src=<%=blog['featured_image'] %> />
           <div class="card_content">
             <h2><%= blog['title'] %></h2>
             <p>
               <span>Summary: </span>
               <%= blog['summary'] %>...
             </p>
             <div class="t_ag_container">
               <p>Tags :</p>

               <% blog['tags'].each do |tag|%>
               <div class="t_ag"><%= tag['name'] %></div>

               <% end %>
             </div>
           </div>
         </div>
       </a>

       <% end %>
     </div>
   </div>
Let’s run our application to preview it.
Display post details
On our Index.erb file, whenever we click on a blog post, we should be directed to a different page to view the post's details (body, tags, etc.). To do that, we will create another route that accepts params. Let’s head to our app.rb file:
get '/detail/:slug' do
 slug = params[:slug]
 puts slug

 uri = URI('https://api.buttercms.com/v2/posts/' + slug + '/?auth_token=YOUR API KEY') # Replace with your API endpoint
 response = Net::HTTP.get(uri)
 data = JSON.parse(response)
 post = data['data']
 date_string = post['published']
 date = DateTime.parse(date_string)
 formatted_date = date.strftime("%m/%d/%Y %I:%M %p")
 puts formatted_date
 erb :detail, locals:{post: post, formatted_date: formatted_date}
end
In the above snippet, the route contains a param called slug which is attached to our ButterCMS endpoint, and it returns the post that matches the slug.
Next, we will pass the returned data to the blogDetail template.
Let’s modify our blogDetail page to use the data returned. Head over to view/blogDetail.erb file:
<div class="container">
<div class="header">
<div class="logo">
<h1>Ruby Blog</h1>
<img class="logo-img" src="https://res.cloudinary.com/drh4lw1m7/image/upload/v1684406814/logo_vxckog.png" />
</div>
<div class="navbar">
<div class="navItem">Stories</div>
<div class="navItem">Category</div>
<div class="navItem">Blog</div>
<div class="navItem">Contact</div>
</div>
</div>
<div class="body_container">
<div class="header_container">
<p>Blog </p>
<div> <hr> </hr> </div>
<p> Published <%= formatted_date %>
</p>
</div>
<div class="title"> <h2>
<%= post['title'] %>
</h2> </div>
<div>
<img src=<%=post['featured_image']%> />
<div class="tag_container">
<p>Tags :</p>
<% post['tags'].each do |tag|%>
<div class="tag">
<%= tag['name'] %>
</div>
<% end %>
</div>
</div>
<div class="content_container">
<%= post['body'] %>
</div>
</div>
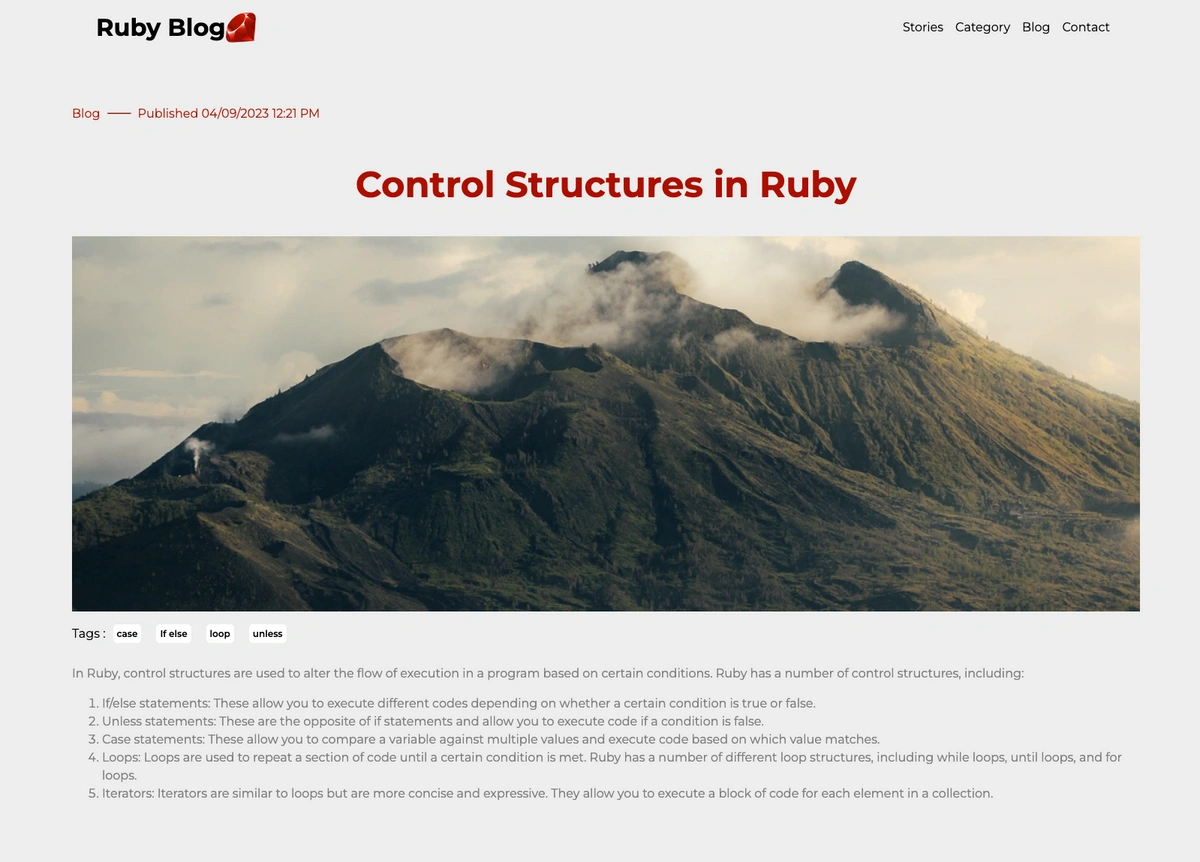
</div>Now, we can click on any post from our index page, and we will be directed to a different page to view more about the post. Let’s preview our application:
Implementing the search feature
For this functionality, we will be using a form. So, whenever we search for a post, we send a request to our ButterCMS endpoint when we click the submit button.
Firstly, let's head over to our views/index.erb file because that's where our form is located:
<form action="/search" method="get" class="form">
           <input
             placeholder="Search..."
             type="text"
             id="query"
             name="query"
           />

           <svg
             fill="#000000"
             class="search-icon"
             width="20px"
             height="20px"
             viewBox="0 0 24 24"
             xmlns="http://www.w3.org/2000/svg"
           >
             <path
               d="M16.9994165,16.2923098 L20.8535534,20.1464466 C21.0488155,20.3417088 21.0488155,20.6582912 20.8535534,20.8535534 C20.6582912,21.0488155 20.3417088,21.0488155 20.1464466,20.8535534 L16.2923098,16.9994165 C14.8819612,18.2444908 13.0292099,19 11,19 C6.581722,19 3,15.418278 3,11 C3,6.581722 6.581722,3 11,3 C15.418278,3 19,6.581722 19,11 C19,13.0292099 18.2444908,14.8819612 16.9994165,16.2923098 Z M11,18 C14.8659932,18 18,14.8659932 18,11 C18,7.13400675 14.8659932,4 11,4 C7.13400675,4 4,7.13400675 4,11 C4,14.8659932 7.13400675,18 11,18 Z"
             />
           </svg>
           <button type="submit">Send</button>
         </form>
When we click the Send button, the form sends a request to the search route which we’ll create in our app.rb file.
get '/search' do
 slug = params[:query]

 uri = URI('https://api.buttercms.com/v2/posts/search/?query=' + slug + '&page=1&page_size=10&auth_token=YOUR API KEY') # Replace with your API endpoint
 response = Net::HTTP.get(uri)
 data = JSON.parse(response)
 blog = data['data']

 erb :searchResults, locals:{data:blog, searchTerm:slug}
end
It also sends a param which we stored in a variable called slug which we attached to our ButterCMS endpoint. It returns a list of posts that match the slug. Next, we pass the data returned to the searchResult template.
Let’s head to the searchResult.erb file in our views folder and modify it:
<div class="text_container">
     <h1>Search Result for: <%= searchTerm %></h1>
   </div>
   <div class="container">
   <% if data.empty? %>
   <div class="text_container">
     <h3>No result found</h3>
   </div>

   <% else %>

     <h4><%= data.length %> results found.</h4>
     <div class="body_post">
       <% data.each do |blog|%>

       <a href="/posts/<%= blog['slug'] %>">
         <div class="card">
           <img src=<%=blog['featured_image'] %> />
           <div class="card_content">
             <h2><%= blog['title'] %></h2>
             <p><span>Summary: </span> <%= blog['summary'] %></p>

             <p />
             <p>
               <span>Author:</span>
               <%= blog['author']['first_name'] %> <%=
               blog['author']['last_name'] %>
             </p>
           </div>
         </div>
       </a>
       <% end %>
     </div>
     <% end %>
   </div>
We can now preview our app and check out the search functionality.
Styling the blog
Our styling sheet is located at the public/style.css; let’s add the styling to our blog application.
body {
 margin: 0;
 padding: 0;
 font-family: "Montserrat", sans-serif;
 background-color: #ededed;
}

h2 {
 margin-top: 4px;
}

.container {
 margin: 0 8rem;
}

.header {
 padding: 0 2rem;
 background-color: transparent;
 display: flex;
 align-items: center;
 justify-content: space-between;
}

.box {
 background-color: transparent;
 display: flex;
 justify-content: center;
 margin: 15px 0;
}

.logo {
 display: flex;
 align-items: center;
}
.logo-img {
 width: 40px;
 height: 40px;
}
input {
 width: 100%;
 padding: 15px;
 border: 2px solid grey;
 border-radius: 5px;
}

.form {
 width: 50%;
}

.search-icon {
 position: absolute;
 top: 25%;
 right: 10px;
 transform: translateY(-50%);
 font-family: "Font Awesome 5 Free";
 font-size: 20px;
 color: black;
}

.fa-search::before {
 content: "\f002";
}

.title {
 text-align: center;
 margin: 2.5rem 0;
 font-size: 2rem;
}

.title h2 {
 color: #aa0f01;
}

.card {
 /* position: relative; */
 color: grey;
 text-decoration: none;
 width: 300px;
 height: 450px;

 border: 1px solid grey;
}

.first_card {
 /* position: relative; */
 color: grey;
}

.first_card img {
 height: 700px;
 width: 100%;
}

.card img {
 width: 100%;
 object-fit: cover;
}

.card_content {
 text-decoration: none;
 height: 50%;
 display: flex;
 flex-direction: column;
 justify-content: space-between;
}

.card_content p {
 margin: 3px 0;
}
a {
 text-decoration: none;
}

.body_post {
 display: flex;
 flex-direction: row;
 flex-wrap: wrap;
 justify-content: space-between;
 align-items: center;
 margin-top: 35px;
}

.body_post img {
 border-radius: 8px;
}

.body_post .card {
 border-radius: 8px;
 padding: 8px;
}

button {
 padding: 5px 25px;
 width: fit-content;
 cursor: pointer;
 background-color: #aa0f01;
 color: white;
 border: none;
 font-size: 16px;
 font-weight: bold;
}

.form {
 text-align: right;
 display: flex;
}

.body_container {
 margin: 3rem 0;
}

.body_container img {
 width: 100%;
 height: 500px;
 object-fit: cover;
}
.tag_container {
 display: flex;
 align-items: center;
}

.tag {
 background: white;
 width: fit-content;
 margin: 0 10px;
 font-size: 12px;
 padding: 5px;
 border-radius: 5px;
 font-weight: 600;
}

.t_ag_container {
 display: flex;
 align-items: center;
}

.t_ag_container p {
 margin: 0;
}

.t_ag {
 background: transparent;
 width: fit-content;
 font-size: 12px;
 padding: 5px;
 border-radius: 5px;
 font-weight: 600;
}

.text_container {
 text-align: center;
}

.header_container {
 display: flex;
}

.header_container p {
 color: #aa0f01;
}

.header_container div {
 display: flex;
 flex-direction: column;
 width: 30px;
 align-items: center;
 justify-content: center;
 margin: 0 10px;
}

hr {
 background: grey;
 border-bottom: 1px solid #aa0f01;
 width: 100%;
}

.navbar {
 display: flex;
}

.navItem {
 margin: 0 8px;
 cursor: pointer;
 padding: 5px 0;
}

.active {
 border-bottom: 2px solid #aa0f01;
}

.content_container {
 color: grey;
 line-height: 1.5rem;
 font-weight: 400;
}
Our rendered blog
In this section, we’ll guide you through the main section of the application. In the gif below you'll see the following sections:
- Home Page: The home page serves as the entry point of the blog application. It provides an overview of the latest blog posts and allows visitors to explore the content. The page is designed to be visually appealing, displaying featured images and snippets of the most recent blog posts.
- Blog Index: Clicking on the "Blog" link in the navigation bar takes users to the blog index page. All blog posts are listed here, sorted by the most recent ones. Each post is displayed with its title, author, publication date, and a brief excerpt. Visitors can click on a blog post to view its full content.
- Individual Blog Post: Users who click on a specific blog post are taken to the individual blog post page. This page displays the full content of the blog post, including any images, videos, or embedded media. In addition, users can read the entire post, leave comments, and share it on social media platforms.
Here’s a full preview of our application:
Final thoughts
Congratulations! You made it to the end of our Ruby blog tutorial.
If you are looking for a powerful and easy-to-use blogging solution for your Ruby application, ButterCMS is worth considering. Its scalability, customization options, and ease of integration make it a great choice for both developers and marketers who want to build great applications rather than worry about the backend infrastructure.
Sometimes, your blog requires additional functionality beyond the default blog post pages. You can follow up on this tutorial and add more existing features. For example, you can create custom blog post pages using the page types feature offered by ButterCMS. ButterCMS provides a flexible content model where you can define custom page types tailored to your specific needs. This allows you to have different templates and fields for various blog posts or pages. I really can’t wait to see what you’ll build with ButterCMS and Ruby Sinatra.
To learn more about how you can use Ruby with ButterCMS check out the following tutorials:

