- The Next.js portfolio pages we will be building
- Tutorial prerequisites
- Setting up the development environment
- Configuring components for our portfolio page
- Creating the Portfolio page with our components
- Adding content to our Portfolio page
- Integrating the components into our Next.js website
- Integrating a blog using the ButterCMS blog engine
- Deploying our Next.js portfolio website
- Examples of Next.js portfolios to use for inspiration
- Closing thoughts
Portfolio websites are websites that are designed in a unique way to showcase your work and experience so that recruiters and others can learn more about you and your experience. It’s one of the best mediums to express yourself, your skills, and your capabilities. A well-designed portfolio website can supercharge your reputation, increase professional lead generation, and give your brand more visibility.
One way to make a portfolio website is to use ButterCMS. ButterCMS is an API-first headless CMS that enables you to build applications and websites with any programming language or framework you want.
Next.js is a JavaScript framework that allows developers to create user-friendly and blazing-fast static websites and static web applications with React. With Next.js and ButterCMS, we will develop a developer portfolio website using core ButterCMS features such as components, pages, and blog engine.
In this tutorial, we will walk through how to build a Next.js developer portfolio website with ButterCMS.
Table of contents
The Next.js portfolio pages we will be building
Below is a demonstration of what we will be building in this tutorial. The portfolio website will have two different pages:
-
Homepage: The homepage will contain the Hero section, the Skills section to display the list of acquired skills, and the Work section to display some recent projects
-
Blog page: The blog page will contain a list of available written blog entries and dynamic route links to the exact blog pages.
Below is a GIF showing what we will build in this tutorial:

Tutorial prerequisites
Below are the main requirements you need to follow along with this tutorial:
-
A ButterCMS trial account
-
A code editor such as Visual Studio Code or Sublime
-
Basic knowledge of React
-
Basic knowledge of Next.js
-
Font Awesome icons

Setting up the development environment
To get started, open the terminal and navigate to where you want to create/store your new app and execute create-next-app to bootstrap the project.
npx create-next-app my-portfolioAfter that, a prompt will appear asking you to confirm some additional dependencies. The command above will automatically scaffold a folder structure for our project.
Configuring components for our portfolio page
The next step is to configure the components needed for our portfolio website in ButterCMS. Before that, we need to set up the ButterCMS project.
So, let's install ButterCMS in our Next.js project with the ButterCMS SDK using the following command:
npm install buttercms --save (using npm)

	OR

yarn add buttercms  (using yarn)
Then, create a Butter account. To create an account, click here. After creating your account, create a .env file in the root of your project and add your ButterCMS API token as an environment variable:
NEXT_PUBLIC_API_KEY = YOUR API KEY
Now, let’s create some of the sections of our portfolio page. We will make use of some of the amazing features from ButterCMS such as components, collections, pages, and the blog engine to build our portfolio website.
The Hero component
The Hero component describes a brief introduction of whomever the portfolio belongs to. It contains a header, an image for a headshot, and social media links.
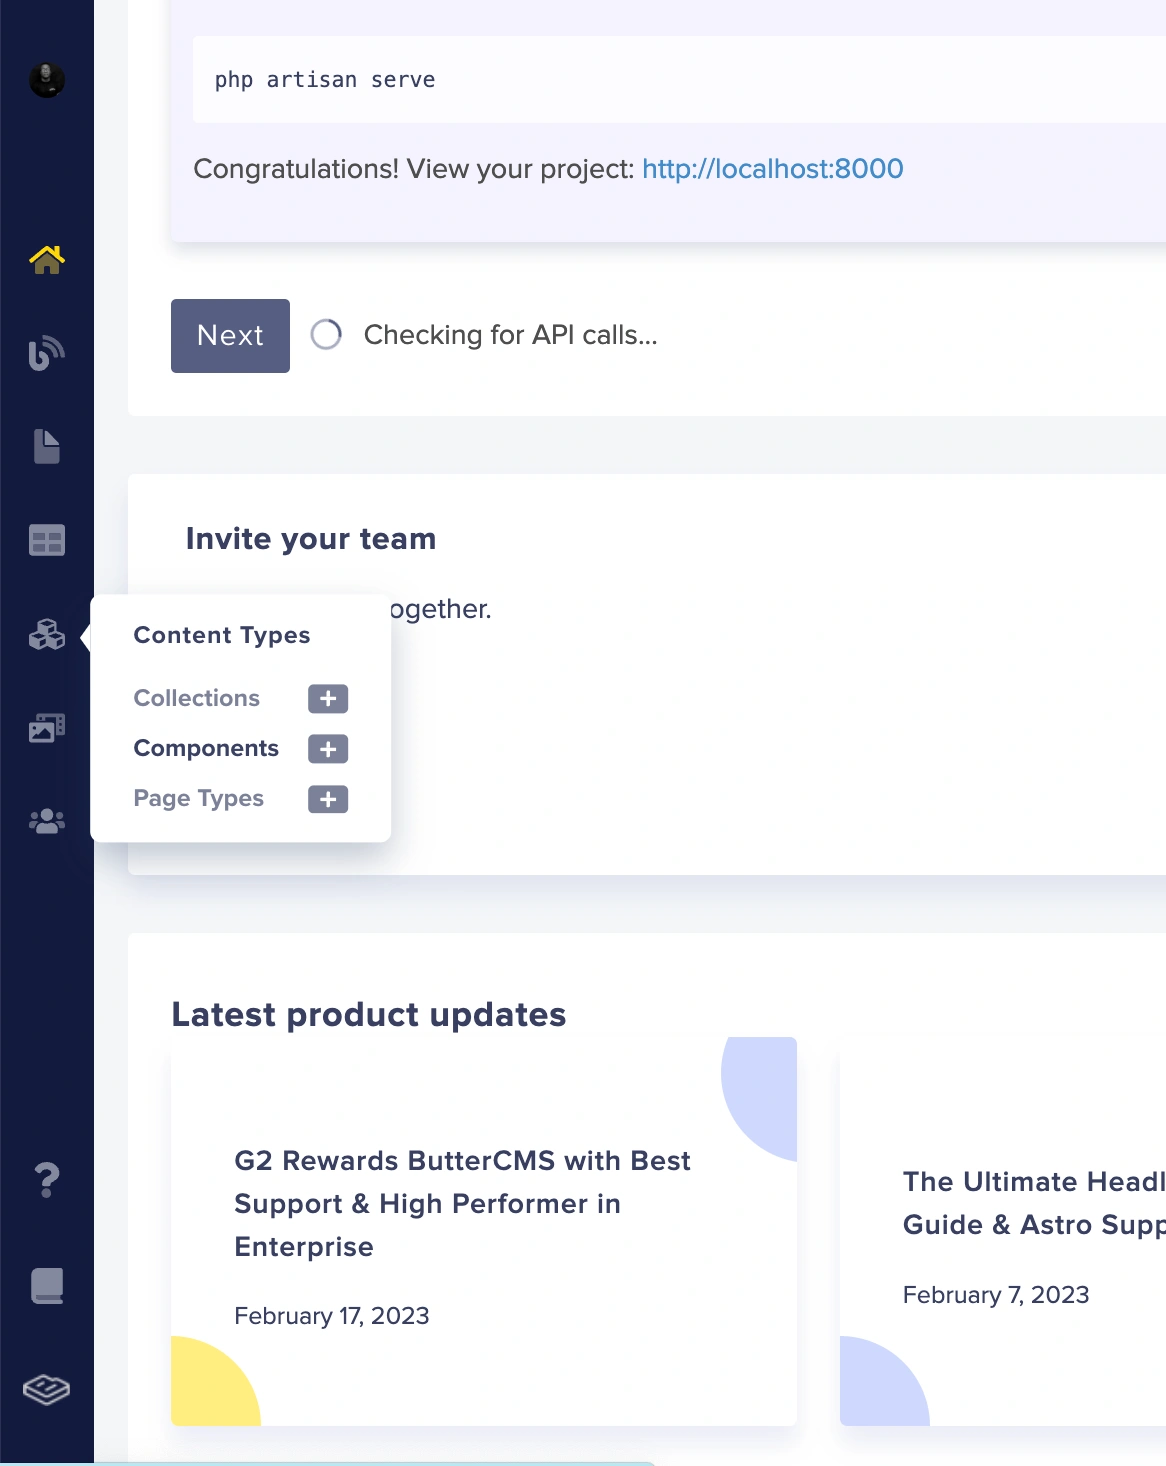
In your ButterCMS dashboard, click on the Content Types tab in your sidebar and then click on Components:
After that, let's go ahead and create the Hero component by following the steps below:
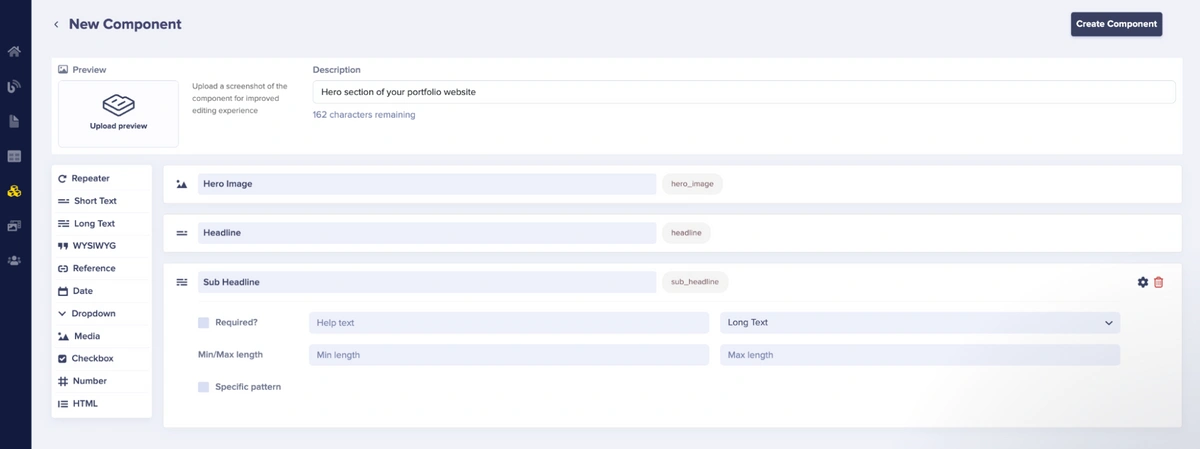
Click on the New Content Type button and select Component. You will land on a New Component configuration page.

Then, add the following fields:
-
Image text for Hero Image
-
Short text for Headline
-
Long text for Sub Headline
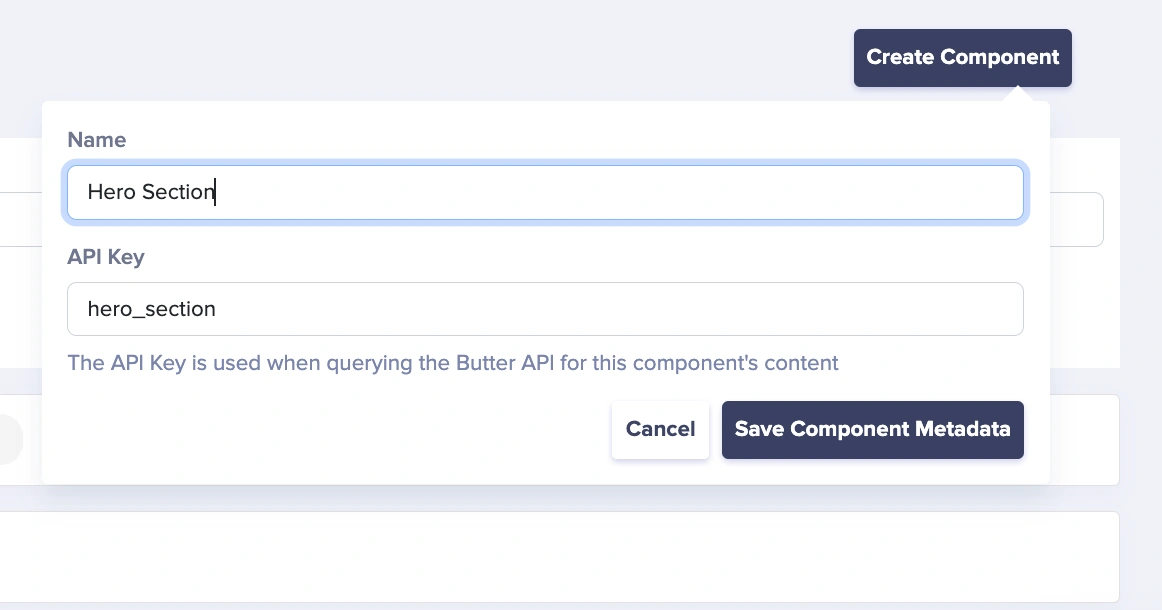
Then, click Create Component:
Now, add the component’s name, Hero Section, and save it:
The About component
After creating the Hero component in ButterCMS, let’s now create the About component. The About component describes a detailed introduction of whomever the portfolio belongs to. It contains a header, an image, and a sub-headline with a detailed introduction.
In your ButterCMS dashboard, click on the Content Types tab in your sidebar and then click on Components. Then, click on New Content Type and select Component. You will land on a New Component configuration page.
Let’s add the following fields:
-
Long text for Sub Headline
-
Image for Image
Then, click Create Component:
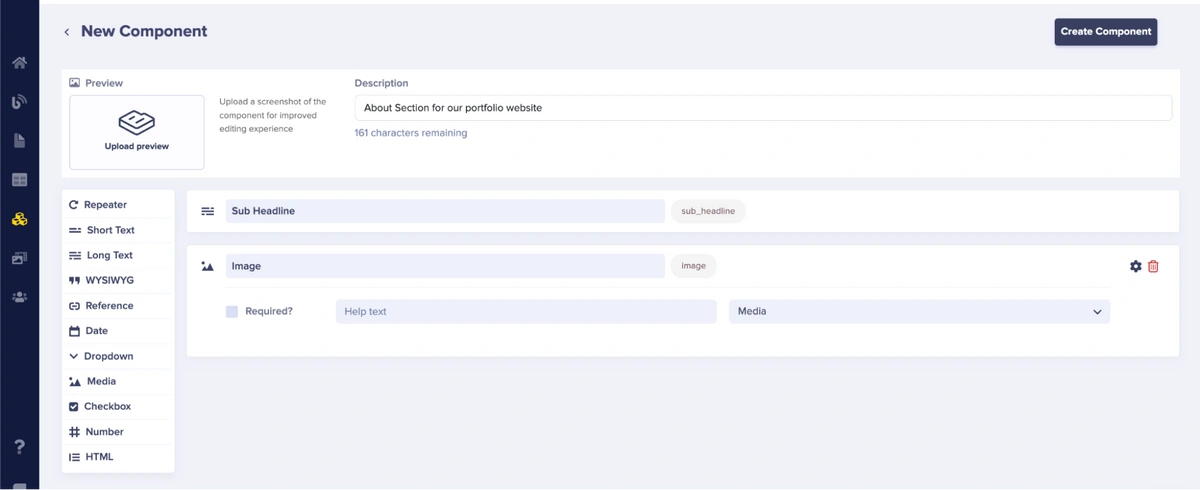
Now, add the component’s name, About Section, and save it:

The Skills component
After creating the About component in ButterCMS, let’s now create the Skills component, The Skills component describes the skills of whomever the portfolio belongs to. It is the section that showcases your potential to a recruiter. Navigate to the Content Types dashboard, click the New Content Type button, and select Component from the drop-down menu.
Let’s add the following fields:
-
Long text for Skill Headline
-
Repeater for Skills
-
Long text for terminology
-
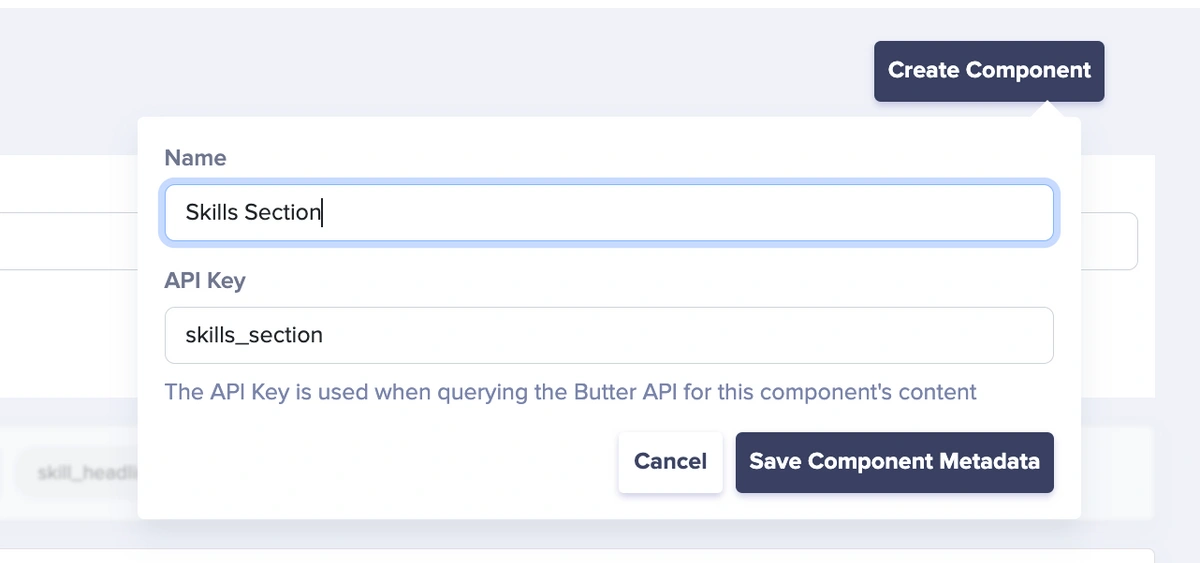
Then, click Create Component:
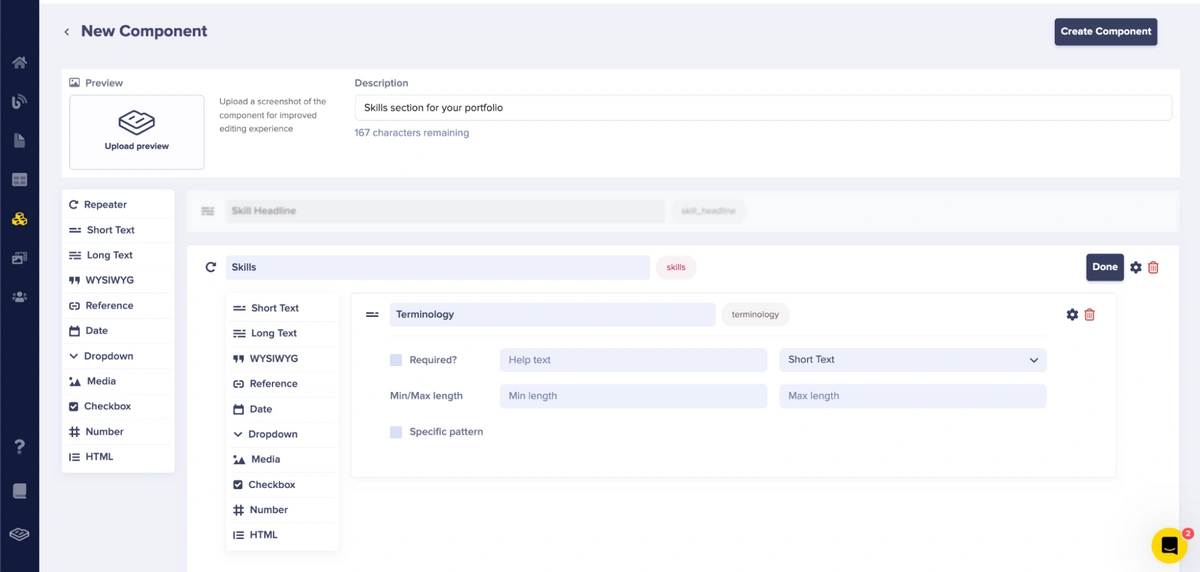
Now, add the component’s name, Skills Section, and save it:
Note: An alternate approach to this section would be to use ButterCMS collections. You would create a collection called Skills and then reference the items within the Skills collection on whatever page you want to display them on.
The Work component
After that, let’s go ahead and create the Work component by following the steps below:
Navigate to the Content Types dashboard, click the New Content Type button, and select Component from the drop-down menu.
Then, add the following fields:
-
Long text for Sub Headline
-
Repeater for Works:
-
Media for Folder Label
-
Short text for Folder URL
-
Media for GitHub Label
-
Short text for GitHub URL
-
Short text for Work Headline
-
Long text for Work Text
-
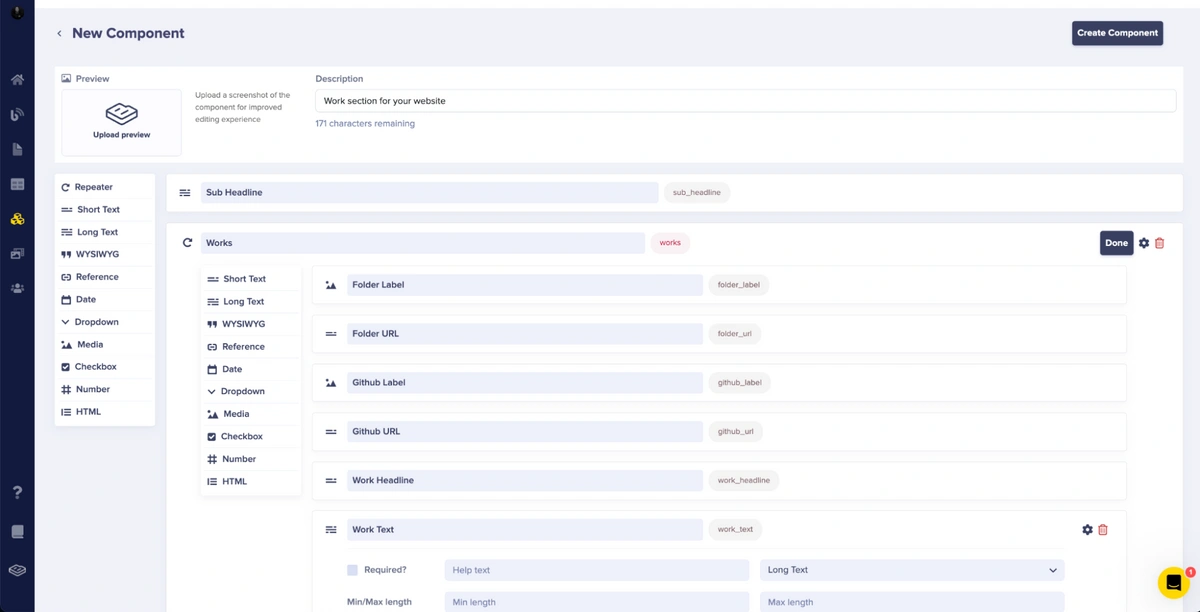
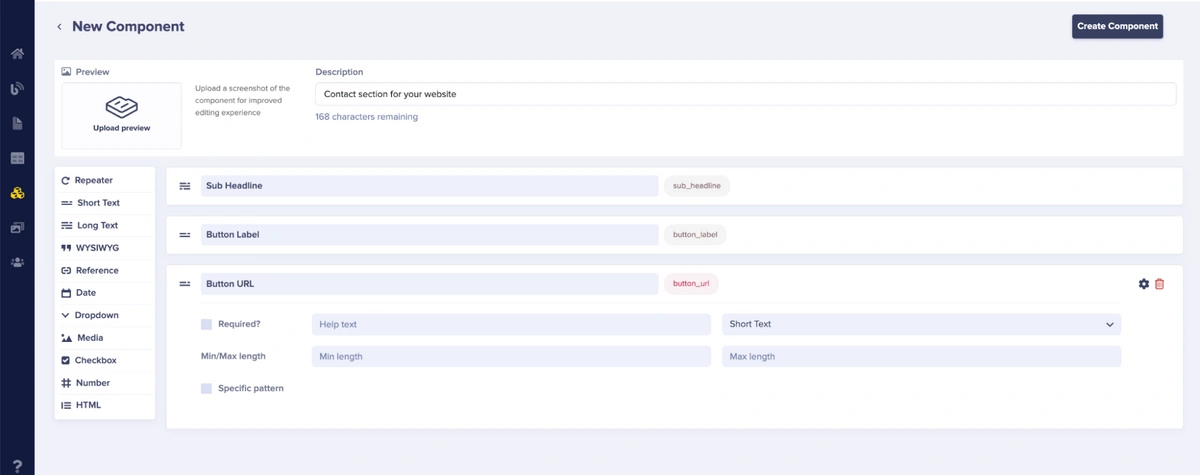
Now, add the component’s name, Work Section, then save it:
The Contact component
After that, let’s go ahead and create the Contact component by following the steps below.
Navigate to the Content Types dashboard, click the New Content Type button, and select Component from the drop-down menu.
Then add the following fields:
-
Long text as Sub Headline
-
Short text as Button Label
-
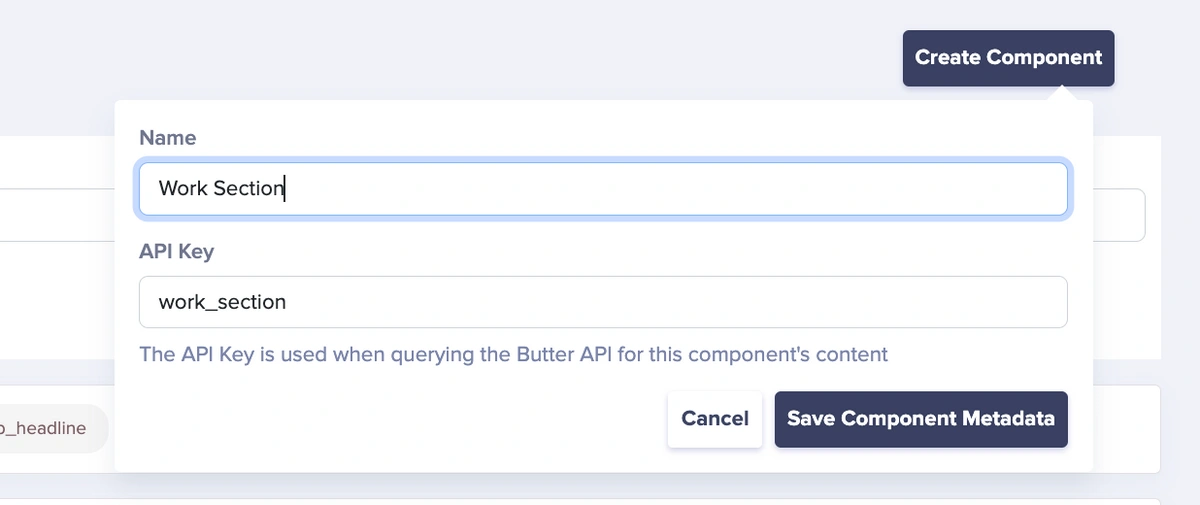
Short text as Button URL
Now, add the component’s name, Contact Section, and save it:

Creating the Portfolio page with our components
After creating the first set of components (Hero, About, and Skills sections), let’s now create the Portfolio page. We’re going to create our portfolio page using ButterCMS pages and add our components to the page schema.
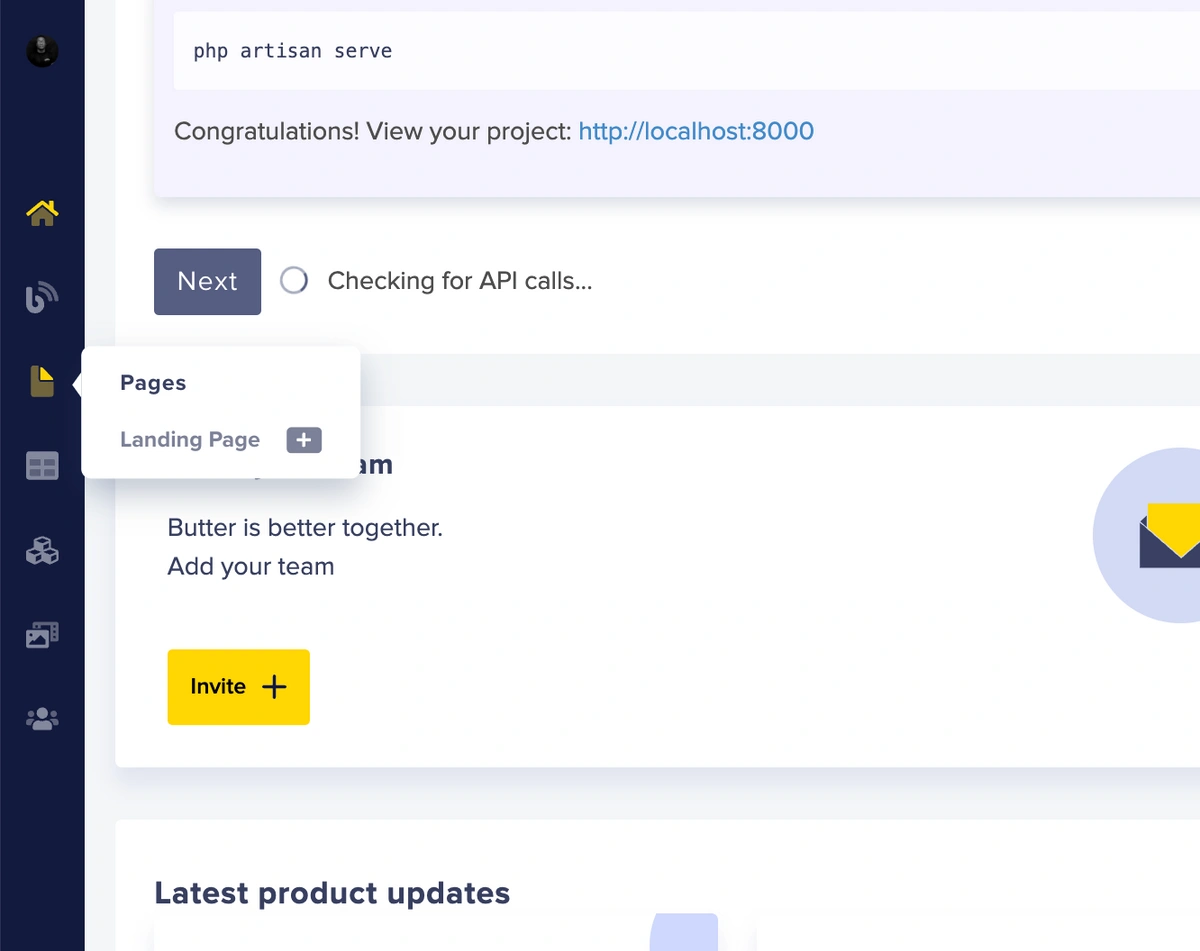
Let’s first go to the Pages section and click Pages:
Click on New Page, then click on Create New Page.

After that, you will land on the New Page screen to configure the schema of the page.
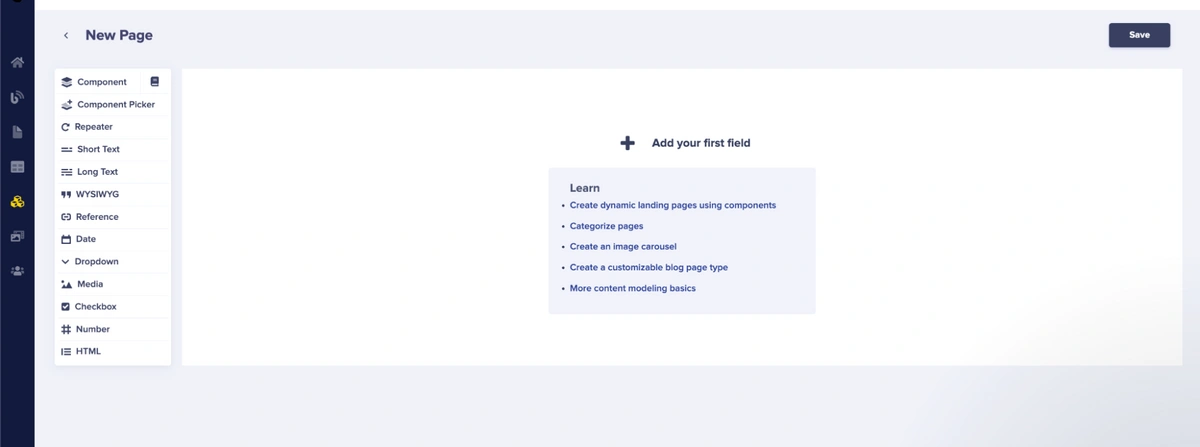
First, let’s add Component as a field:
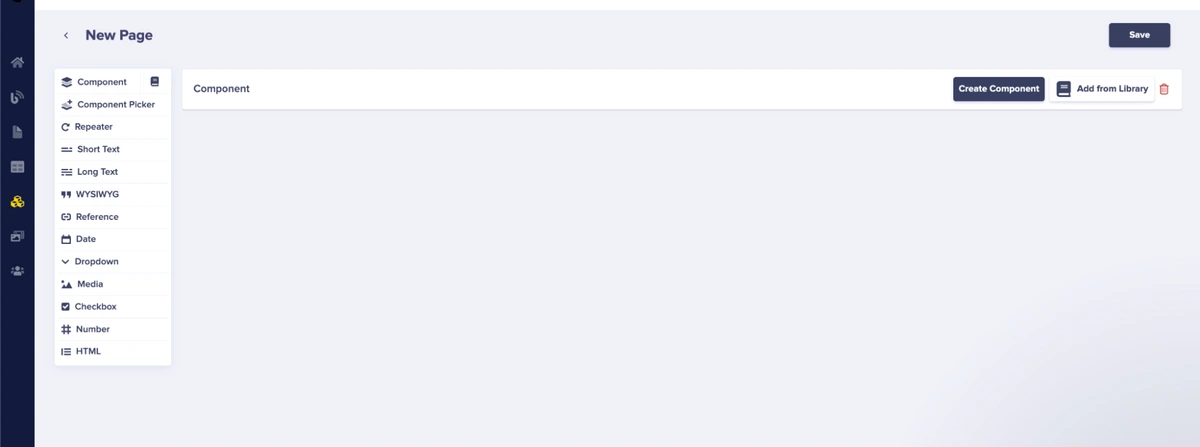
Then, click on Add from Library in order to insert the components we created earlier.
Now, select the Hero section component from the component library.
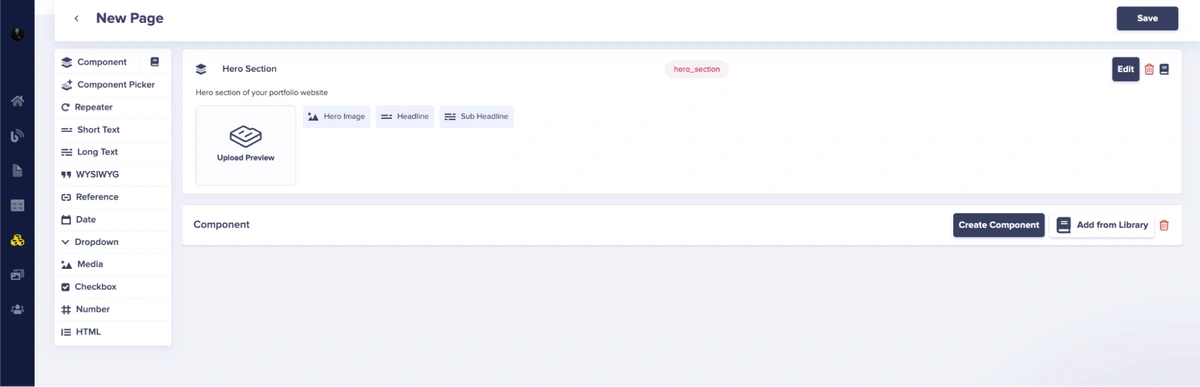
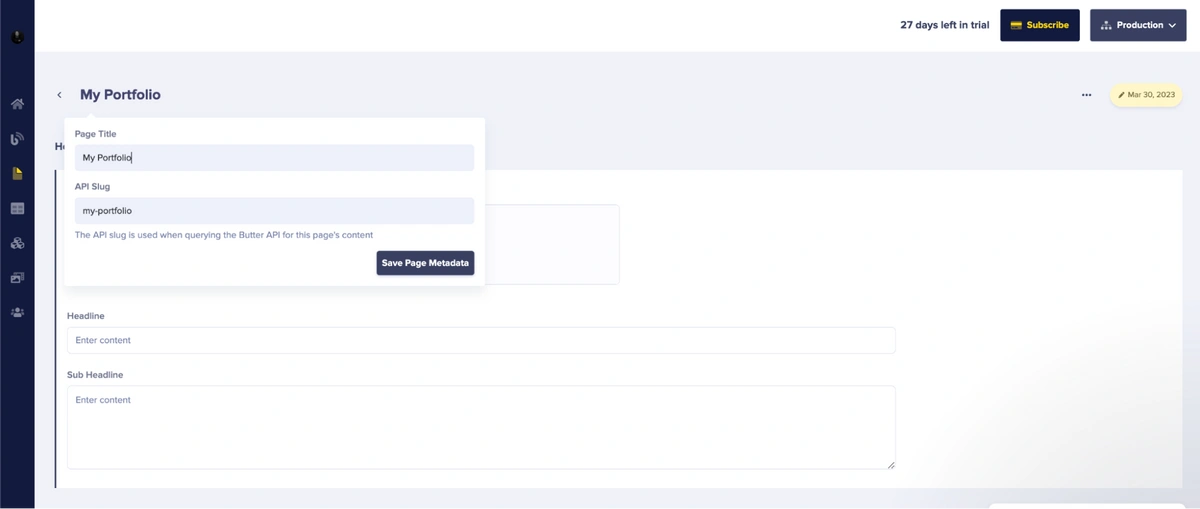
Then, repeat the previous step and select the About, Skills, Work, and Contact components. Then, save the schema by clicking Save in the top right corner. After saving you should land on the page editor where you will proceed to name and save this page as My Portfolio.
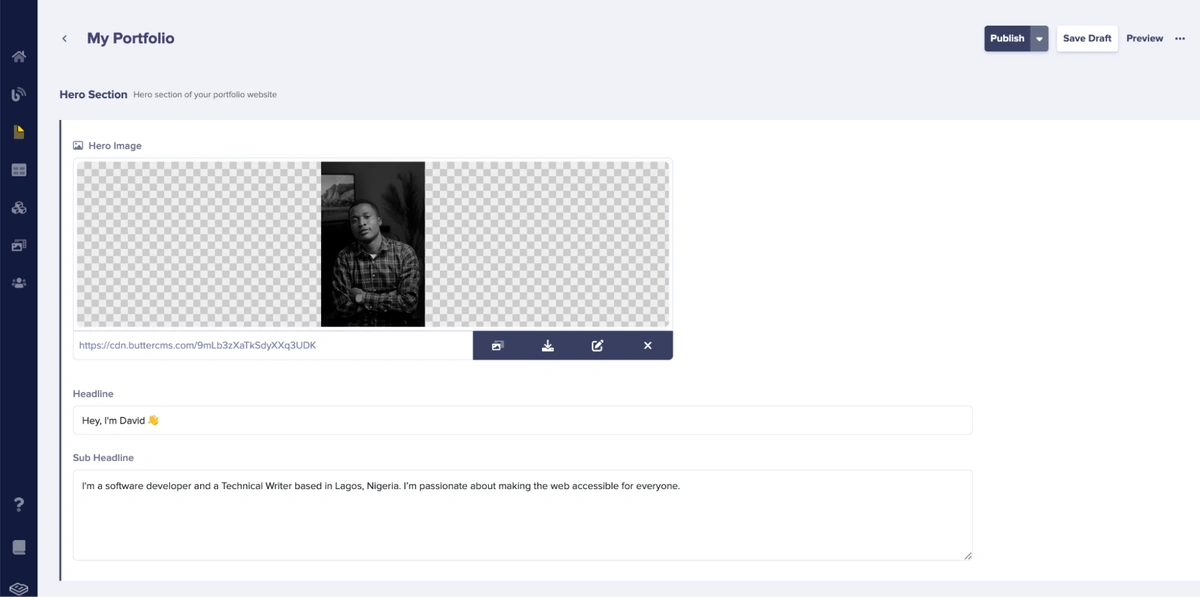
Adding content to our Portfolio page
After saving the new page, then we can start adding content. Below, we’ll begin with the Hero section and input the details for the headline, subheadline, and hero image fields. For the image, you can upload and use your custom images to the ButterCMS CDN or choose from the available images provided by ButterCMS.
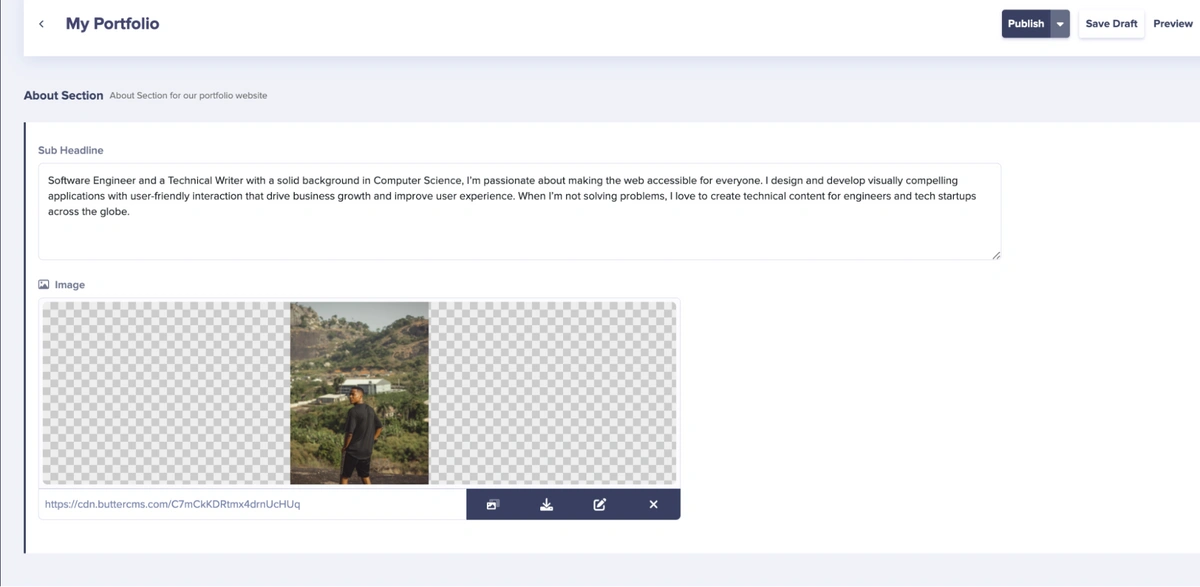
Then, add the content for the About component:
Next, let’s add the content for the Skills component. For the repeater in this section, you'll need to click the + Skills button to add a New Item and fill out the subsequent fields that pop up for each item.

Here's what your skills section should look like after adding a few items to the repeater:

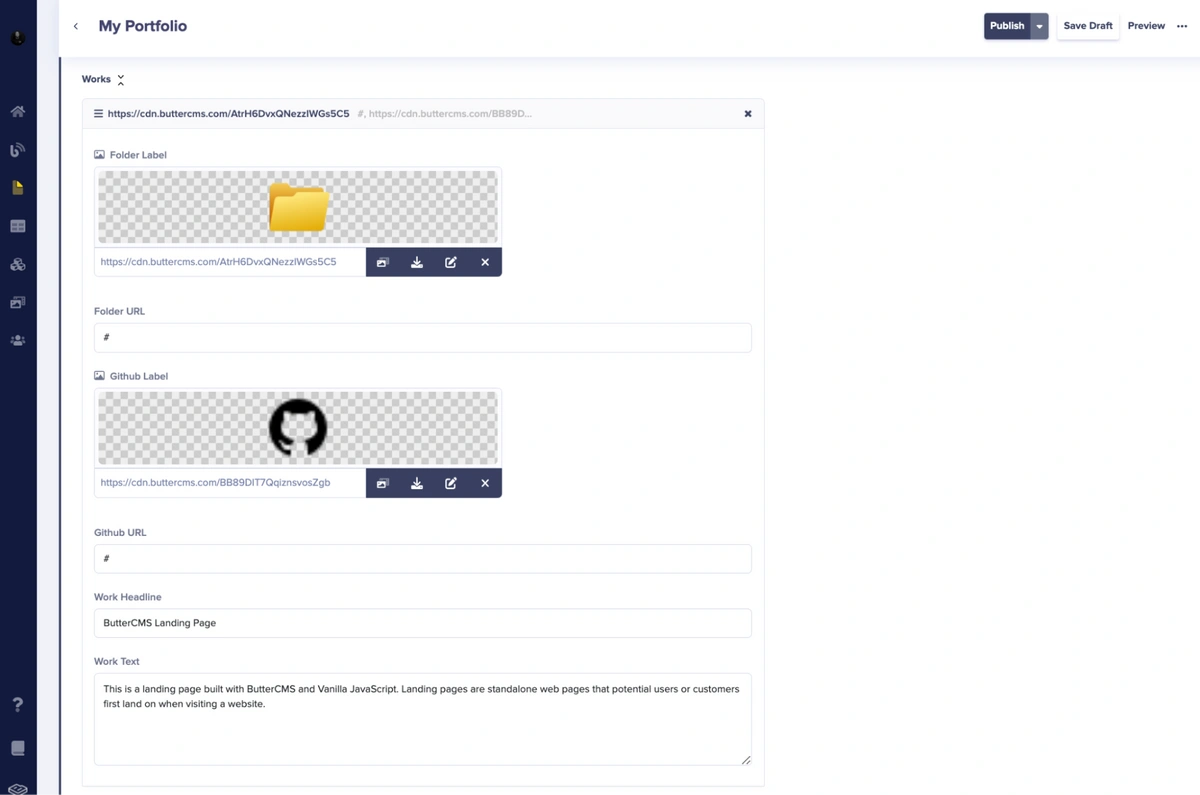
Next, let’s add the content for the Work Section component. The repeater in the Work Section component works the same as last time. Select the + Work button to add a New Item to the repeater and fill out the fields.
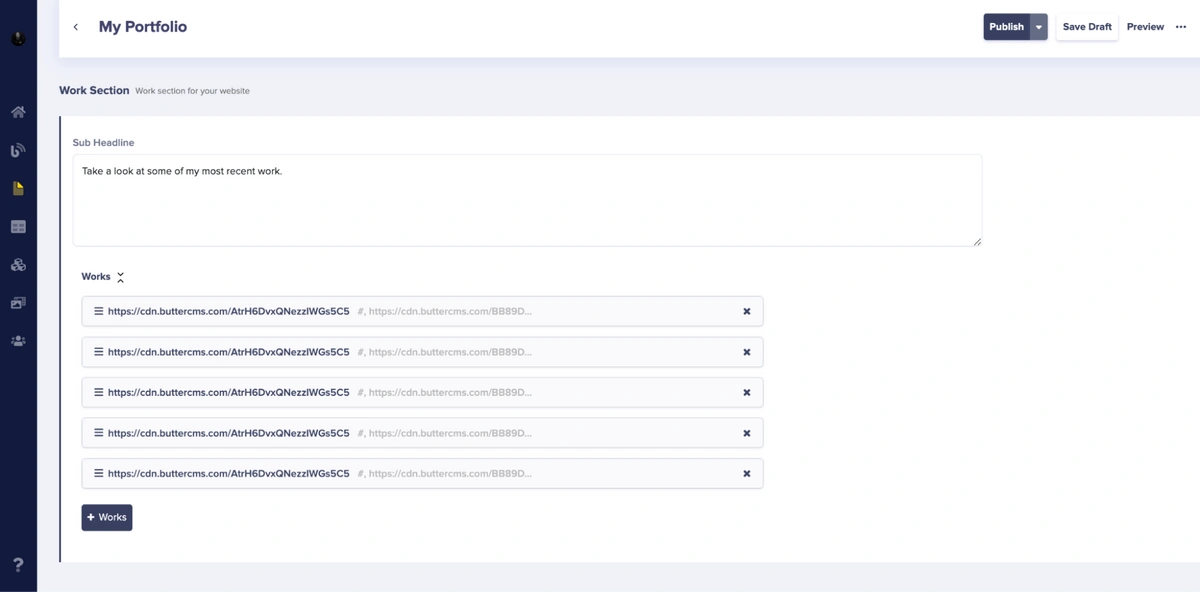
Here's what it should look like after adding all the works you'd like to show off in your portfolio.
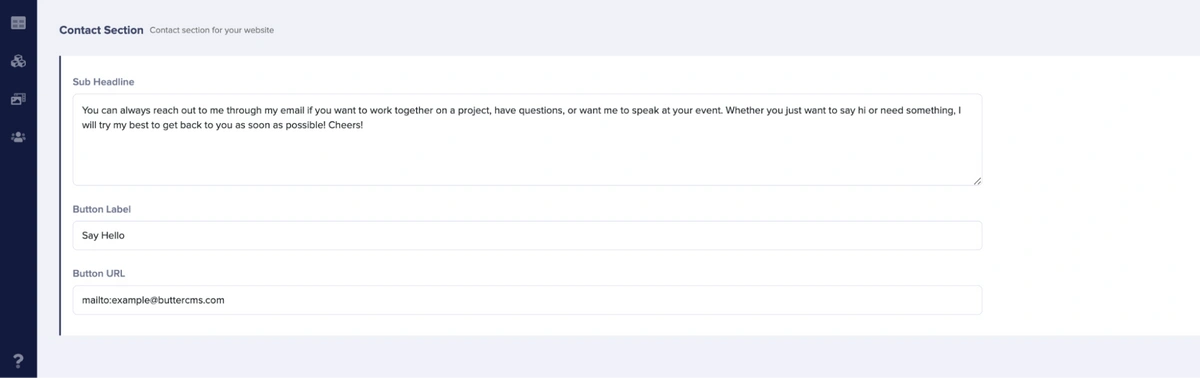
Next, let’s add the content for the Contact component:
Then, click Publish.
After publishing the content, we can test the API through ButterCMS’s API Explorer:

Then, an API Explorer window pops up that displays the API data of the portfolio page, like below:

It works!!!
Integrating the components into our Next.js website
After preparing the content in ButterCMS, let’s go back to integrating the components in our code.
Before that, let's create the navbar and footer of our portfolio website. Create a components folder in the src folder of your Next project, then create a Navbar and Footer component that will be used within the Layout component.
Open your Navbar.js component and add the following code:
This code below will display the Navigation menu of the page which contains the logo, link to the blog page, and the resume link.
// components/Navbar.js

import Link from "next/link";

const Navbar = () => {
 return (
   <div className="nav-container">
     <div className="logo">
       <Link href="/">
         David Adeneye
       </Link>
     </div>

     <a href="" className="blog-menu">My Blog</a>
     <a href="" className="cta-btn">Resume</a>
   </div>
 )
}

export default Navbar;
Then open the Footer.js component and add the following code:
This code below will add the footer section of the page which contains social icons and the date
// components/Footer.js

const Footer = () => {
   return (
     <>
       <hr/>
       <div className="footer-container">
         <p>
           (c) {new Date().getFullYear()} David Adeneye
         </p>
         <div className="social_icons">
           <a
             href="https://twitter.com/davidadeneye"
             aria-label="Twitter"
             target="_blank"
             rel="noopener noreferrer"
           >
             <i className="fa-brands fa-twitter"></i>
           </a>
           <a
             href="https://github.com/daacode"
             aria-label="GitHub"
             target="_blank"
             rel="noopener noreferrer"
           >
             <i className="fa-brands fa-github"></i>
           </a>
           <a
             href="https://www.linkedin.com/in/david-adeneye-490027188/"
             aria-label="LinkedIn"
             target="_blank"
             rel="noopener noreferrer"
           >
             <i className="fa-brands fa-linkedin"></i>
           </a>
         </div>
       </div>
     </>
   )
 }
  export default Footer;
For this article, we will be using Font Awesome icons. So, you must either install it into your project or use its CDN. You can add the CDN link to your _document.js file like this:
import { Html, Head, Main, NextScript } from 'next/document'

export default function Document() {
 return (
   <Html lang="en">
   <Head>
     <meta charSet="utf-8" />
     <link
       rel="stylesheet"
       href="https://cdnjs.cloudflare.com/ajax/libs/font-awesome/6.2.1/css/all.min.css"
       integrity="sha512-MV7K8+y+gLIBoVD59lQIYicR65iaqukzvf/nwasF0nqhPay5w/9lJmVM2hMDcnK1OnMGCdVK+iQrJ7lzPJQd1w=="
       crossorigin="anonymous"
       referrerpolicy="no-referrer"
     />
   </Head>
   <body>
   <Main />
   <NextScript />
   </body>
 </Html>
 )
}
Note: Perhaps if you link a different version of Font Awesome via the CDN, you will need to swap in the appropriate integrity for that release.
After creating some of the necessary components for your layout, you can create the Layout component itself and add this component to your pages by wrapping your page content within it.
The Layout component will accept children as prop, thereby allowing you to access the content of your Next.js pages.
Open your Layout.js component and add the following code:
// components/Layout.js
import Footer from './footer';

const Layout = ({ children }) => {
 return (
   <>
     <main>{children}</main>
     <Footer />
   </>
 )
}

export default Layout;
With the code above, you have successfully created the Layout component which holds the Footer component alongside the children props. Now, you can add the Layout component to your pages by wrapping the page content in it. To do this, open the _app.js file.
// pages/_app.js

import '@/styles/globals.css';
import Layout from '../components/layout';

export default function App({ Component, pageProps }) {
 return (
   <Layout>
     <Component {...pageProps} />
   </Layout>
 );
}
Now, let’s incorporate the component we created in the previous section. So, in your source folder inside the components folder create the files Hero.js, About.js, and Skills.js.
Open your Hero.js file and add the following code:
// components/Hero.jsx
import Butter from "buttercms";
import React, { useEffect, useState } from "react";


const butter = Butter(`${process.env.NEXT_PUBLIC_API_KEY}`);


const Hero = () => {

   const [hero, setHero] = useState({});

   useEffect(() => {
       butter.page
         .retrieve("*", "my-portfolio")
         .then(function (resp) {
           console.log(resp.data.data.fields.hero_section);
           setHero(resp.data.data.fields.hero_section);

         })
         .catch(function (resp) {
           console.log(resp);
         });
     }, []);

 return (
   <div className="hero-container">
       <img src={hero?.hero_image} loading="lazy" className="profile-img" width={200} height={200} alt="David personal headshot" />
     <div className="hero-text">
       <h1>{hero?.headline}</h1>
       <p>
         {hero?.sub_headline}
       </p>
       <div className="social-icons">
         <a
           href="https://twitter.com/olawanle_joel"
           aria-label="Twitter"
           target="_blank"
           rel="noopener noreferrer"
         >
           <i className="fa-brands fa-twitter"></i>
         </a>
         <a
           href="https://github.com/olawanlejoel"
           aria-label="GitHub"
           target="_blank"
           rel="noopener noreferrer"
         >
           <i className="fa-brands fa-github"></i>
         </a>
         <a
           href="https://www.linkedin.com/in/olawanlejoel/"
           aria-label="LinkedIn"
           target="_blank"
           rel="noopener noreferrer"
         >
           <i className="fa-brands fa-linkedin"></i>
         </a>
       </div>
     </div>
   </div>
 )
}

export default Hero;
In the code above, we imported ButterCMS and also passed the API key to ButterCMS so we could use it later in the code to fetch our content.
Then, open About.js and add the following code:
The code below will add the About section of the page which contains a headline, a subheadline for a detailed introduction about whomever the portfolio website belongs to, and an image.
// components/About.js

import Butter from "buttercms";
import React, { useEffect, useState } from "react";


const butter = Butter(`${process.env.NEXT_PUBLIC_API_KEY}`);

const About = () => {

 const [about, setAbout] = useState({});

   useEffect(() => {
       butter.page
         .retrieve("*", "my-portfolio")
         .then(function (resp) {
           console.log(resp.data.data.fields.about_section);
           setAbout(resp.data.data.fields.about_section);

         })
         .catch(function (resp) {
           console.log(resp);
         });
     }, []);


 return (
   <div className="about-container">
     <h2>About Me</h2>
     <div className="flex-about">
       <div className="about-text">
         <p>
           {about?.sub_headline}
         </p>
         <p>{about?.sub_headline}</p>
       </div>
       <div className="about-img">
         <image src={about?.image} className="profile-img" width={300} height={500}/>
       </div>
     </div>
   </div>
 )
}

export default About;
After that, open the Skills.js file and add the following code:
The code below will add the Skills section of the page which contains a list of acquired skill sets.
 // components/Skills.js

 import Butter from "buttercms";
 import React, { useEffect, useState } from "react";

 const butter = Butter(`${process.env.NEXT_PUBLIC_API_KEY}`);


 const Skills = () => {

   const [skill, setSkill] = useState({});

     useEffect(() => {
         butter.page
           .retrieve("*", "my-portfolio")
           .then(function (resp) {
             console.log(resp.data.data.fields.skills_section);
             setSkill(resp.data.data.fields.skills_section);

           })
           .catch(function (resp) {
             console.log(resp);
           });
     }, []);

     return (
       <div className="skills-container">
         <h2>Skills</h2>
         <h4>{skill?.skill_headline}</h4>


         <div className="grid-skills">
                     {skill?.skills?.map((skill, index) => {
                   return (
                     <div className="skill-card" key={index}>
                       <p >{skill.terminology}</p>
                     </div>
                   );
                 })}
             </div>
         </div>
     )
   }

   export default Skills;
Then, to integrate the content into our project, create a new file in your src/components folder named Works.js and add the following code:
// components/Works.js

import Butter from "buttercms";
import React, { useEffect, useState } from "react";

const butter = Butter(`${process.env.NEXT_PUBLIC_API_KEY}`);

const Works = () => {
   const [work, setWork] = useState({});

   useEffect(() => {
       butter.page
         .retrieve("*", "my-portfolio")
         .then(function (resp) {
           console.log(resp.data.data.fields.work_section);
           setWork(resp.data.data.fields.work_section);

         })
         .catch(function (resp) {
           console.log(resp);
         });
   }, []);

   return (
       <div className="projects-container">
           <h2>Works</h2>
           <h4>{work?.sub_headline}</h4>


           <div className="projects-grid">
               {work?.works?.map((work, index) => {
                   return (
                       <div className="project-card" key={index}>
                           <div className="project-header">
                               <img src={work.folder_label} className="folder-icon" width={50} height={50}/>

                               <div className="small-icons">
                                   <a href={work.github_url}><img src={work.github_label} /></a>
                               </div>
                           </div>
                           <h3>{work.work_headline}</h3>
                           <p>{work.work_text}</p>
                       </div>
                   )
               })}
           </div>
       </div>
   )

}

export default Works;
After that, create a new file in your src/components folder named Contact.js and add the following code:
// components/Contact.js

import Butter from "buttercms";
import React, { useEffect, useState } from "react";

const butter = Butter(`${process.env.NEXT_PUBLIC_API_KEY}`);

const Contact = () => {
   const [contact, setContact] = useState({});

   useEffect(() => {
       butter.page
         .retrieve("*", "my-portfolio")
         .then(function (resp) {
           console.log(resp.data.data.fields.contact_section);
           setContact

           (resp.data.data.fields.contact_section);

         })
         .catch(function (resp) {
           console.log(resp);
         });
   }, []);

   return (
       <div className="contact-container">
           <h2>Get In Touch</h2>
           <p>{contact?.sub_headline}</p>
           <a href={contact?.button_url} className='cta-btn'>{contact?.button_label}</a>
       </div>
   )
}

export default Contact;
Then open your index.js file and add all the components you just created:
// pages/index.js

import Navbar from '@/components/Navbar';
import Hero from '@/components/Hero';
import About from '@/components/About';
import Skills from '@/components/Skills';
import Works from '@/components/Works';
import Contact from '@/components/Contact'
import Head from 'next/head';

const Home = () => {
 return (
   <>
     <Head>
       <title>David Adeneye Portfolio</title>
       <meta name="description" content="David Adeneye Portfolio" />
       <meta name="viewport" content="width=device-width, initial-scale=1" />
       <link rel="icon" href="/favicon.ico" />
     </Head>
     <div>
       <Navbar />
       <Hero />
       <About />
       <Skills />
       <Works />
       <Contact />
     </div>
   </>
 );
};

export default Home;
In the code above, we imported all the components and added them to our page layout.
Next, copy the styles in the styles/globals.css file in the GitHub repo and add them into your own file if you’re following along with the tutorial. This is the main CSS style for our project.
Run the command below to launch your app in dev mode:
npm run dev
Your webpage should look like below:

Integrating a blog using the ButterCMS blog engine
ButterCMS provides you with a blog engine out of the box, so you don’t have to build a blog from scratch. In this section, we will walk through how to integrate the pre-built blog engine with Next.js for your portfolio website.
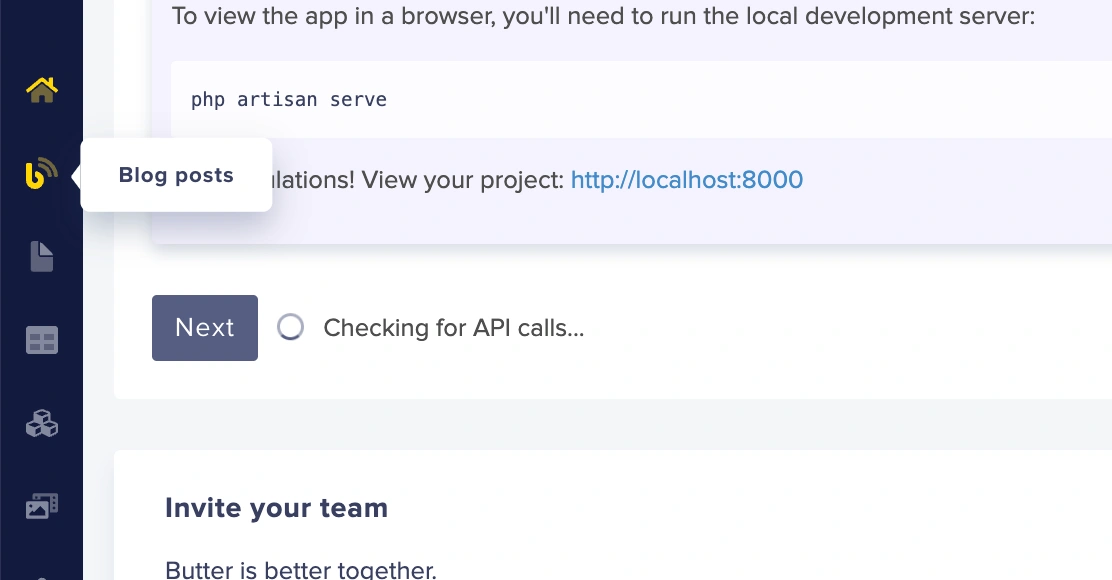
Go back to your dashboard and click on Blog Posts on the sidebar menu:
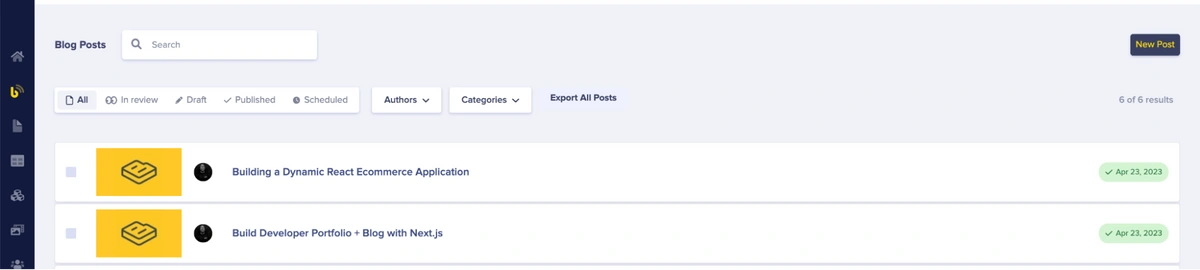
Click on New Post to add a new blog post. As you can see below, you will see a list of blog posts that I have added before.
After clicking New Post you'll land on a Blog Editing page where you can name your blog post, add content using the text editor, add a cover image, author information, relevant tags, and important SEO data without any additional configuration.
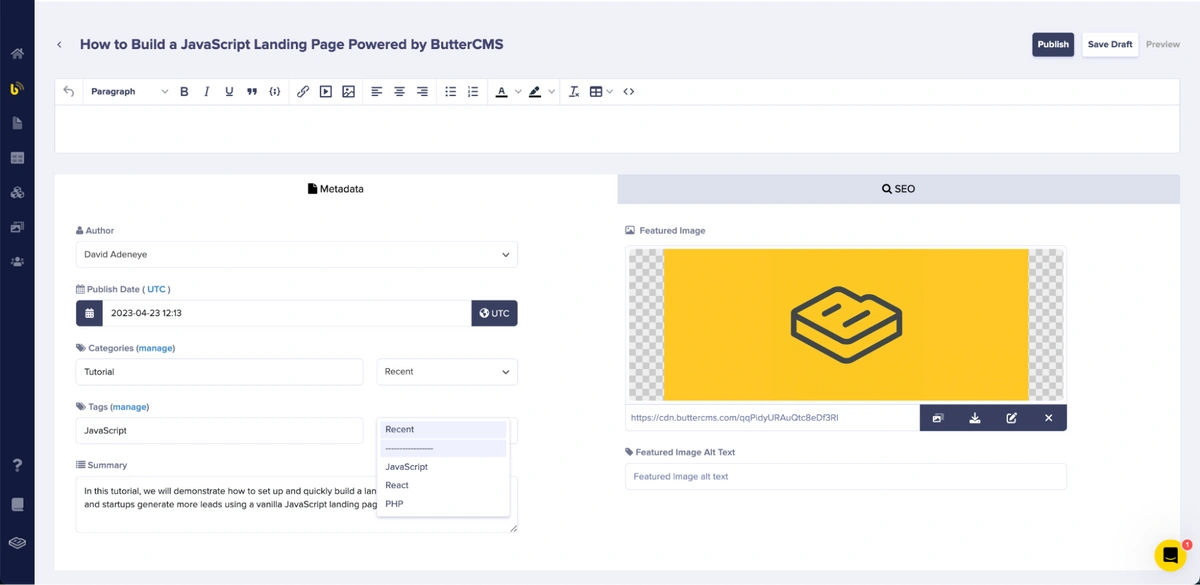
In the image above, you should see that the blog engine enables us to add features like categories and tags. Follow the steps above to add as many more blog posts as you would like.
To incorporate the blog into your Next.js project, create a new file called blog.js inside the src/pages folder. Open the file and add the following code:
import React, { useEffect, useState } from "react";

import Link from "next/link";

const read_token = process.env.NEXT_PUBLIC_API_KEY;

export default function Blog({ posts }) {


   return (
       <>
       <div className="nav-container">
           <div className="logo">
               <Link href="/">
               David Adeneye
               </Link>
           </div>

           <Link href="/blog" className="blog-menu">
               My Blog
           </Link>
           <a href="" className="cta-btn">Subscribe</a>
       </div>

       <div className="blogpost-container">
           {posts.data.map((post, index) => (
           <div className="blogpost-box" key={index}>

               <div className="blogpost-img">
                   <img src={post.featured_image} alt="Blog" width={300} height={300}/>
               </div>


               <div className="blogpost-text">
                   <span className="blogpost-tag">{post.tags[0].name}</span>
                   <a href={`/posts/${post.slug}`} className="blogpost-title">{post.title}</a>
                   <p>{post.summary}</p>
               </div>

               <div className="blogpost-footer">
                   <div>
                       <img src={post.author.profile_image} alt="avatar" />
                       <p className="blogpost-name">{
                         post.author.first_name + " " + post.author.last_name
                       }</p>
                   </div>

                   <Link href={`/posts/${post.slug}`} className="blogpost-link">
                       Read More
                   </Link>
               </div>

           </div>

       ))}
       </div>

       </>
   );
}


// This function gets called at build time
export async function getStaticProps() {
   // Call an external API endpoint to get posts
   const res = await fetch(`https://api.buttercms.com/v2/posts?auth_token=${read_token}`)
   const posts = await res.json()

   // By returning { props: { posts } }, the Blog component
   // will receive `posts` as a prop at build time
   return {
     props: {
       posts,
     },
   }
 }
In the code above, we fetched the posts from the ButterCMS blog API and displayed them on the blog page.
We’ve populated the Blog page with the blog data, but we are yet to create individual blog pages. We want the URL for these pages to depend on the blog data, which means we need to use dynamic routes. With Next.js, you can statically generate pages with paths that depend on external data. To do that, create a folder named posts inside the src/pages folder, then create a file named [id].js inside and add the following code:
import React, { useEffect, useState } from "react";

const read_token = process.env.NEXT_PUBLIC_API_KEY;


export default function Post({ post }) {
    console.log(post.data.title)

 return(
     <>
       <div className="blog-container">
           <span className="blog-goBack"><a href="/blog">Go back</a></span>
           <div className="blog-wrap">
               <header>
                   <p className="blog-date">Published {post.data.created}</p>
                   <h1>{post.data.title}</h1>
                   <div className="blog-tag">
                       <div></div>
                   </div>
               </header>
               <img src={post.data.featured_image} alt="cover" />
               <div className="blog-content" dangerouslySetInnerHTML={{__html: post.data.body }}></div>
           </div>
       </div>
     </>
 )
}

// This function gets called at build time
export async function getStaticPaths() {
   // Call an external API endpoint to get posts
   const res = await fetch(`https://api.buttercms.com/v2/posts?auth_token=${read_token}`)
   const posts = await res.json()
    // Get the paths we want to pre-render based on posts
   const paths = posts.data.map((post) => ({
     params: { id: post.slug },
   }))

    // We'll pre-render only these paths at build time.
   // { fallback: false } means other routes should 404.
   return { paths, fallback: false }
 }

 // This also gets called at build time
export async function getStaticProps({ params }) {
   // params contains the post `id`.
   // If the route is like /posts/1, then params.id is 1
   const res = await fetch(`https://api.buttercms.com/v2/posts/${params.id}?auth_token=${read_token}`)
   const post = await res.json()


    // Pass post data to the page via props
   return { props: { post } }
 }
The code above will generate a page for each post based on the params id: post.slug.
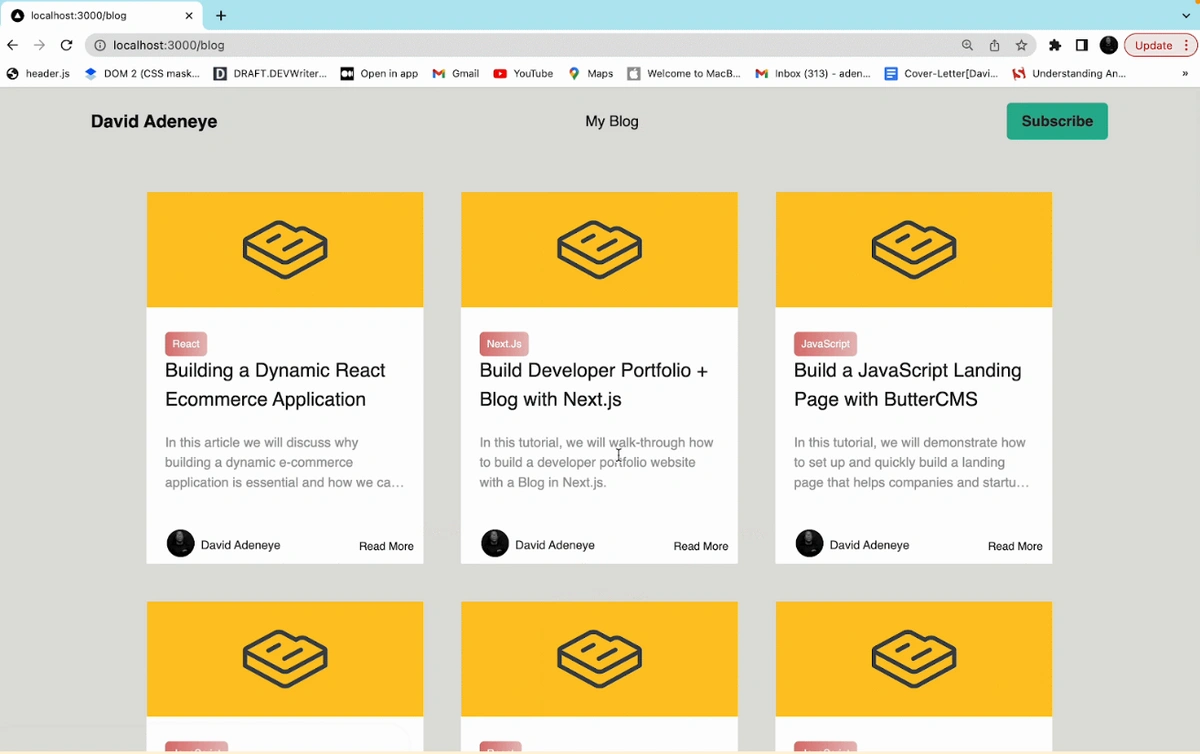
Your blog home should look like this:
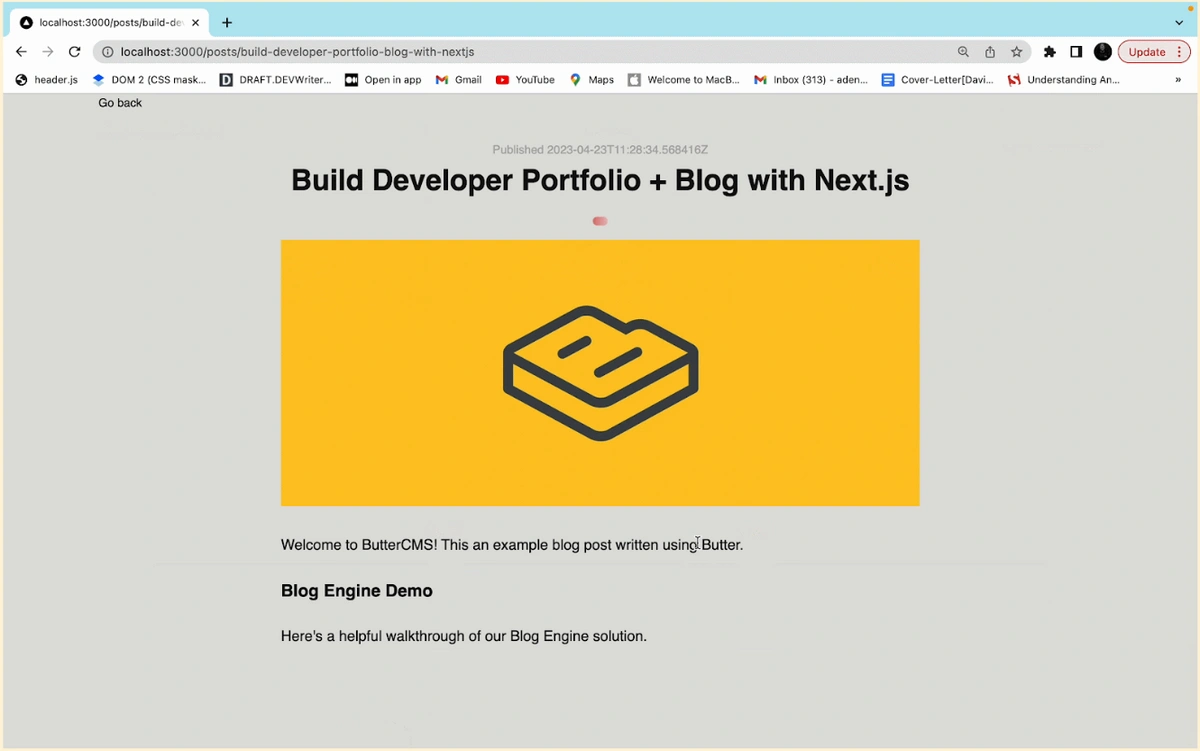
And this is what an individual blog post page should look like:
Deploying our Next.js portfolio website
There are several ways and different platforms you can use to deploy your Next.js application, but I will recommend using Vercel because it’s built by the creator and maintainer of Next.js. They have built the platform in such a way that it enables you to quickly deploy your application in a few minutes.
To deploy your application to production, follow this guide.
Your deployed application should look like below:
Examples of Next.js portfolios to use for inspiration
Let’s take a look at some portfolio websites built with Next.js that you can use for inspiration. One of the benefits of reviewing other people’s portfolio websites is that it allows you to learn from others. The examples below are some of the best simple portfolio websites I have seen; However, there are other amazing portfolios out there that you can get inspiration from, too.
Codewonders.dev
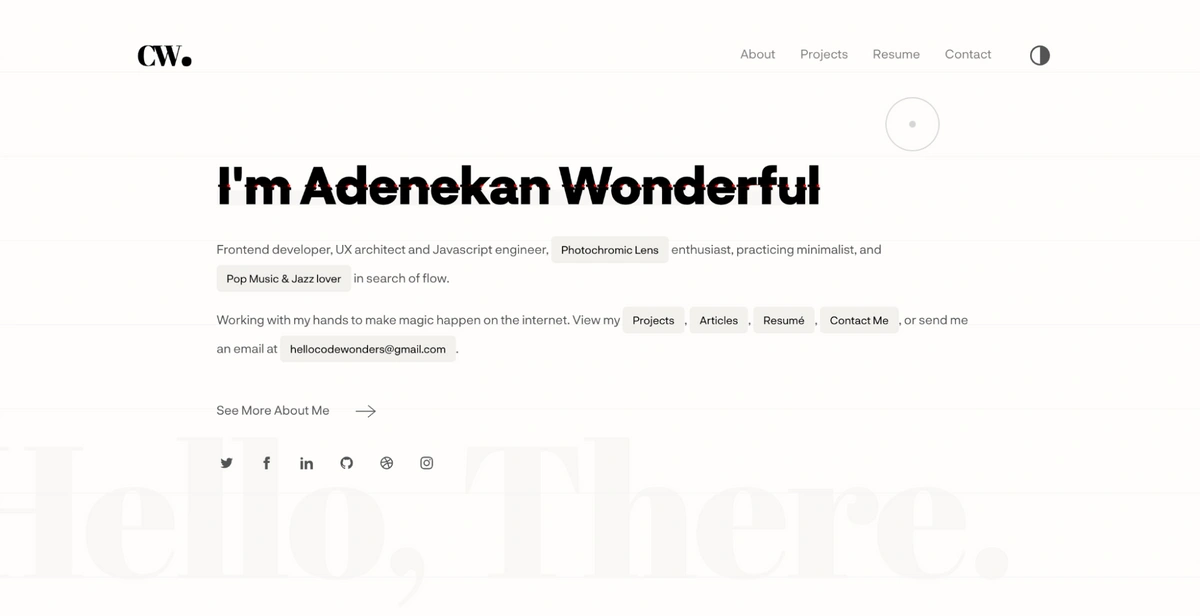
This portfolio is of a software engineer who specializes in front-end development. I love the simplicity of this website, the animations, and, most especially, the mouse-scrolling style. It’s such an amazing portfolio and you should check it out to get inspiration for your next portfolio project.
rittikbasu.tech
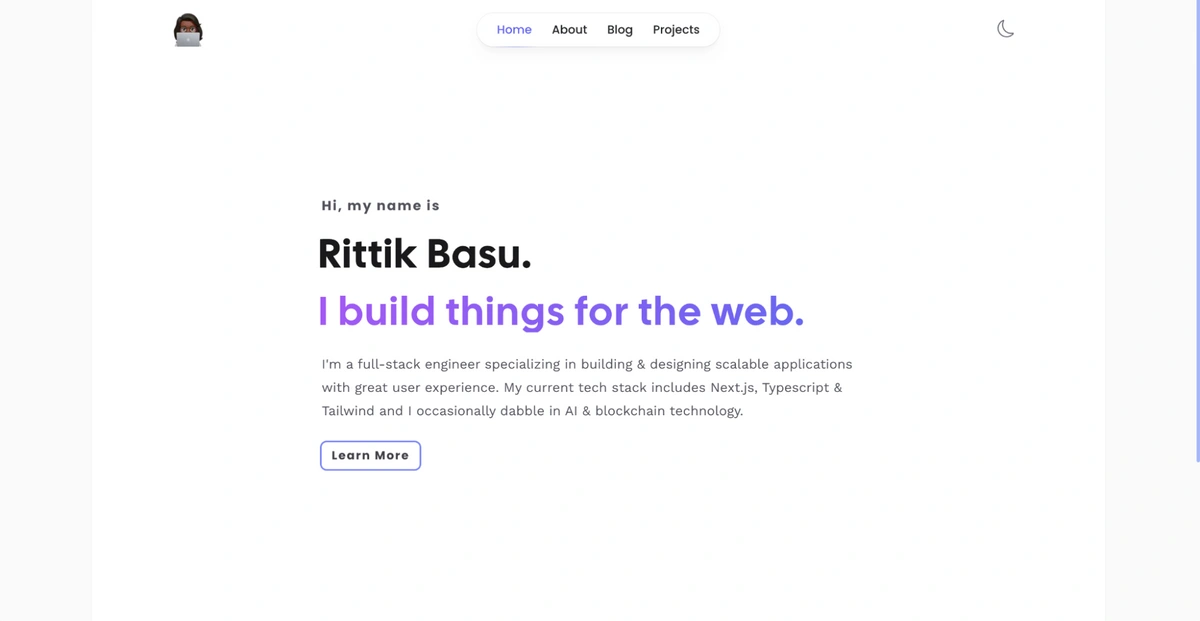
This portfolio is just a mirror version of what we developed in this tutorial. I like the simplicity of the website—it is so straightforward. It also has a light- and dark-mode feature.
J471n.in

The portfolio above was also developed with Next.js. The design and layout are very simple and classic. I love the smooth animation scrolling effect of the website and the dark-mode feature.
Closing thoughts
We hope you've enjoyed reading this tutorial. If you've followed along you should now have a killer portfolio website built with Next.js and ButterCMS. As an added bonus your portfolio should also include a blog built with the ButterCMS blog engine.
ButterCMS is such a great tool for building your portfolio website. It can save you from the stress of managing your content manually—you can get your portfolio website set up in minutes with a frontend framework such as Next.js. We can’t wait to see you build your next portfolio website with this technology.
To learn more about how you can use Next.js with ButterCMS, we encourage you to check out the following tutorials: