First impressions are crucial. They could make or break an entire business, determine if you make it to the next round of interviews, or dictate whether or not a new product grows to dominate a given industry. And in the digital sphere, it's often your landing pages that deliver this first impression, especially if operating an e-commerce brand.
So, in this tutorial, we will cover how to build a slick e-commerce landing page with ButterCMS and Next.js. Showing you how simple it can be to create unique landing pages that help move your prospects along your sales funnel rather than turning them away entirely.
Table of contents
Why use Next.js?
Your team is sure to enjoy Next.js' many features because it was created with developers in mind. This includes the use of reusable components that help save time and money. Additional main advantages for developers include:
Developer experience
Developers may construct completely interactive, incredibly dynamic, and highly performant modern online applications using Next.js. Routing, data collecting, integrations, and static generation are all prevalent problems that Next.js addresses.
Better image optimization
Since version 10.0, Next.js has included an integrated image optimization feature that is an extension of the HTML element and has been updated for the modern web. Images are automatically optimized by Next.js's image component. The most recent standard, WebP, is used to serve and reduce the size of images. Graphics are also configured to benefit from smaller viewports.

Data security
Next.js provides a secure means of communicating with external APIs where sensitive information like API keys are not reflected on the client side. That is thanks to “API routes” which allow us to create server-side endpoints accessible from the frontend of our application. This comes with a few benefits which include:
- Keeping sensitive information like private API routes and API keys on the server side and not on the browser. This prevents attackers from obtaining this information from the browser and prevents unauthorized access.
- Having more control over how the application communicates with external APIs and services.
Speed
Next.js websites are speedy due to their static nature. Building a minimum viable product (MVP) is also considerably faster with Next because there are so many ready-to-use components available. By using components to build an MVP, you can quickly build and launch your website/product and immediately collect feedback from actual customers and make the necessary improvements to your product without wasting time or money.
Built-in CSS and TypeScript support
Next.js comes with built-in CSS and TypeScript support which allows developers to use these languages in our application without having to install or set up additional plugins or configurations.
With TypeScript enabled, we can write our code in .ts and .tsx files which gives us many of the benefits of TypeScript, including but not limited to:
- Static typing which improves code quality and maintainability and helps catch errors at compile time rather than during runtime.
- High scalability which makes it great for large projects and codebases.
- Support for modern JavaScript syntax and features which can also be compiled to a version of JavaScript that can run on older browsers.
- A better development experience, and with VS Code and other modern text editors, TypeScript helps with code readability due to the IntelliSense feature.
Why use ButterCMS?
In any digital marketing plan, landing pages are essential tools. They are often used to target different audiences with different personalized versions of the same page. In cases where you need to create, publish, iterate, and re-iterate these pages on a regular basis, ButterCMS comes in handy. ButterCMS helps you build and manage your landing pages (and a plethora of other content types) seamlessly.
ButterCMS is a headless CMS that is widely used by enterprises and individuals to build their websites. Users with little to no technical coding expertise can easily create and manage their application’s content with ButterCMS after proper setup.
With ButterCMS, you can easily write, publish, and manage your content using a variety of features such as components, collections, page types, and a built-in, ready-to-go blog engine.
Tutorial overview: Building a flexible Next.js e-commerce landing page
For this tutorial, we will set up a content structure on ButterCMS that contains all the data to be displayed on the landing page. We will be building a landing page for a sneaker company. The contents to be included on the landing page are:
- A home section that contains a hero image, hero text, navigation menu, and logo.
- A services section showcasing cards containing offered services.
- A products section where the company’s top merchandise, a description, and a price tag are shown.
- A testimonials section.
After setting up the app content structure on ButterCMS, we will build and style the landing page using the Next.js framework and TailwindCSS library, while connecting our application to our CMS to display its content. Without further ado, let’s dive in and begin developing our application.
Tutorial prerequisites
You must meet the following requirements in order to effectively follow along with this article:
- Comprehension of JavaScript syntax
- Basic knowledge of the Next.js framework
- Understanding of APIs and applications
- Understanding of the CLI and its commands
- Node.js installed on your local computer
- An active ButterCMS trial account
Creating our landing page in ButterCMS
To make use of ButterCMS, a user account on the platform is required. If you do not already have one, navigate in your browser to the ButterCMS login page and create a new user account.
Upon signing into your account, you will be redirected to a dashboard similar to the image below:

Creating a hero section
For the landing page, we will be using the Pages content type. You can find the Pages option on the left sidebar. Here, click on the New Page button, and select create a new page from the dropdown menu. This will open up the content structure configuration page:
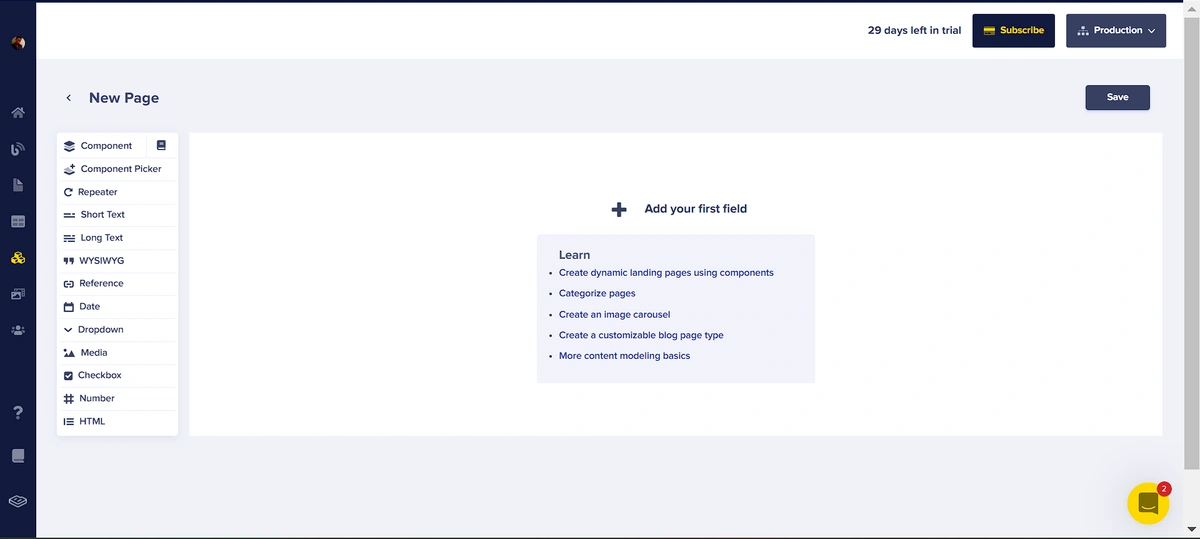
The first item we will add here is a Component Picker. With this, we will select the Hero component provided by ButterCMS.
In addition to the fields provided by the Hero component, we will add two additional fields: a media field called “Logo” for the site logo and a repeater field for the site navigation items. We will add these fields to the hero component we added with the component picker.
The repeater will contain a short text for each navigation item:
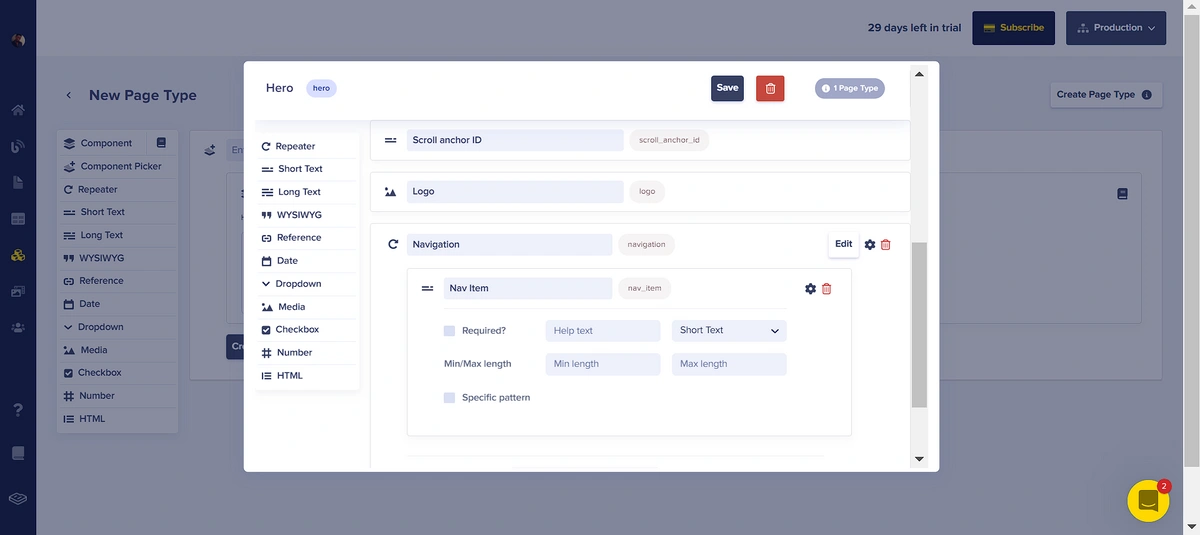
Click on the Save button to finalize the changes made.
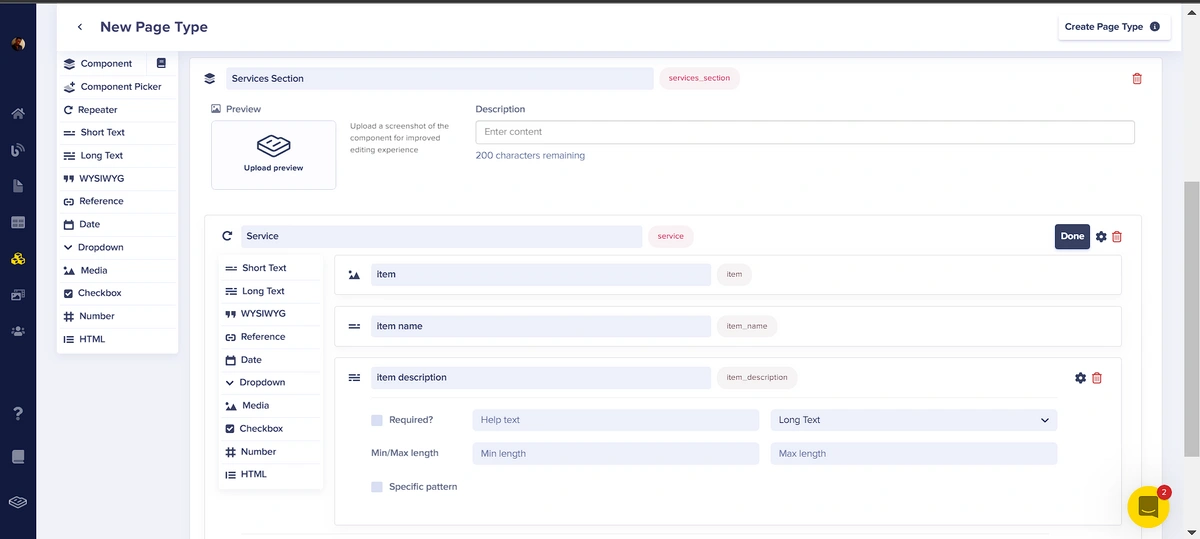
Creating a services section
For the Service section, we will add an additional component named "Services Section" to our page. This component will contain the following fields: a repeater called "Service" which will contain a media field, a shorttext field, and a longtext field called “item”, “item name”, and “item description”, respectively. The fields will contain the name of items, their images, and descriptions of the services offered by the company.
Creating a products section
Here, create another component called "Product Section". This component will have a repeater called “product card” that contains a media field “product”, a title short text called “product title”, a long text field called “product description”, and a short text field called “cta button” for a call-to-action button.

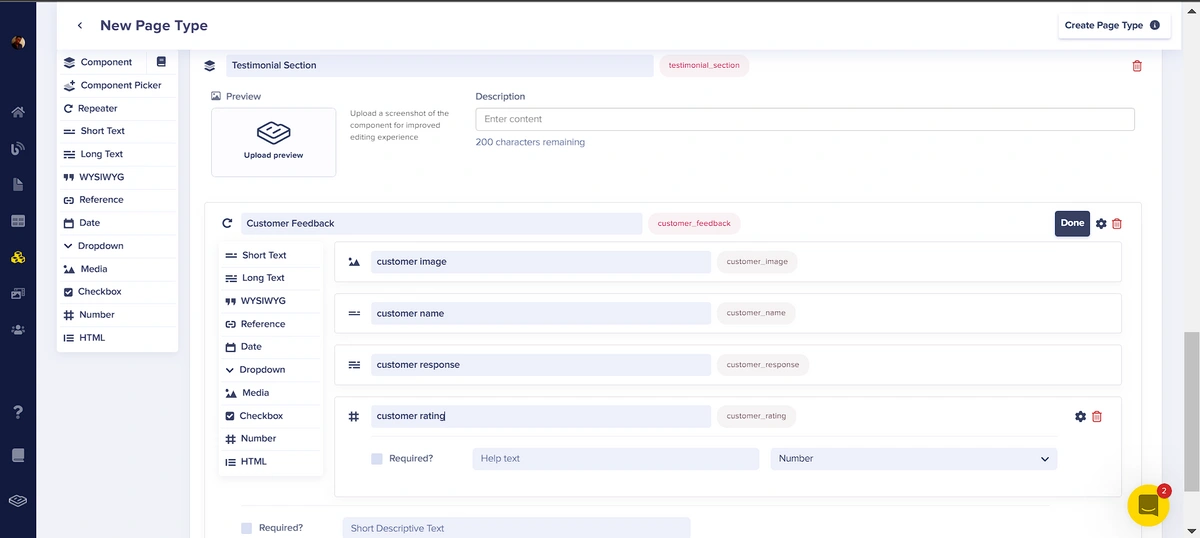
Creating a testimonials section
In this section, we will create another component called the "Testimonial Section". It will contain a repeater field called “Customer feedback” for the products. We will have a media field called “customer image” for the customer image, a short text field called “customer name” for the name, a long text field called “customer response” for the description, and a number field called “customer rating” for the customer rating.
With all the sections added, click on the Create Page Type button to save the created page. For the Page Type name, we will use “ButterCMS Landing Page”.
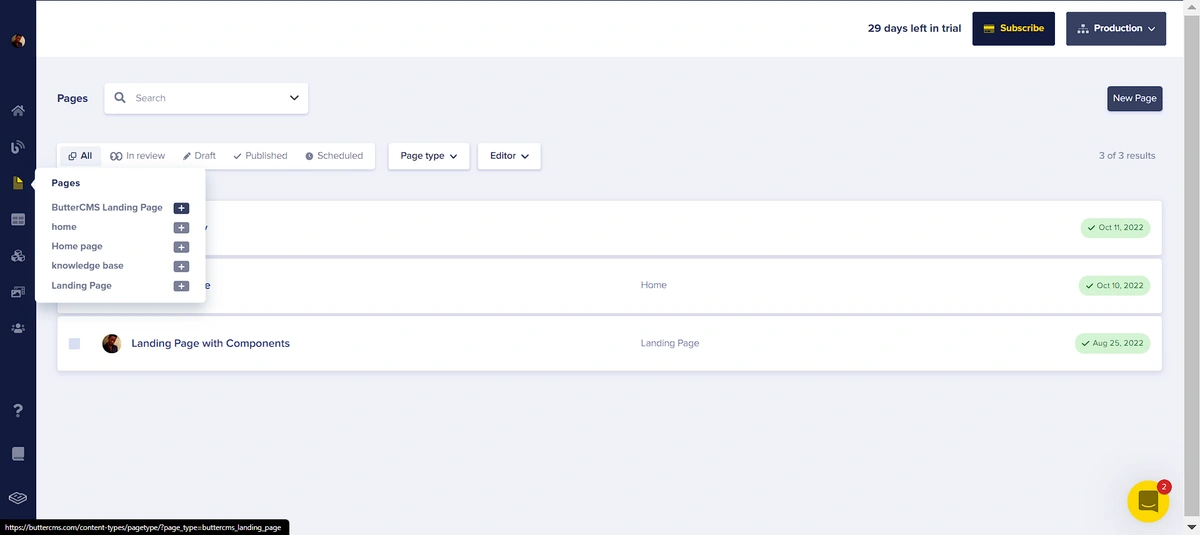
Adding content to our ButterCMS landing page
To add items to the newly created page type, select the plus icon next to the created page on the left sidebar:
Before we can fill in the site sections, we are prompted to input a Page Title. For this tutorial, we will use “Happy feet” as the title. Fill in the different sections with your desired content. In the end you should have a fully filled page similar to the GIF below:
Click on the Publish button to save your entries when you’re done filling up the fields.
Setting up our frontend
For this tutorial, we will use Next.js and Tailwind CSS to build our application. To install this on your local machine, open a directory of your choice and enter the following command in the CLI:
//create a new next app
npx create-next-app happyfeet

// install the TailwindCSS dependency
npm install -D tailwindcss postcss autoprefixer axios
npx tailwindcss init -p

Once the installation is completed, open up the project directory in your code editor and make the following change to tailwind.config.js:
/** @type {import('tailwindcss').Config} */
module.exports = {
  content: [
    "./pages/**/*.{js,ts,jsx,tsx}",
    "./components/**/*.{js,ts,jsx,tsx}",
  ],
  theme: {
    extend: {},
  },
  plugins: [],
}
In globals.css, add the following Tailwind style directives to enable the usage of Tailwind utilities in your application:
@tailwind base;
@tailwind components;
@tailwind utilities;
For each section of our site, we will have a separate component. In the project directory, create a folder called components and create the following files in it: Landing.jsx, Services.jsx, Product.jsx, and Testimonial.jsx. To connect our application to ButterCMS, we will need a read token. This can be found in the Settings section of the left sidebar menu in your ButterCMS account.
In the pages folder, add the following code to index.js:
import Landing from "../components/Landing";
import Products from "../components/Products";
import Services from "../components/Services";
import Testimonial from "../components/Testimonial";
import { React, useEffect, useState } from "react";
import axios from "axios";

export default function Home() {
  const readtoken = "your read token here";
  const [page, setPage] = useState([]);
  useEffect(() => {
    const getPageData = async () => {
      await axios
        .get(
          `https://api.buttercms.com/v2/pages/buttercms_landing_page/happy-feets/?auth_token=${readtoken}`
        )
        .then((res) => {
          setPage(res.data.data.fields);
        })
        .catch((err) => {
          console.log(err);
        });
    };
    getPageData();
  }, []);
  return (
    <div>
      <Landing content={page.landing_section}/>
      <Services content={page.services_section}/>
      <Products content={page.product_section}/>
      <Testimonial content={page.testimonial_section}/>
    </div>
  );
}
Here, we made a fetch request using Axios to the ButterCMS page content we created. Then, we passed the response as props to our components, each with the appropriate data.
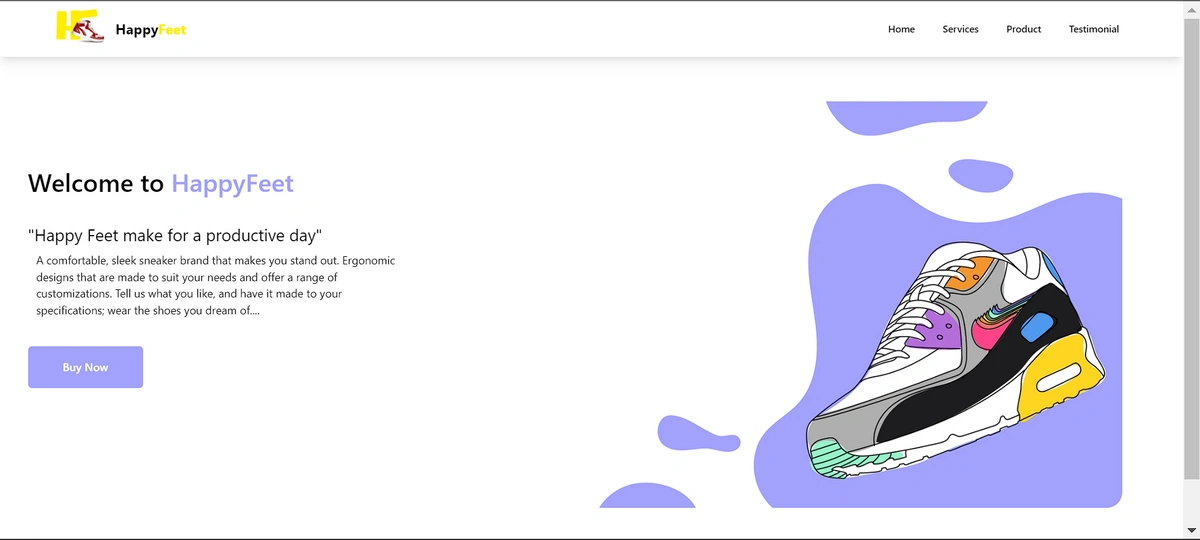
Building the landing section (i.e., hero section)
To create the landing section, add the following code to Landing.jsx:
import { React } from "react";
const Landing = ({ content }) => {

  return (
    <div>
      {/* Navigation Menu */}
      <div>
        <nav className=" shadow-lg fixed w-full z-10 backdrop-blur-md">
          <span className="w-full">
            <div className="flex items-center h-20 w-full">
              <div className="flex items-center items mx-20 justify-between w-full">
                <span className="flex items-center justify-center gap-4 ">
                  {/* site Logo */}
                  <img
                    src={`${content ? content[0].fields.logo : ""}`}
                    height={70}
                    width={70}
                  />
                  {/* company name */}
                  <h1 className=" font-bold cursor-pointer text-xl">
                    Happy<span className=" text-[#ffed02]">Feet</span>
                  </h1>
                </span>
                <span className="hidden md:block">
                  <div className=" ml-10 flex items-baseline space-x-4">
                    {/* navigation list items */}
                    {content
                      ? content[0].fields.navigation.map((item) => {
                          return (
                            <a
                              key={item.nav_item}
                              className="cursor-pointer hover:bg-[#ffed02] text-black hover:text-white px-3 py-2 rounded-md text-sm font-medium"
                            >
                              {item.nav_item}
                            </a>
                          );
                        })
                      : ""}
                  </div>
                </span>
              </div>
            </div>
          </span>
        </nav>
      </div>
      {/* landing section */}
      <div className=" h-screen">
        <div className=" relative" id="Home">
          <div className=" relative w-full h-full top-36 flex justify-center flex-col sm:flex-row">
            <div className=" pl-10 md:w-3/6 sm:w-screen">
              <h2 className=" text-4xl font-semibold mt-24 mb-10 ">
                {/* welcome text */}
                Welcome to <span className=" text-[#a3a1fd]">HappyFeet</span>
              </h2>
              <h4 className=" text-2xl">
                {/* Headline Text */}
                {`"${content[0]?.fields.headline}"`}
              </h4>
              {/* Descriptive text */}
              <h4 className=" pt-2 pl-3 " >{content[0]?.fields.subheadline}</h4>
              <button className=" text-white rounded-md px-12 py-4 mt-10 font-semibold border-2 border-[#a3a1fd] bg-[#a3a1fd] hover:bg-white hover:text-[#a3a1fd] ">
              {/* cta button */}
              {content[0]?.fields.button_label}
              </button>
            </div>
            <span className="h-full w-3/6 relative flex justify-center items-center sm:w-full effect">
                {/* landing hero image */}
              <img
                src={`${content ? content[0].fields.image : ""}`}
                height={950}
                width={950}
              />
            </span>
          </div>
        </div>
      </div>
    </div>
  );
};
export default Landing;
If we run our code with the npm run dev command in the CLI, we can preview our landing section:
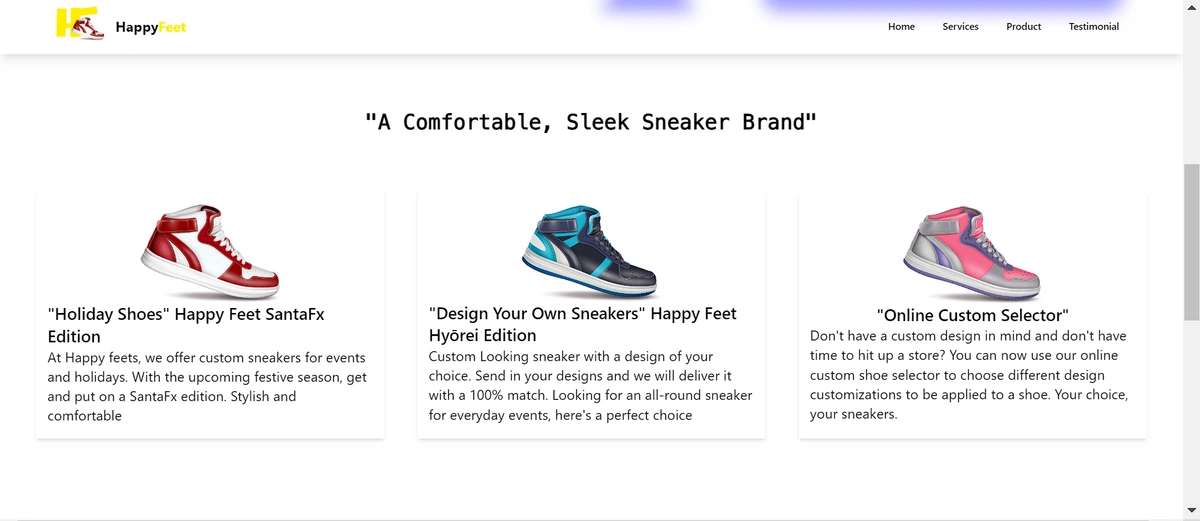
Adding the services section
For our services page, we will have a grid of three cards containing information on the services rendered. To do this, add the following code to Services.jsx:
import React from "react";
const Services = (content) => {

  return (
    <div className="w-full h-[80vh] flex items-center flex-col overflow-hidden">
      <h1 className=" font-mono font-semibold text-3xl mt-24 mb-20 ">
        "A Comfortable, Sleek Sneaker Brand"
      </h1>
      {/* services cards */}
      <div className=" flex gap-12 " >
        {content.content
          ? content.content.service.map((item, index) => {
              return (
                <div className=" w-[500px] flex justify-center items-center flex-col py-5 px-4 shadow-md ">
                  <img src={`${item.item}`} height={200} width={200} />
                  <p className="font-medium text-2xl" >{item.item_name}</p>
                  <p className=" text-xl " >{item.item_description}</p>
                </div>
              );
            })
          : null}
      </div>
    </div>
  );
};
export default Services;
When we run our code, we get the following result:
Building the products section
To create the products section of the site, add the following code to Product.jsx:
import React from "react";
const Products = (content) => {

  return (
    <div className=" w-screen min-h-screen flex items-center flex-col overflow-hidden">
      <h1 className=" font-mono font-semibold text-3xl mt-24 mb-20 ">
        "A Comfortable, Sleek Sneaker Brand"
      </h1>
      {/* product cards */}
      {content.content
        ? content.content.product_card.map((item, index) => {
            return (
              <div key={index} className=" flex flex-col items-center">
                <div
                  className={` w-max-content overflow-hidden flex gap-8 mb-10 ${
                    index % 2 === 0 ? "flex-row-reverse pl-24 " : "flex-row"
                  }  `}
                >
                  <span className=" w-[700px] flex justify-center items-center h-80 bg-[#a3a1fd] ">
                    {/* product image */}
                    <img src={`${item.product}`} height={350} width={350} />
                  </span>
                  <span className=" bg-white w-[700px] ">
                    <h3 className=" font-medium text-2xl mb-4 ">
                      {/* product title */}
                      {item.product_title}
                    </h3>
                    <h3 className=" max-w-md text-xl ">
                      {/* product description */}
                      {item.product_description}
                    </h3>
                    <button className=" text-white rounded-md px-8 py-4 mt-3 font-semibold border-2 border-[#a3a1fd] bg-[#a3a1fd] hover:bg-white hover:text-[#a3a1fd] ">
                      {/* cta button */}
                      {item.cta_button}
                    </button>
                  </span>
                </div>
              </div>
            );
          })
        : null}
    </div>
  );
};
export default Products;
With this, we get the product image when we run our application:

Building the testimonials section
We will create the testimonials section in the Testimonial component. To do this, add the following code to Testimonial.jsx:
import React from "react";
const Testimonial = (content) => {
  console.log(content);
  return (
    <div className="w-full h-[80vh] flex items-center flex-col overflow-hidden">
      <h1 className=" font-mono font-semibold text-3xl mt-24 mb-20 ">
        "Testimonies from our Customers"
      </h1>
      {/* testimonial cards */}
      <div className=" flex gap-14 ">
        {content.content
          ? content.content.customer_feedback.map((item, index) => {
              return (
                <div className=" w-[500px] flex justify-center items-center flex-col py-8 px-4 shadow-md ">
                  <img src={`${item.customer_image}`} height={200} width={200} />
                  <p className="font-medium text-2xl my-4 ">{item.customer_name}</p>
                  <p className=" text-xl ">{item.customer_response}</p>
                </div>
              );
            })
          : null}
      </div>
    </div>
  );
};
export default Testimonial;
The resulting application
Congratulations on making it this far! Hurray! You have successfully created a landing page using ButterCMS and Next.js. Running your application will produce the following results:

Closing thoughts
Congratulations on completing this tutorial! You should now have your very own Next.js e-commerce landing page. This article has taught us the foundations of creating an effective landing page that might potentially turn visitors into paying customers. We have demonstrated how to create a landing page by utilizing the cutting-edge tools of Next.js, Tailwind CSS, and ButterCMS, a headless CMS which facilitates the creation of our landing page. For further reading, you could as well go through these articles: