
In today’s interconnected world, where digital channels transcend borders and cultures, the importance of localization cannot be understated. In fact, nearly 73% of customers prefer to purchase from a site that offers information in their own language and 65% would prefer reading content in their language, even if it was poor quality. Meaning, if you’re not localizing your content, you could be alienating a whole slew of potential customers.
However, as essential as localization is, it is not easy to implement. Cost and quality are the two largest hurdles you'll need to overcome, as third-party localization technologies can be costly, and more affordable options tend to struggle with capturing the nuances of language.
Fortunately, one of ButterCMS's latest integrations, DeepL AI, was created to fill this gap and tackle language barriers by enabling content creators and marketers to translate their online content using DeepL's advanced neural networks. These networks capture even the slightest linguistic nuances and deliver real-time translations that sound human. This integration will allow you to localize your web applications powered by ButterCMS.
In this tutorial, we'll create a CRM SaaS landing page using Laravel and ButterCMS. Then we will translate the content using DeepL. Since I can understand and read Spanish, we will translate the content from English into Spanish. I also reverse-checked the translations to ensure that they obey Spanish grammar. DeepL is designed to improve your translation workflow, not replace it altogether.
Table of contents
To get started, we'll use ButterCMS to create a Page Type for our landing page. Before we begin creating the Page Type, it's necessary to set up the Collections and Components. These elements will assist us in constructing distinct sections of the Page Type in an organized and fluid manner. All the code for this tutorial can be found in this GitHub repo.
Enabling the DeepL AI integration
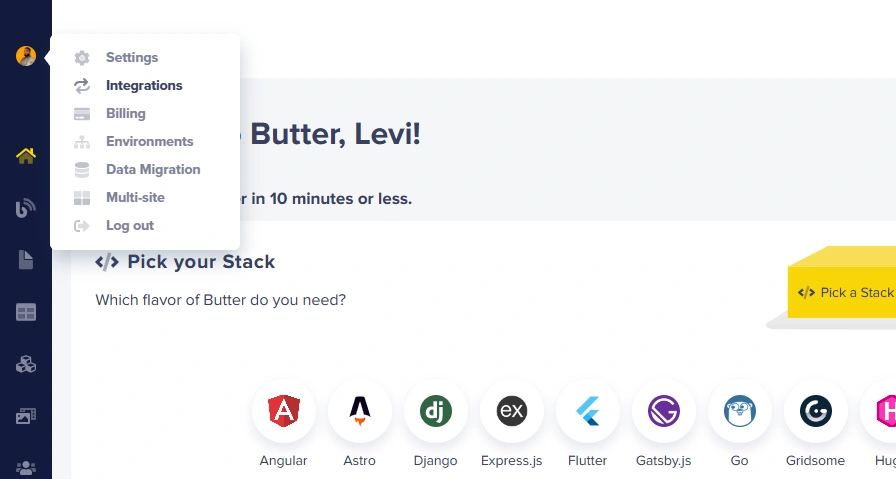
To enable your DeepL AI integration, log in to your ButterCMS dashboard, hover over your profile picture icon, and click on "Integrations":
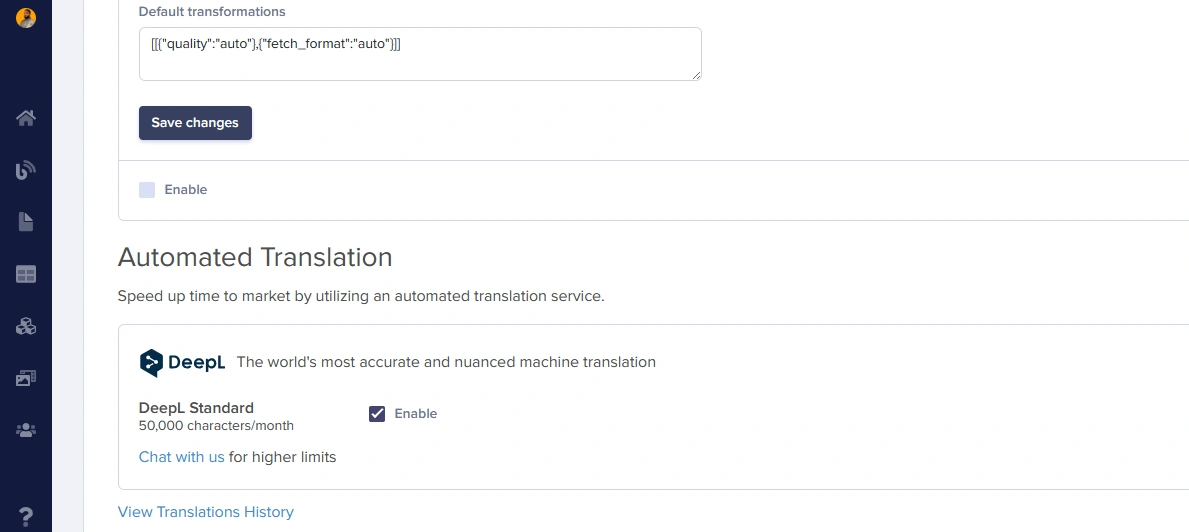
This action will redirect you to the settings page for integrations. Once you're on the page, scroll to the bottom to find the DeepL integration section. Click on the checkbox button to enable it:
Prior to utilizing DeepL in your portal, you need to add the locales it can recognize. DeepL supports multiple locales, and you can find the complete list here.
Adding a New Locale
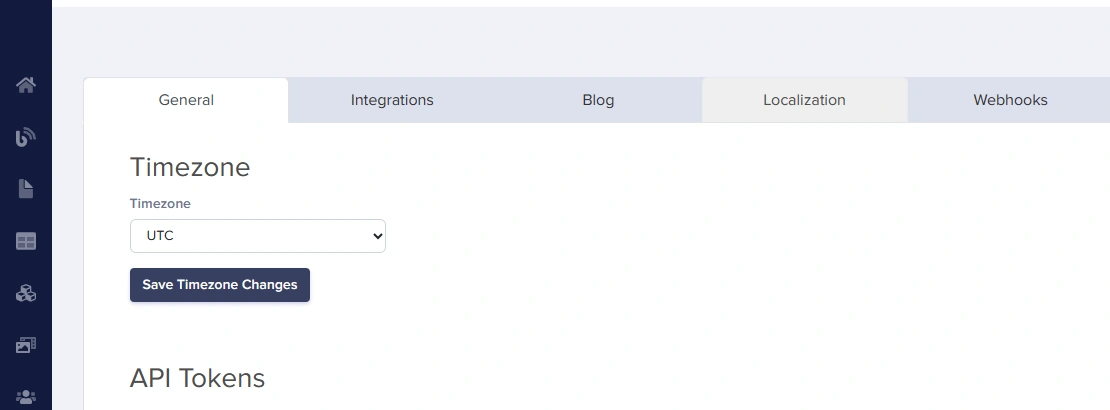
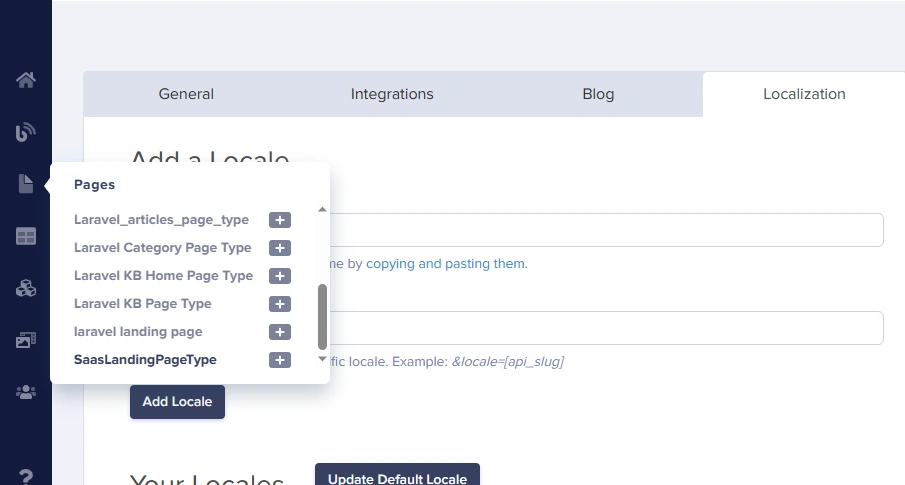
Before you can avail the option to translate content, you must include the name and slug for a new locale. To accomplish this, hover over the profile icon and click on "Settings":
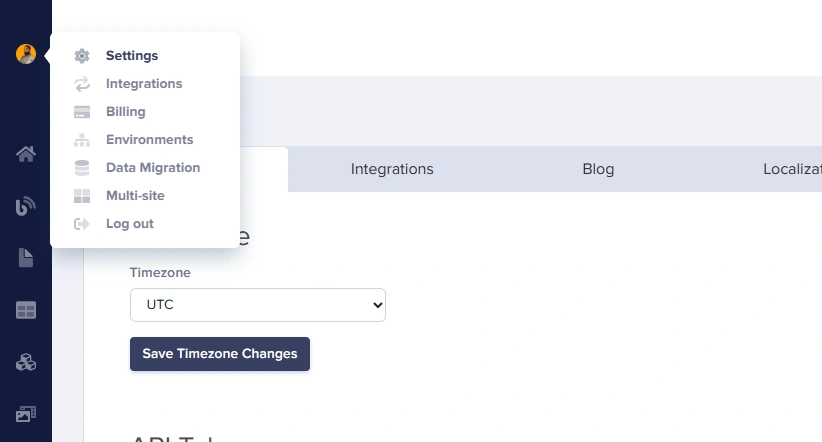
This will redirect you to the Settings page. Once you're on the page, click on the "Localization" tab in the navigation:
After being redirected, input the name and API slug for your locale, and then click on the "Add Locale" button:
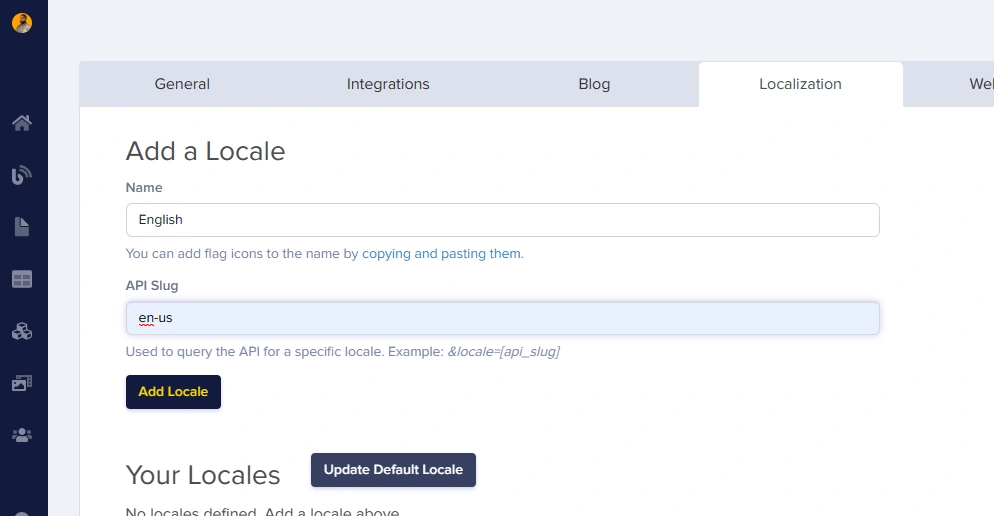
Clicking the button will prompt a pop-up warning modal; click "Proceed." Once the first one is added, proceed to add another one with the following attributes:
-
Name: Spanish
-
API slug: es-es
The list of all locales should appear as follows:
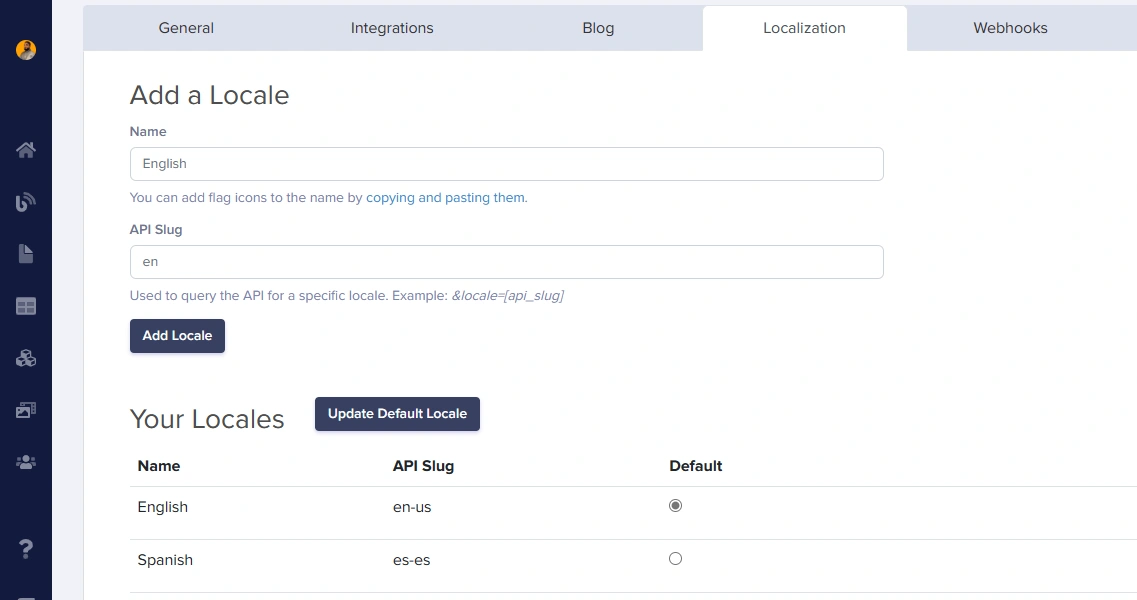
Excellent! You have successfully configured your ButterCMS account to incorporate DeepL Spanish translations.
Now, you will begin creating Collections and Components for the SaaS landing page we are about to build. The website's translation will be addressed in the final section since we need to construct the website before translating it. However, for collections, you will need to translate them individually after adding content to ensure that both an English and Spanish version of the content is available.
Utilizing collections for storing navigation and quote data
Collections are utilized by ButterCMS to effectively store data for a group of items with similar properties or attributes. Collections are a potent tool within ButterCMS, as they can be employed by a Component, another Collection, a Page Type, or directly integrated into the frontend using a simple customized function called fetchContentFields.
Creating the Collection for Menu Items
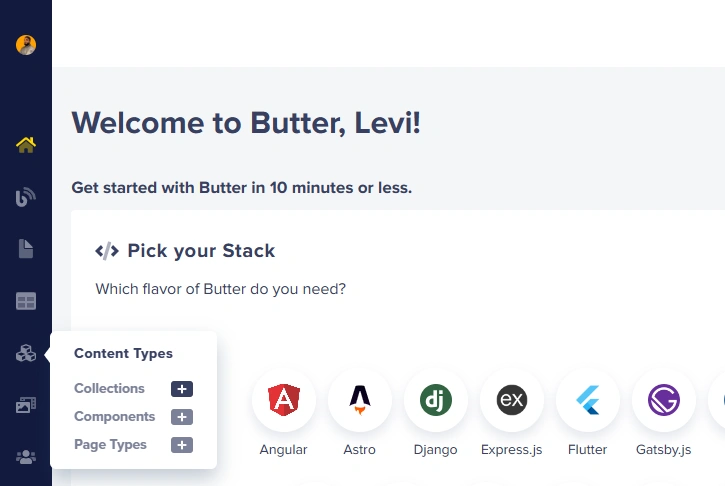
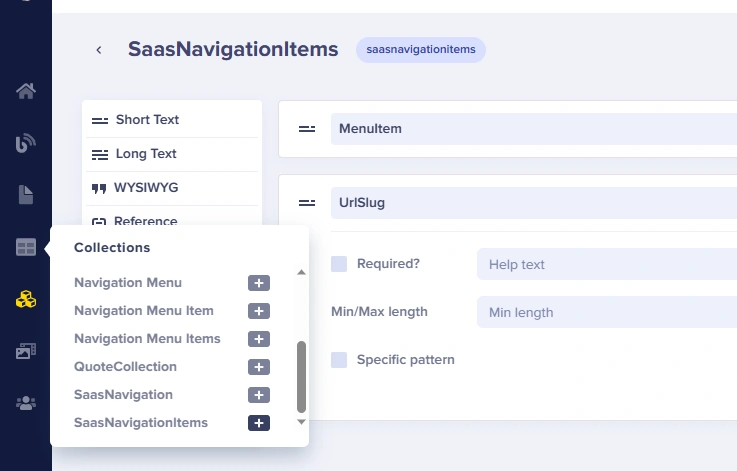
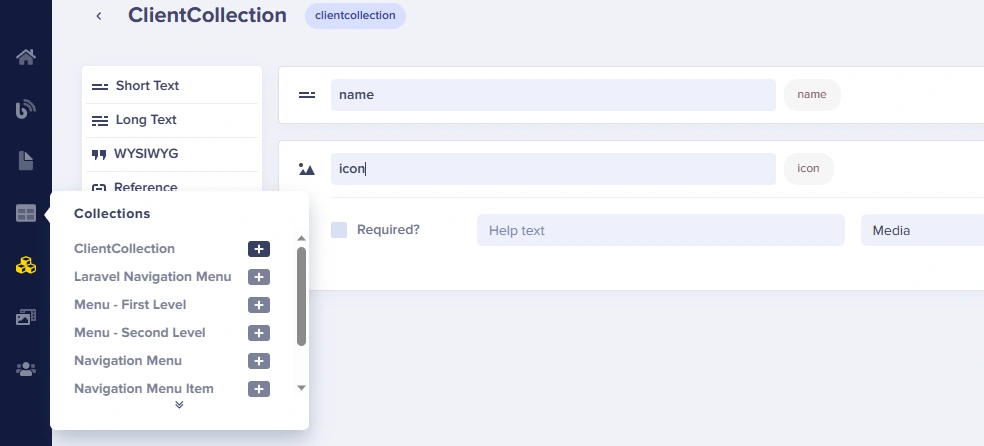
To initiate the creation of your menu items collection, hover over the Content Types icon in the sidebar and click on the "+" button located next to "Collections":
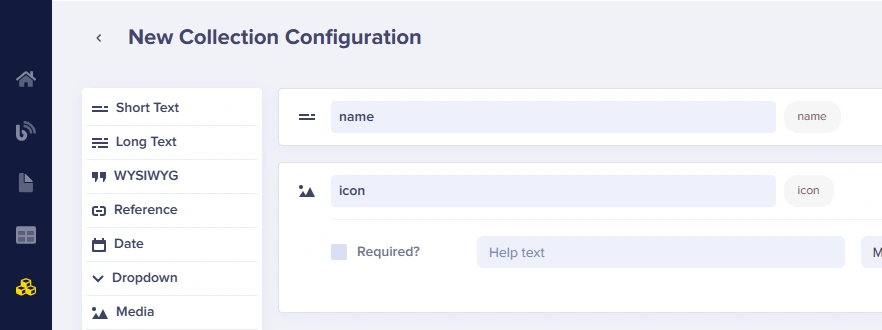
After being redirected to the Collection's configuration page, proceed to add the following Content Fields to the schema:
-
Short text: MenuItem
-
Short text: UrlSlug
This is what the schema looks like:
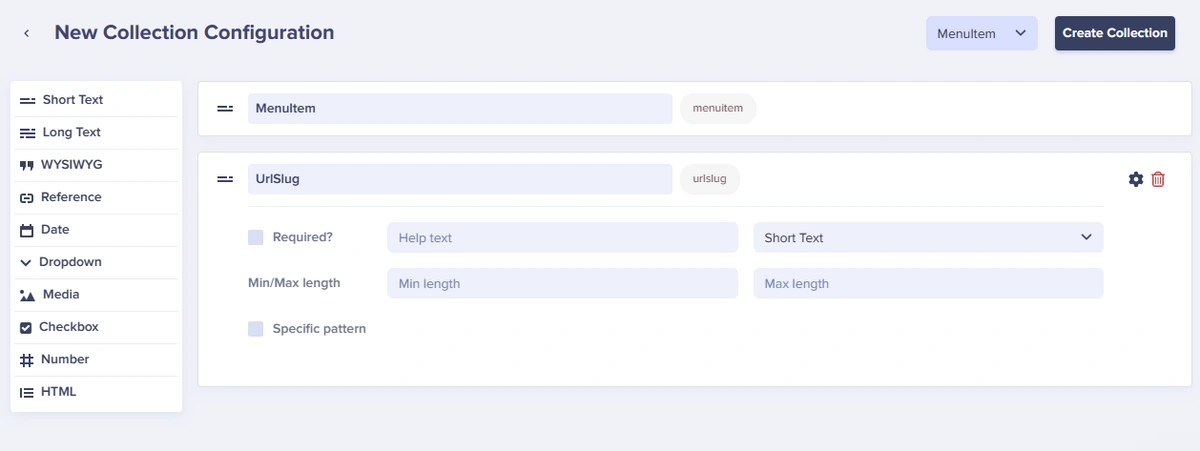
Once you've completed the setup, click the "Create Collection" button and save the Collection as "SaasNavigationItem".
Adding Data to SaasNavigation
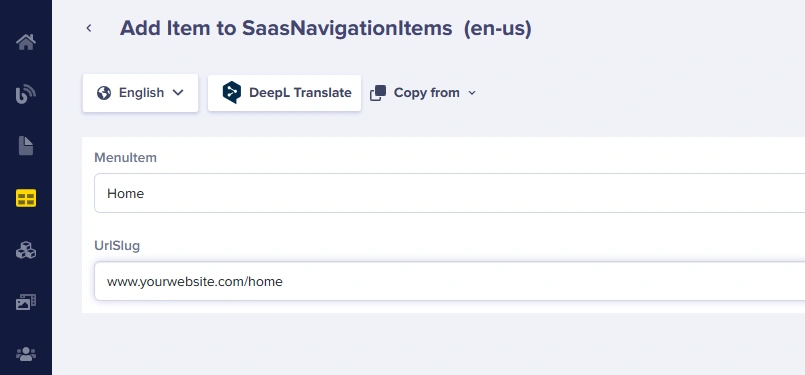
Once you've saved the Collection, proceed to populate it with collection items. Hover over the Collections icon on the sidebar and click on the "+" button next to "SaasNavigationItem":
Next, input the content for the Collection, and then click the "Publish" button to publish:
Repeat the steps mentioned above and add more items to the SaasNavigationItems collection.
Translating the SaasNavigation Collection Items
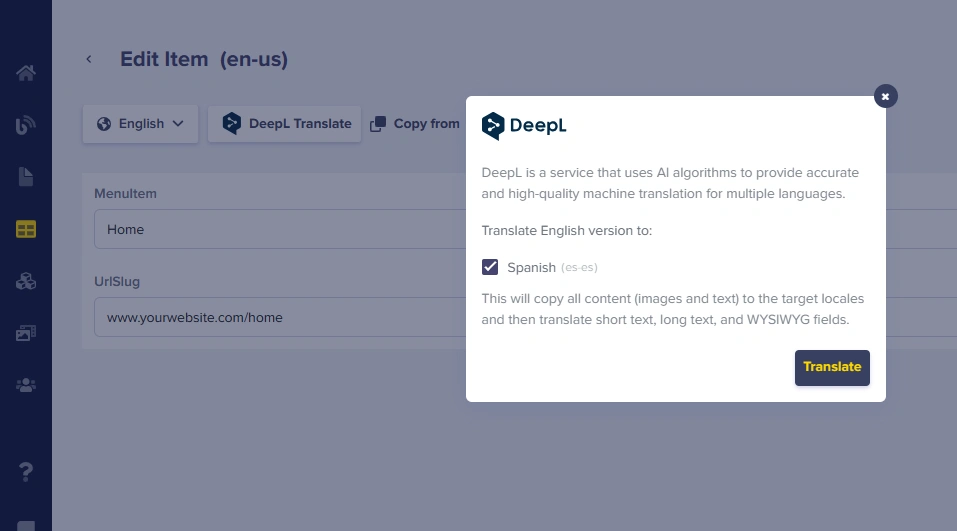
Once you've published the English version, click the "DeepL Translate" button, choose Spanish, and then click "Translate" to translate the content into Spanish:
Now, publish the collection item again. To confirm the accuracy of the translation, click the dropdown menu labeled "English" and choose "Spanish". Once you've selected Spanish, you will see the translated version of the item.
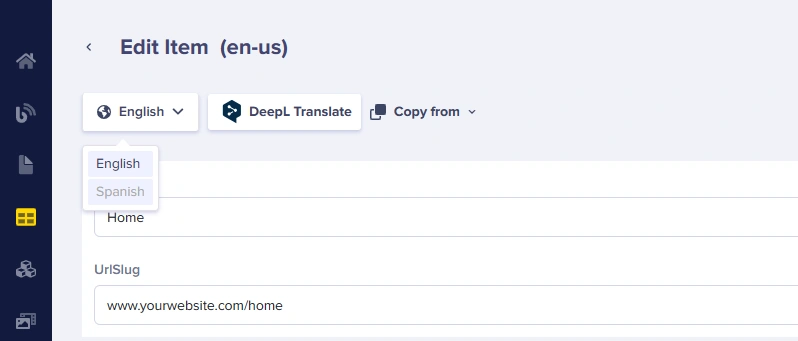

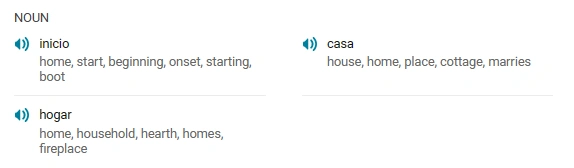
DeepL did not attempt to translate the website URL, but it did correctly translate 'Home.' In Spanish, "Home" is typically translated as "Casa," but in the context of a website, "Casa" would not be the appropriate term to use. Instead, "Inicio" is a more suitable term:
Now, translate all the other items you added to the SaasNavigationItems by following the same steps as mentioned earlier.
Refining Your Translations
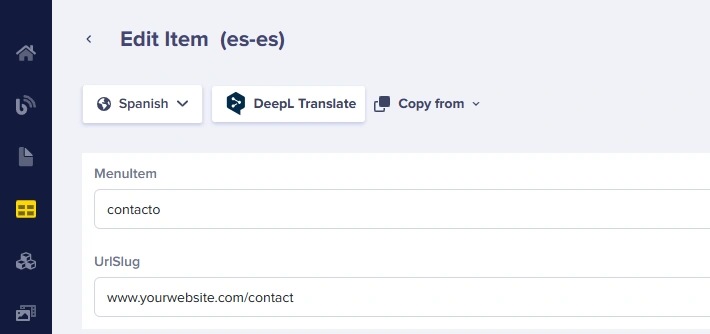
As you translate the "contact" item in SaasNavigationItems:
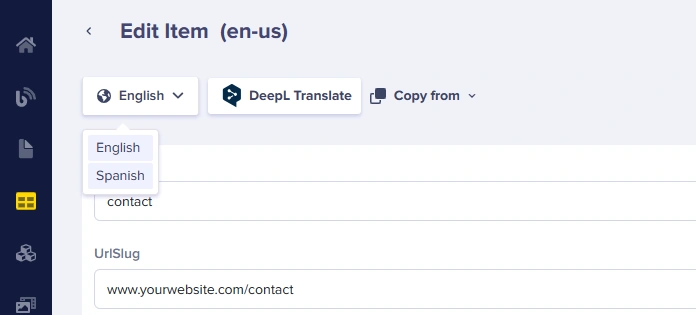
The translation returned the following:
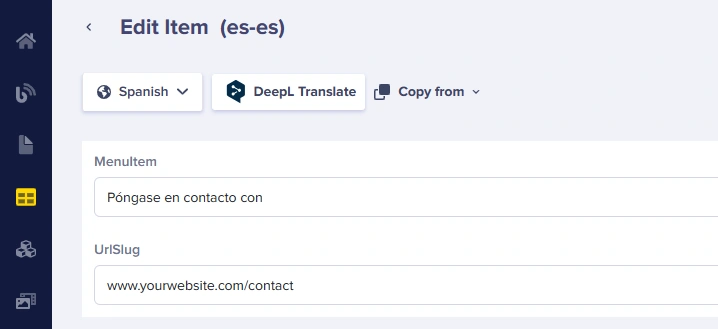
"Póngase en contacto con" simply implies "get in touch by contacting." Not to say the translation is incorrect, but since we are translating a menu item, we would prefer to have a one-word translation for display on the navigation menu. So, to refine this, you can easily substitute the translation with "contacto" and then publish:
Make sure to review your translations and verify if they align with the context of your web application. Adjust them where needed.
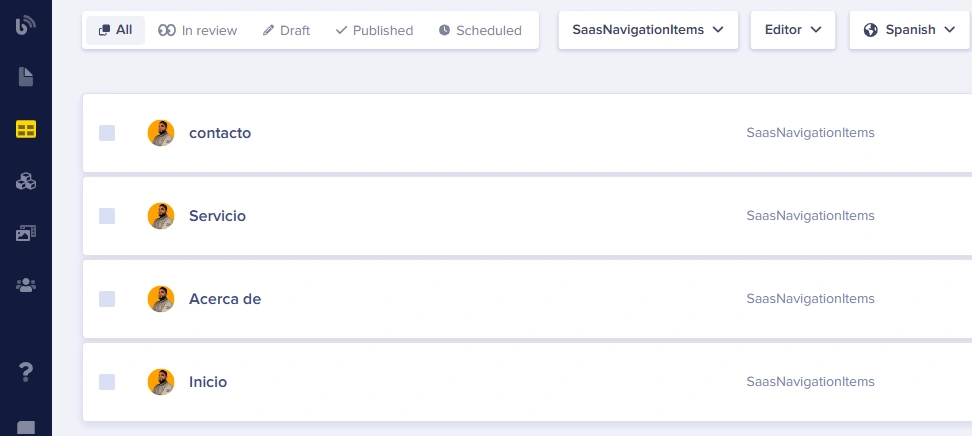
To view all the translated collection items, hover over the Collections icon, click on "SaasNavigationItem," and then select the Spanish filter:
Now you can proceed to create additional Collections. Please note that these steps will also be applied to translate the next two Collections we create.
Creating the Quotes Collection
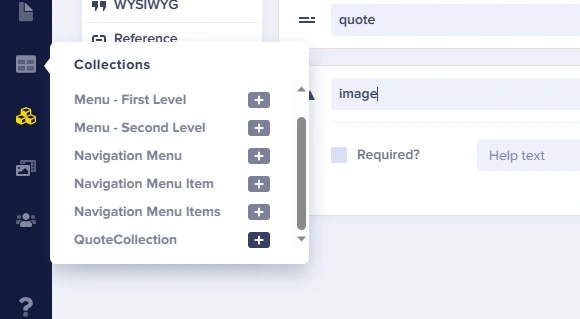
This collection will serve to store customer quotes and testimonials. To initiate the creation of your collection, access ButterCMS' dashboard, hover over the Content Types icon in the sidebar, and click on the "+" button next to "Collections":
This action will redirect you to the Collection Configuration Page. The collection will include the following Content Fields:
-
Short text: full_name
-
Long text: quote
-
Media: image
The schema on the configuration page should look like this:
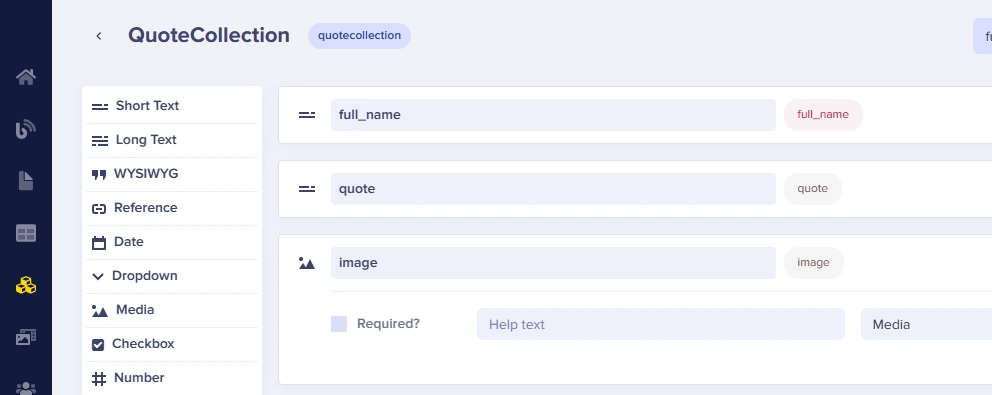
Save the collection as "QuoteCollection".
Adding items to QuoteCollection
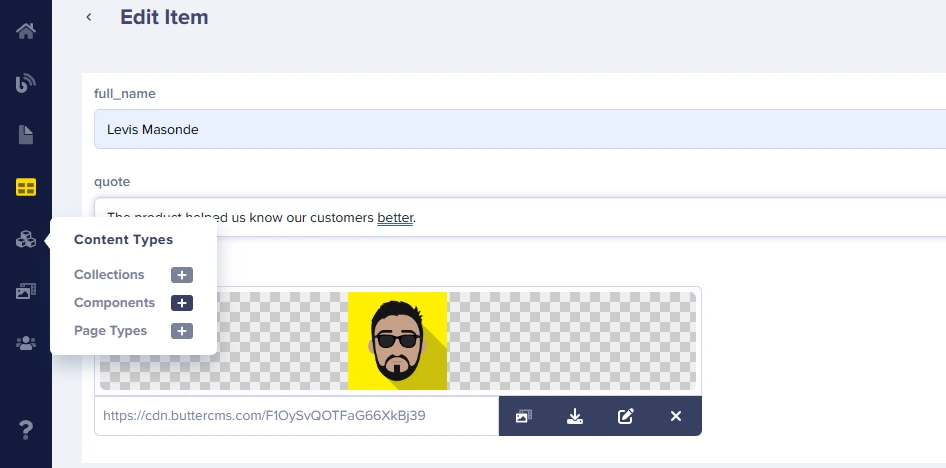
To begin adding data to the collection, hover over the Collections icon on the sidebar and click on the "+" button next to "QuoteCollection":
After being redirected to the "Add Item" page, add content to the fields and upload or drag an image from your computer to the image field:
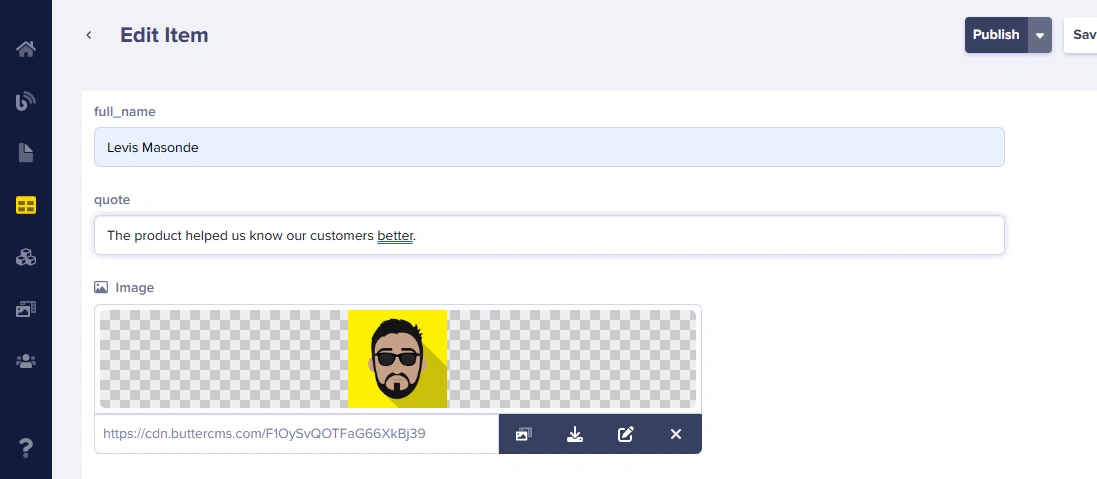
Once you've added the item's data, click the "Publish" button to save the information.
Translating the QuoteCollection
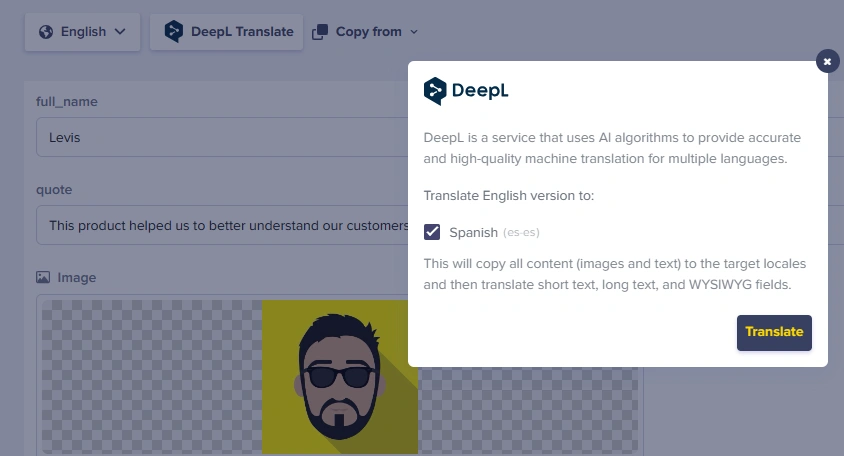
To begin translating the content of the QuoteCollection item, click the "DeepL Translate" button.

In the pop-up, select the checkbox next to Spanish and then click the "Translate" button:
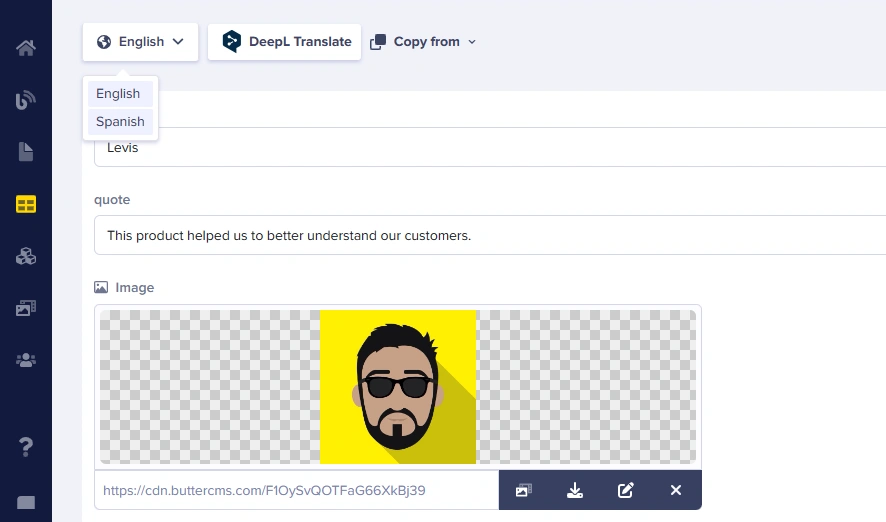
Once the translation is complete, click on the Language dropdown and change it to Spanish:
This is the translated content:
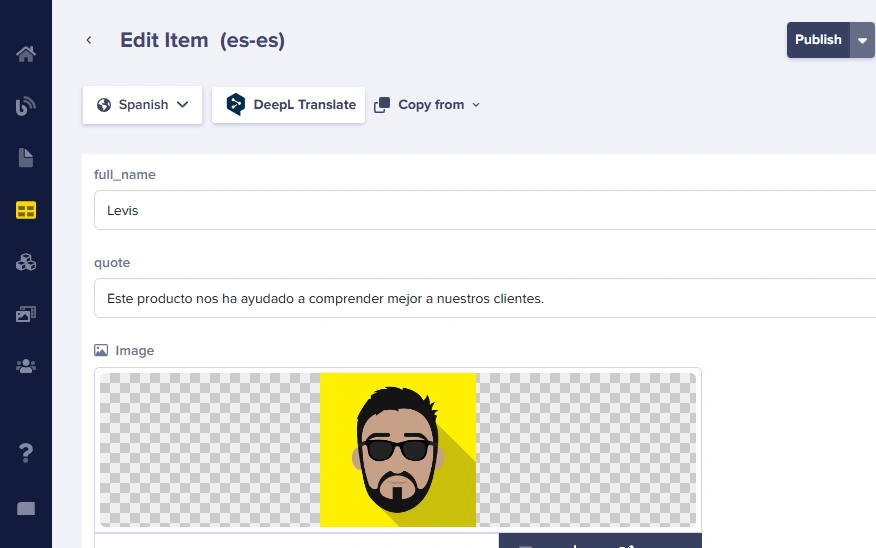
Once again, DeepL does an excellent job of translating the quote—it is spot on and requires no adjustments. It's reassuring to observe that DeepL maintains a natural translation without overcompensating.
Now, proceed to add more items to the QuoteCollection and translate them:
Creating Collections for Clients
In this section, you’ll be creating a collection intended for storing the logos of the company's prominent clients. Displaying the logos of your key clients can aid in building trust with prospective clients.
Proceed as per the previously outlined steps to initiate the creation of a Collection, and incorporate the subsequent Content Fields:
-
Short text: name
-
Media: icon
This is how the schema will look:
Save the Collection as "ClientCollection".
Adding Data to the ClientCollection
To begin adding data to the collection, hover over the Collections icon on the sidebar and click on the "+" button next to "ClientCollection":
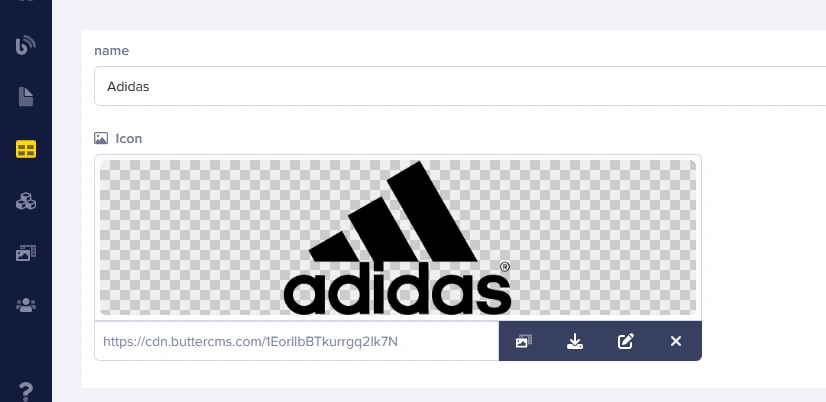
This action will redirect you to a page where you can input your content. Add your content and save it by clicking the "Publish" button:
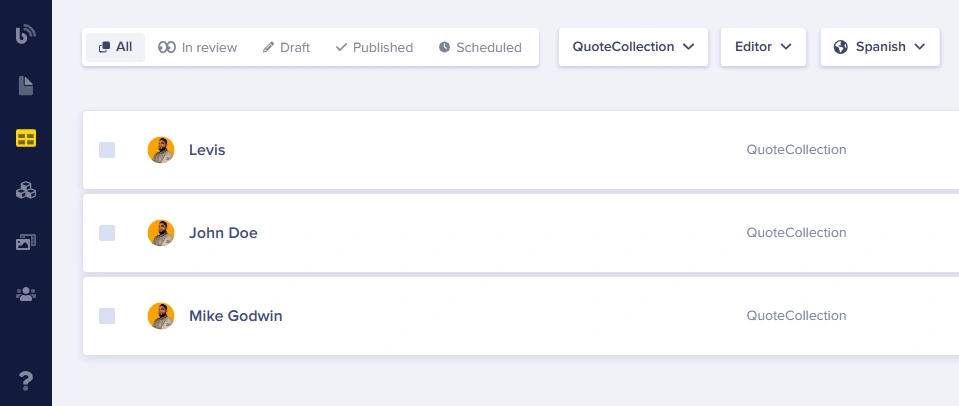
After adding your initial item, replicate the same steps to include more client information. To view all the items added to the Collection, hover over the Collections icon on the sidebar and select "ClientCollection":
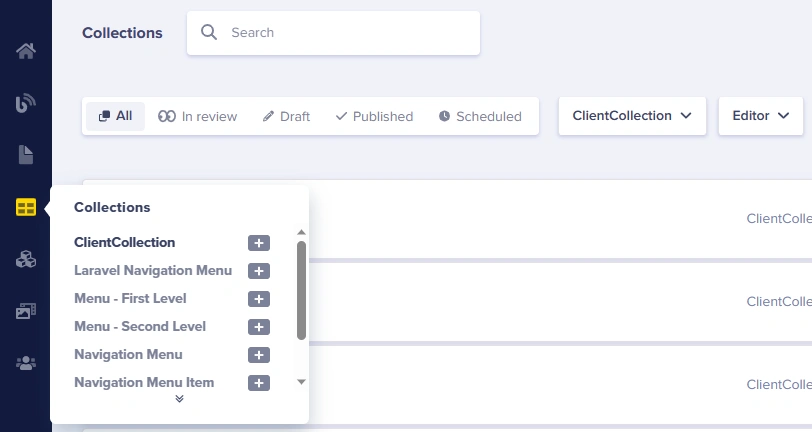
This action will redirect you to the Collections page filtered to show all the items in the ClientCollection:
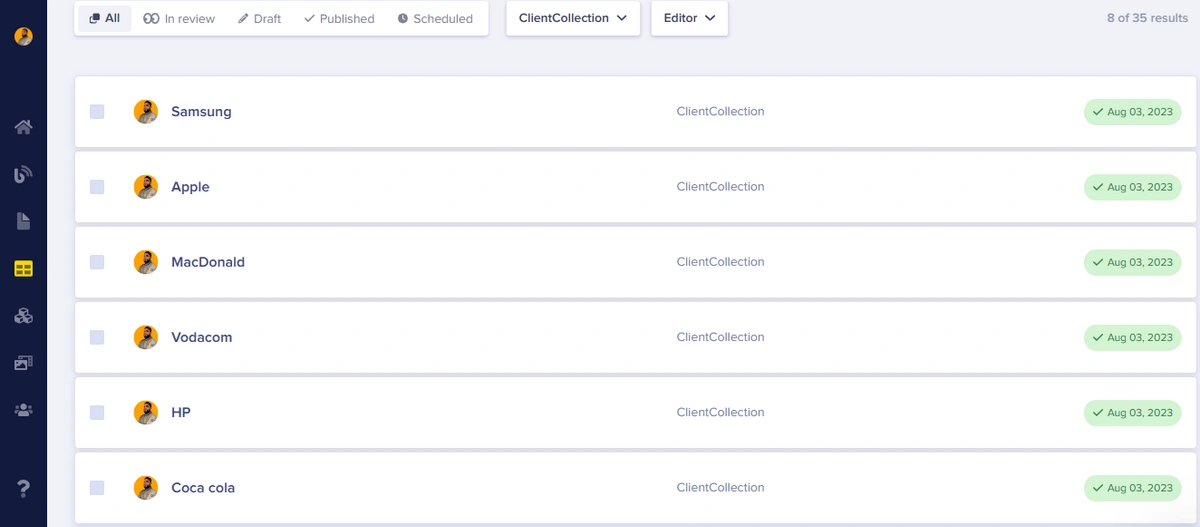
There is no necessity to translate these collection items, as the collection pertains to brands that typically maintain the same name globally, along with their logos.
Creating a features Collection
This collection will be used to store a summary of what users can do with the CRM SaaS software we’re creating a landing page for. Navigate to the Collection configuration page and add the following fields:
-
Media: icon
-
Short text: description
The schema will appear as follows:
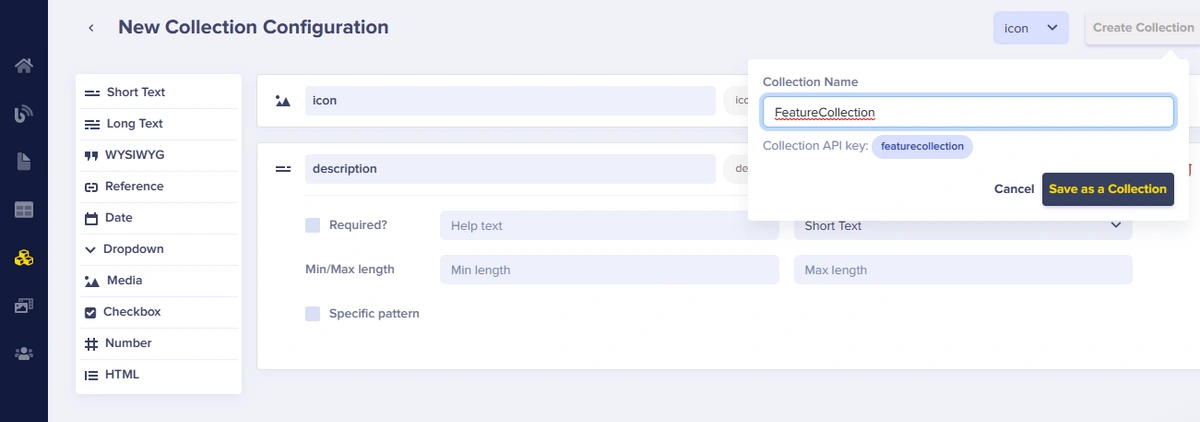
Once done, click the "Create Collection" button and save the collection as "FeatureCollection".
Adding items to the FeatureCollection
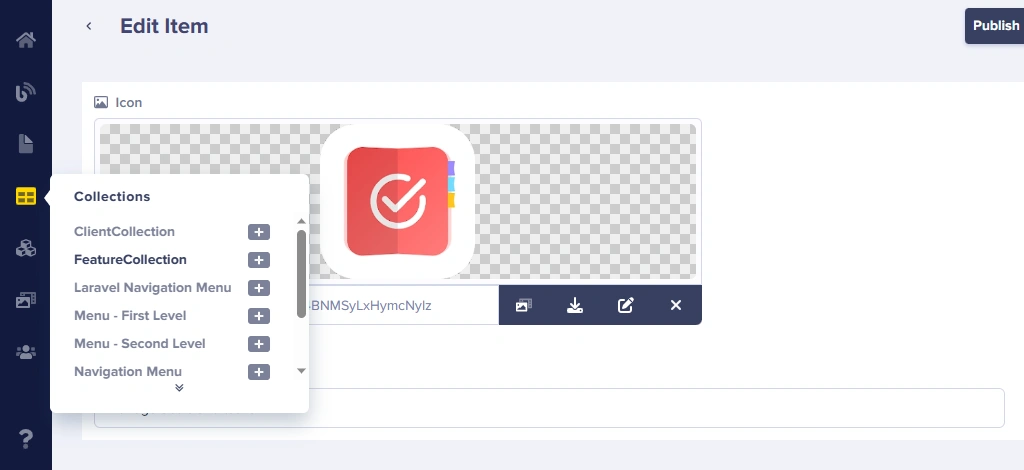
To add items to the FeatureCollection, hover over the Collections icon on the sidebar and click on the + button next to FeatureCollection:
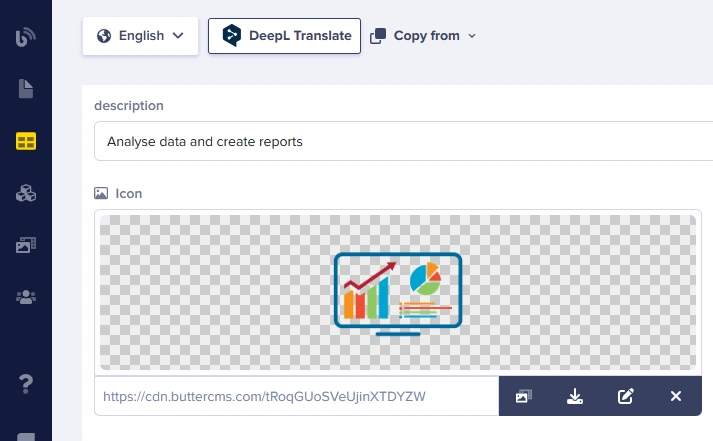
After this action, you’ll be redirected. Add content to the first item:
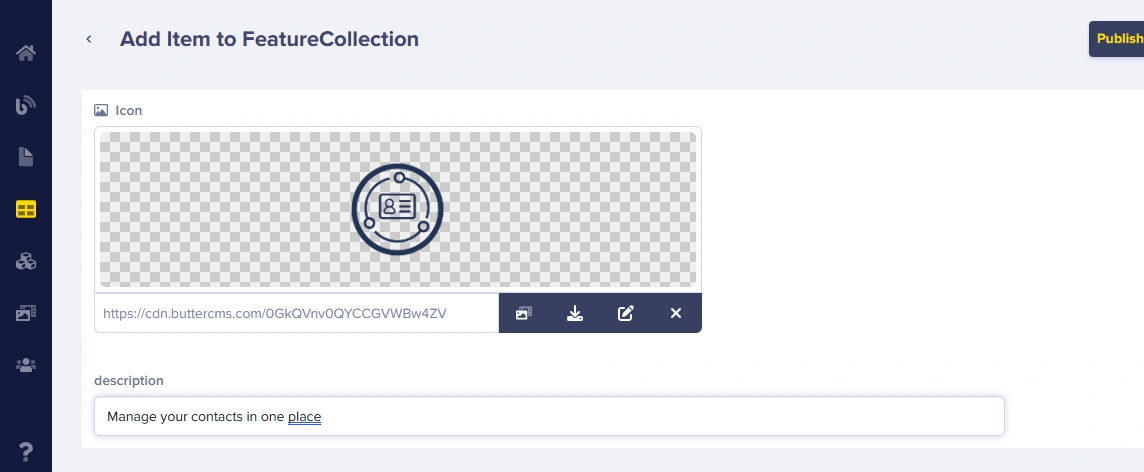
Click on the Publish button to save your content. Then repeat the step above to add more items to your collection.
Translating the FeatureCollection
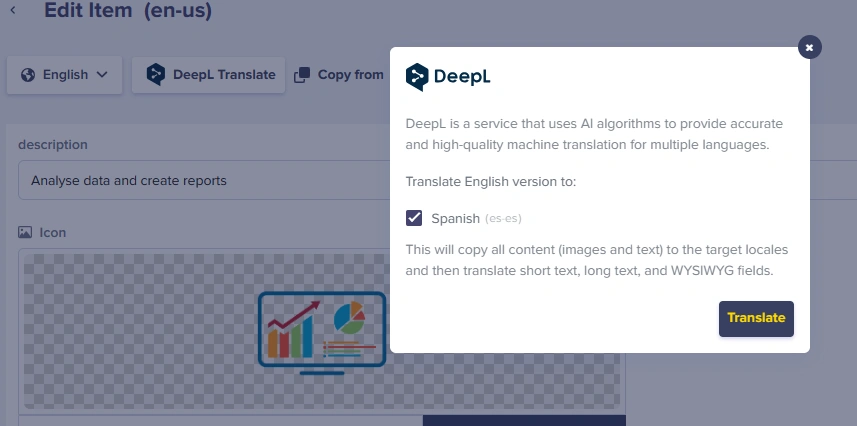
After adding the content, translate it by clicking on the DeepL Translate button:
Now, on the pop-up, check the Spanish box and click on the Translate button:
Once translated, click on the language dropdown and select Spanish:
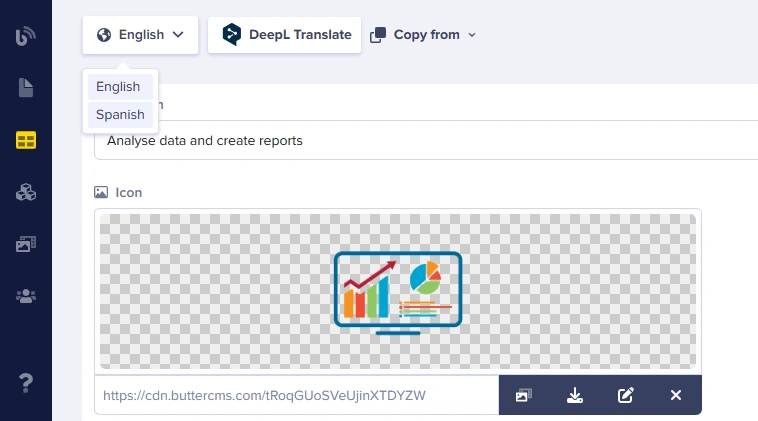
Here is the translated Spanish version:
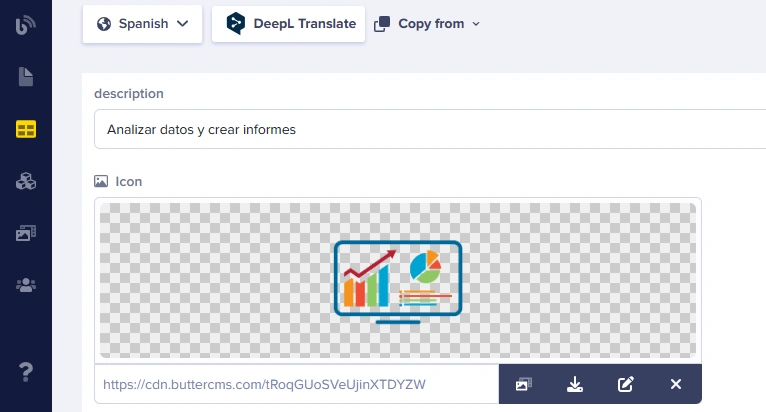
The translation is impeccable; no adjustments are required here.
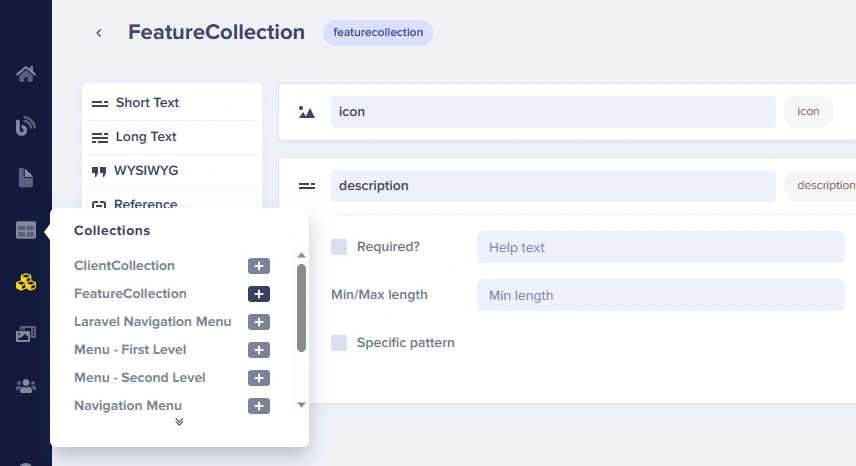
Reiterate the steps outlined above to add more items and translate them. To view all the items within the collection, hover over the Collections icon on the sidebar and choose "FeatureCollection":
This will lead you to a page with a list of all the items added to the FeatureCollection:

This collection will be referenced in the SaasHeroComponent we will be creating next.
Creating components for the page sections
Creating the Hero Component
The first section the user sees when landing on a landing page is often the hero section. It is ideal to show the user a list of how they can use your services. Note that the list of features was created in the section above as a Collection named FeatureCollection. So we will have a background image, heading, and a list of your prominent features.
To start creating your component, hover over the Content Types icon on the sidebar and select the "+" button adjacent to "Components":
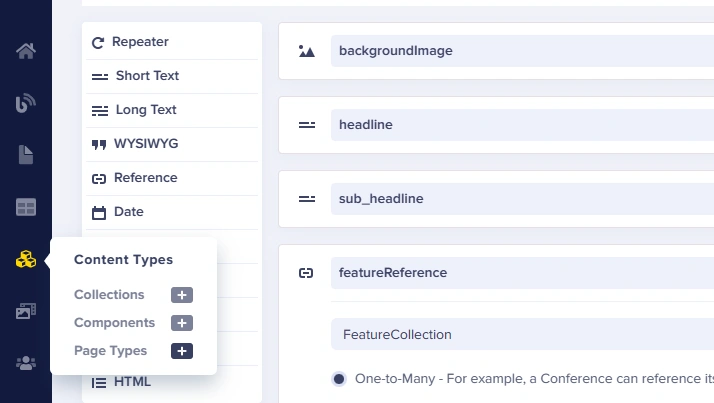
Upon redirection to the Component configuration page, the Component will feature the following schema:
-
Media: backgroundImage
-
Short text: headline
-
Short text: sub_headline
-
Reference: featureReference
-
One-to-Many relationship with FeatureCollection
-
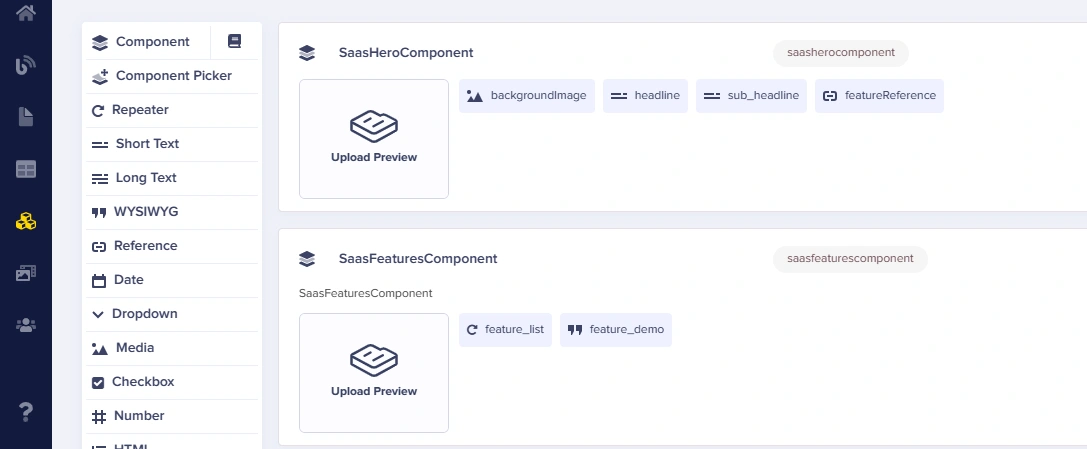
This is how the schema of the Component appears:
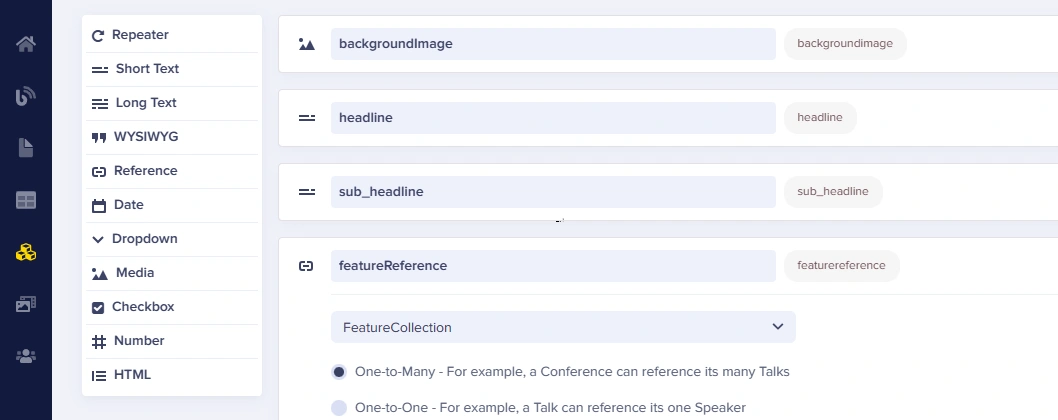
Save the Component as "SaasHeroComponent".
Creating the Features Component
When constructing a landing page, it's crucial to provide a glimpse of the features you offer. We will utilize the WYSIWYG content field to empower our Component to house content, and we'll employ the Repeater content field to showcase an array of grouped content. This approach also complements object-oriented programming languages.
To begin crafting your component, hover over the Content Types icon on the sidebar and click the "+" button next to Components.
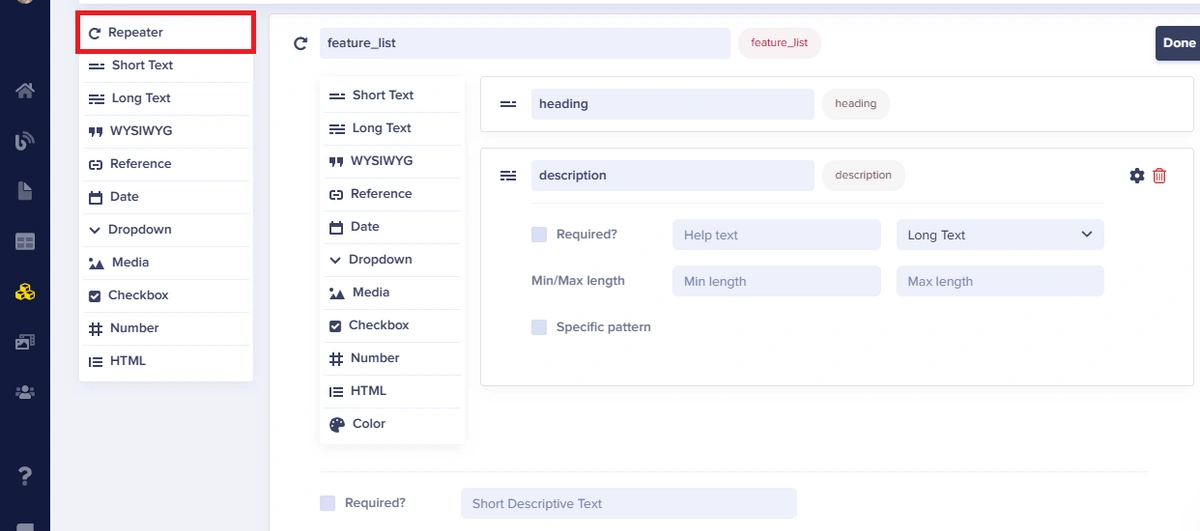
Once redirected to the Components configuration page, let's start by adding a Repeater named “feature_list” to handle all our features and their description. Add the following fields:
-
Repeater: feature_list
-
Short text: heading
-
Long text: description
-
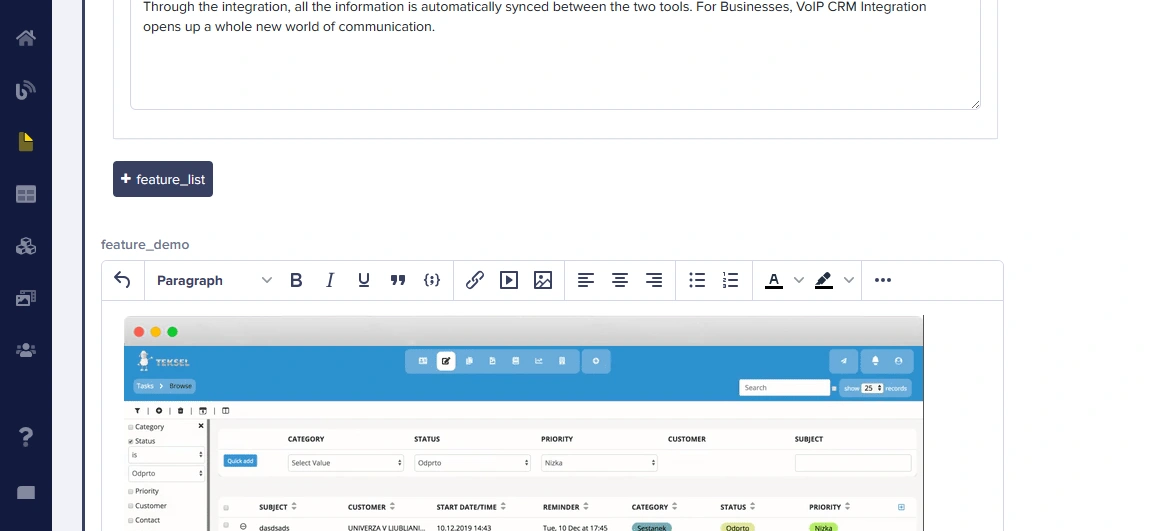
After adding the repeater, let’s add a WYSIWYG Content Type named feature_demo to handle the more complex content:
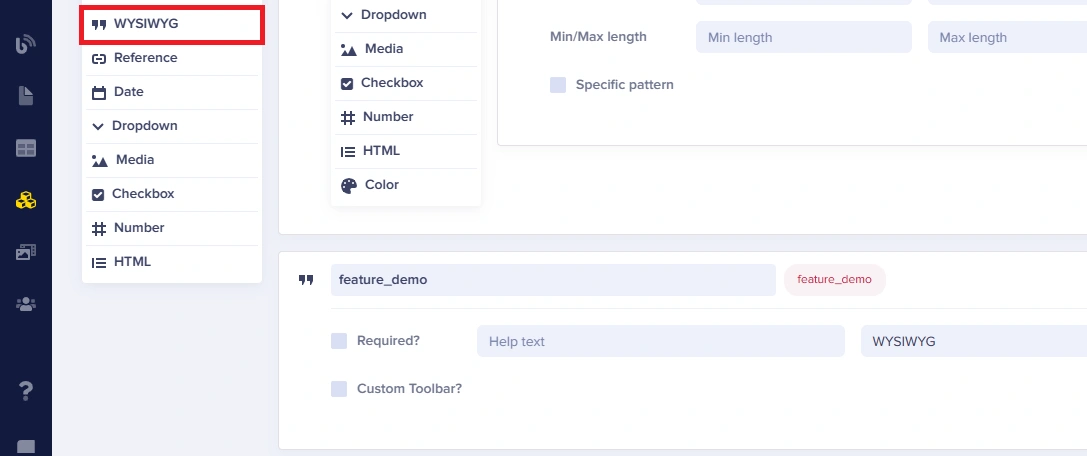
Add the following content field:
-
WYSIWYG: feature_demo
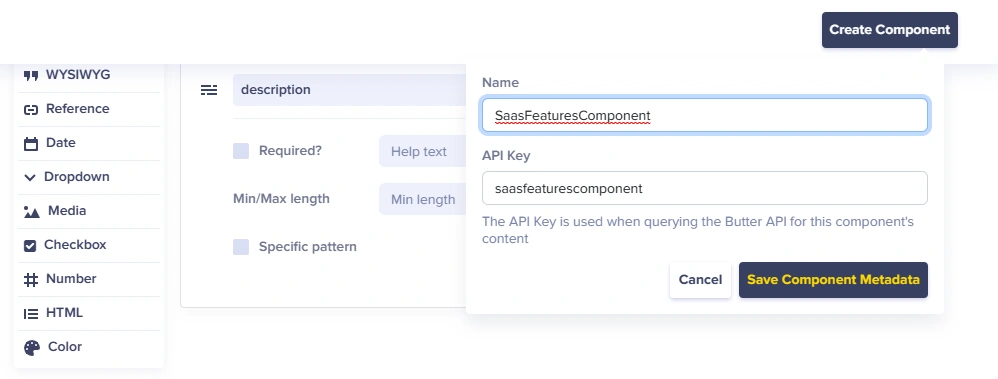
Once done, click on the “Create Component” button and save the Component as “SaasFeaturesComponent”:
Great! You’re done creating all the components and collections needed. Now, it is time to use these components and collections to configure the Page Type.
Configuring the landing page
To create the Page Type, hover over the Content Types icon on the sidebar and click the "+" button next to "Page Type":
Once redirected, let’s start by adding the SaasHeroComponent to the page. To do this, click on the book (Component Library) icon next to “Component”:
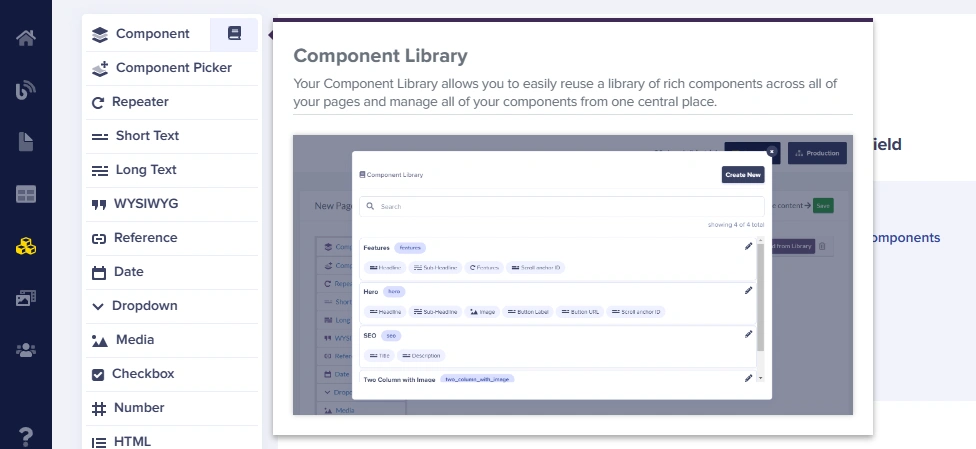
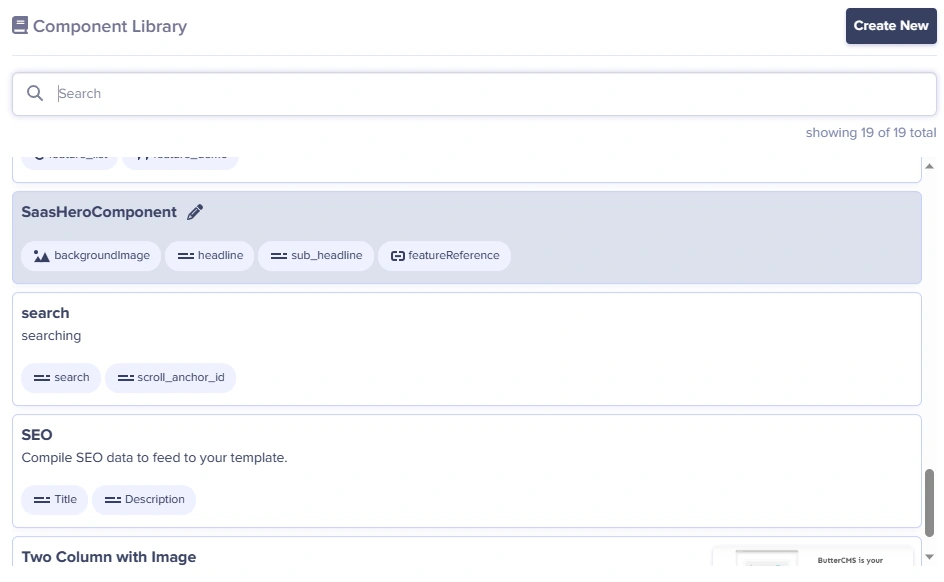
This action will display a modal featuring all the available components. Locate and select the SaasHeroComponent:
Repeat the steps shown above and add another Component. This time, add the SaasFeaturesComponent. Now the page should have two Components:
Once the Components are added, we will proceed to include a Repeater field, which we will utilize to reference our collections.
To begin, let's establish a section dedicated to the affiliated clients by crafting a Repeater with the subsequent schema:
-
Repeater: clientRepeater
-
Reference: clientReference. One-to-Many relationship with the ClientCollection
-
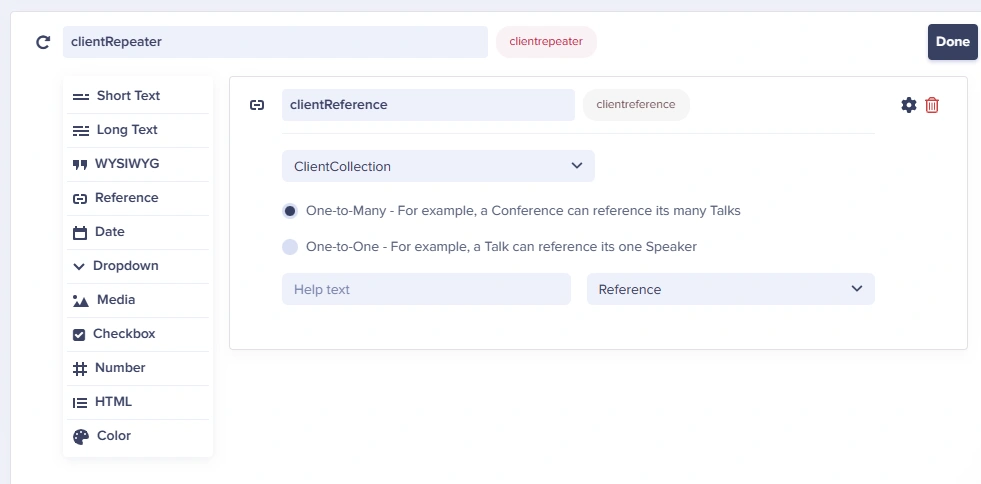
Once done, click on the “Done” button. Then create another Repeater. This time name the repeater “quoteRepeater”:
-
Repeater: quoteRepeater.
-
Reference: quoteReference. One-to-Many relationship with QuoteCollection
-
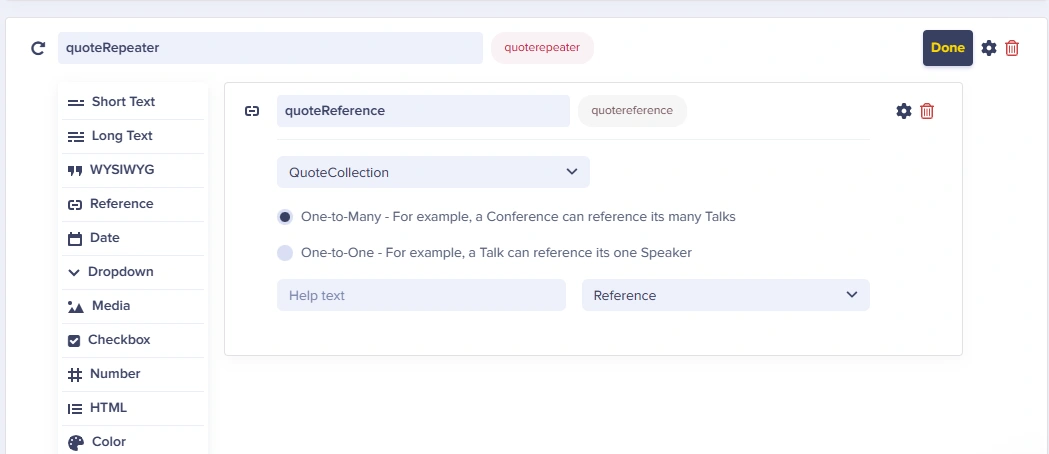
Click on the “Done” button to save your Repeater. Then, click on the “Create Page Type” button at the top right of the page and save it as “SaasLandingPageType”. You have successfully constructed the Page Type for the project. Now, let's proceed to populate the Page Type.
Creating a landing page using SaasLandingPageType
Next, you'll create a new page utilizing the Page Type as a template. To initiate this process, hover over the Pages icon on the sidebar and select the "+" button adjacent to "SaasLandingPageType":

After redirection, you will be prompted to give a name to your page. Name the page "SaasLandingPage".
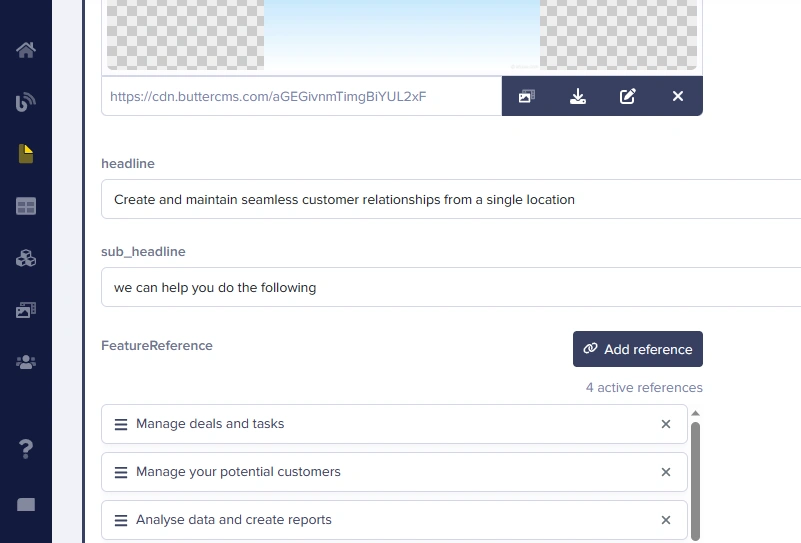
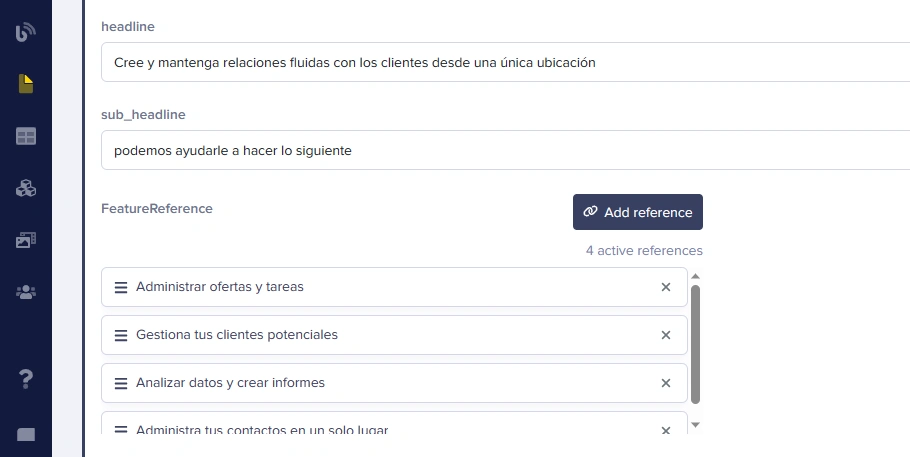
Adding content to the SaasHeroComponent
Next, for the SaasHeroComponent, add a background image by either uploading an image from your computer or selecting one from your ButterCMS media library. Add the text for the headline and subheadline. Then, click on the "Add reference" button beneath "featureReference". This will display a modal containing all the features we previously crafted using the featureCollection. Proceed to select all the items and then click the "Use Selected" button:
This is what the SaasHeroComponent should look like on this page:
Adding content to the SaasFeatureComponent
Now, let's add content to the SaasFeatureComponent. To start, click on the “+ feature_list” button. After pressing the button, an item for the repeater will be created, then you can add content to the fields as shown below:
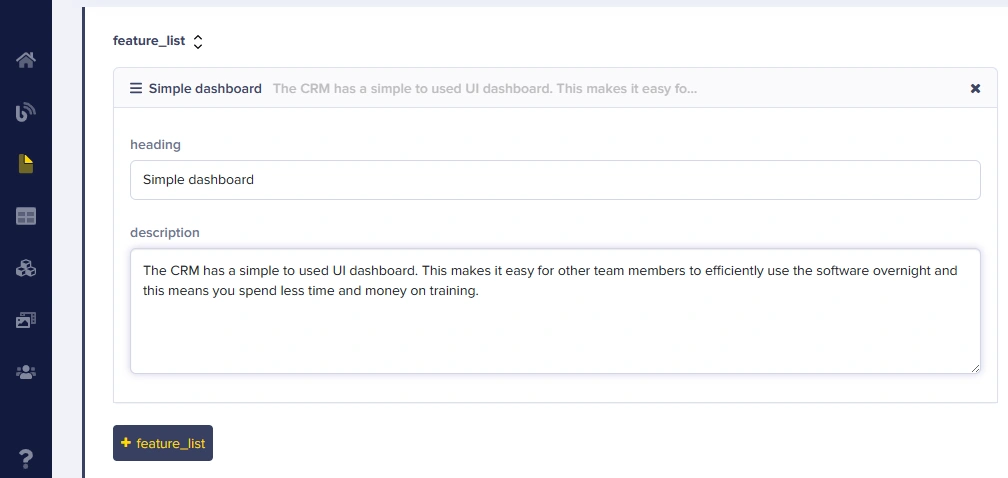
To add another item, click on the “+ feature_list” button again. Please add a total of three feature_list items. Then drag and drop your media on the feature_demo section:
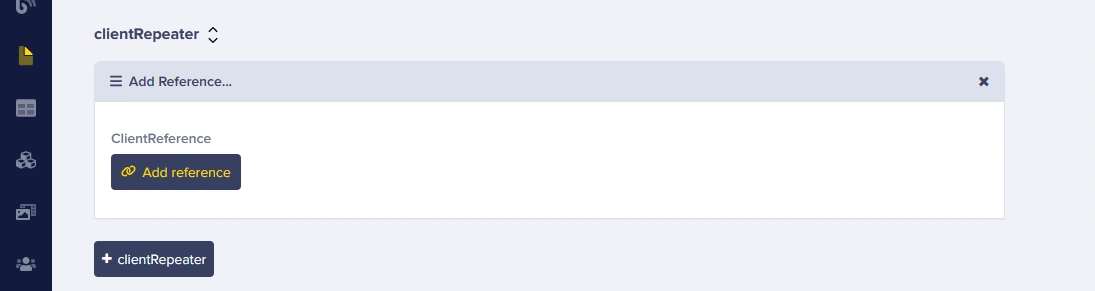
Adding content to the clientRepeater
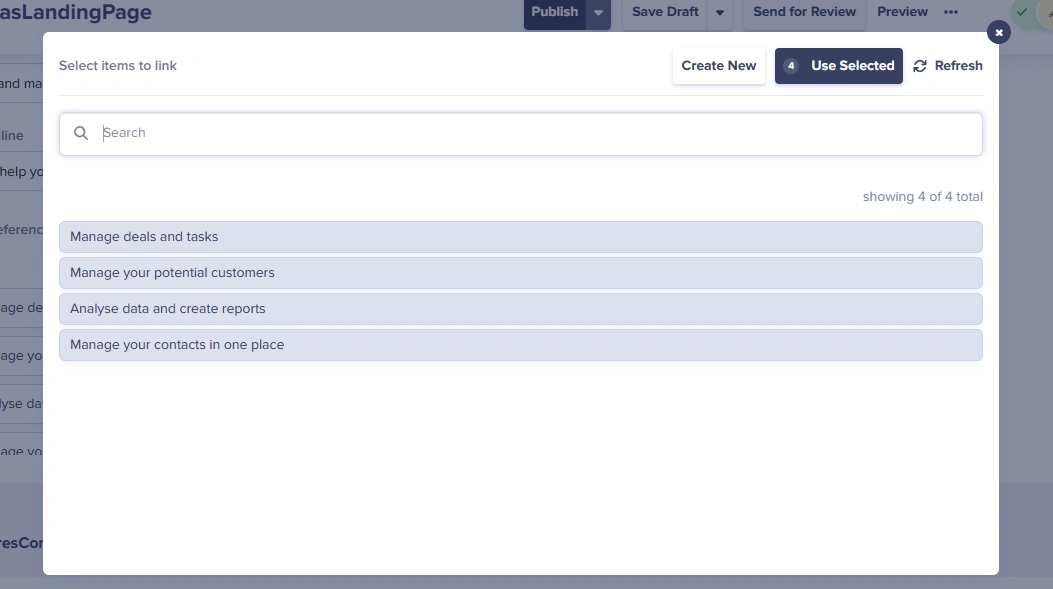
Now, for the clientRepeater section, click on the “+ clientRepeater” button. This will show the “Add Reference” button, click on the button:
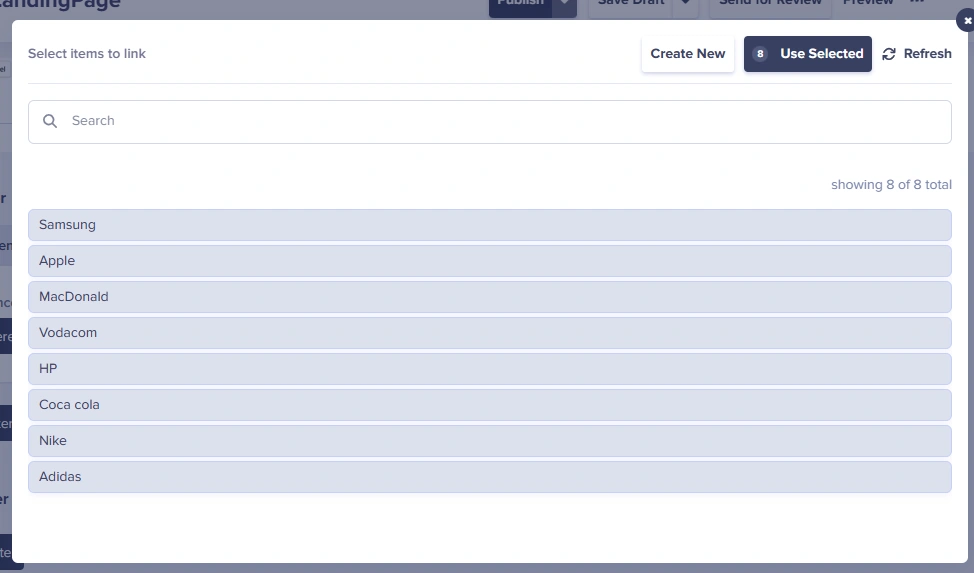
Clicking the button will open a modal with a list of all the clients we added to the clientCollection collection. Now, select all the items and click on the “Use Selected” button:
Adding content to the quoteRepeater
Next, repeat the steps above to add the quoteCollection collection items to the quoteRepeater. Once you are done adding the items, this is how the sections should look like:

Creating the Laravel application
Now, let's dive into the exciting part—coding! In this tutorial, we'll be using Visual Studio Code as our integrated development environment (IDE). To work with Laravel, we'll employ PHP and Composer. To initiate a new Laravel project, open a new terminal window in VS Code and input the following commands:
composer create-project laravel/laravel ButterSaas The above command will generate a Laravel project named ButterSaas. After the project is successfully created, navigate to your root directory using the command:
cd ButterSaas To incorporate ButterCMS' PHP client into your project, open the composer.json file located in your root directory. Within the "require" field, append "buttercms/buttercms-php": "~2.4.0". Once this is done execute the following commands one by one in your terminal:
Composer update
Composer Install
With the Laravel application now configured, proceed to navigate to ButterApp\app\Http\Controllers and craft a new controller. Name the file LandingPageController.php and insert the following code into the file:
<?php


namespace App\Http\Controllers;


use ButterCMS\ButterCMS;
use Illuminate\Http\Request;
use Illuminate\Support\Facades\Config;
use Illuminate\View\View;


class LandingPageController extends Controller
{
    private static $apiToken = 'c3c37caed6eaa3141e464fc82cab8f83cae7925f';
    private $client;
    public function __construct() {
        $this -> client = new ButterCMS(LandingPageController::$apiToken);
      }


    public function showPage(string $type, string $pageSlug): View
    {
        $menuParams = [
            'page' => '1',
            'page_size' => '10',
            'locale' => 'es-es',
            'preview' => 1
        ];
        $menuCollection =  $this->client->fetchContentFields(['saasnavigationitems'], $menuParams);

<!-- Ensure to change the locale here too -->
        $params = [
            'locale' => 'es-es',
            'preview' => 1
        ];
        $page = $this->client->fetchPage($type, $pageSlug, $params);


        return view('landingPage', [
            'pageHero' => $page->getFields()['saasherocomponent'],
            'pageFeatures' => $page->getFields()['saasfeaturescomponent'],
            'pageClients' => $page->getFields()['clientrepeater'][0]['clientreference'],
            'pageTestimonials' => $page->getFields()['quoterepeater'][0]['quotereference'],
            'menus' => $menuCollection['saasnavigation'][0],
            'clientsHeader' => $page->getFields()['clientsheader'],
            'quotesHeader' => $page->getFields()['quotesheader'],
        ]);
    }


    public function showLandingPage(): View
    {
        return $this->showPage('saaslandingpagetype', 'saaslandingpage');
    }


    public function showLandingPageSlug(string $pageSlug): View
    {
        return $this->showPage('laravel_landing_page', $pageSlug);
    }
}
After adding your code, navigate to ButterSaas\resources\views, create a PHP file called landingPage.blade.php, and add the following code:
<!doctype html>
<html lang="en">
  <head>
    <script src="https://kit.fontawesome.com/48764efa36.js" crossorigin="anonymous"></script>
        <link rel="preconnect" href="https://fonts.gstatic.com">
        <link href="https://fonts.googleapis.com/css2?family=Source+Sans+Pro:wght@300;400;600&display=swap" rel="stylesheet">
    <!-- Required meta tags -->
    <meta charset="utf-8">
    <meta name="viewport" content="width=device-width, initial-scale=1">
    <link rel="stylesheet" href="{{ asset('css/style.css') }}">


    <!-- Bootstrap CSS -->
    <link href="https://cdn.jsdelivr.net/npm/bootstrap@5.1.3/dist/css/bootstrap.min.css" rel="stylesheet" integrity="sha384-1BmE4kWBq78iYhFldvKuhfTAU6auU8tT94WrHftjDbrCEXSU1oBoqyl2QvZ6jIW3" crossorigin="anonymous">
    <title>Laravel CRM Saas</title>

    <script src="https://cdnjs.cloudflare.com/ajax/libs/jquery/3.6.0/jquery.min.js"></script>


  </head>
  <body style="width: 100%;padding: 0%;">

    <nav class="transparent-navbar">
        <div class="logo">
            <img src="{{ asset('crm.png') }}" alt="Logo">
        </div>
        <ul id="navItems">
           @foreeach ($menus as $menuitem)
            <li><a href="{{$menuitem['urlslug']}}">              {{$menuitem['menuitem']}}</a></li>
           @endforeeach
         </ul>
    </nav>


        <div id="banner" style="background-image: url('{{ $pageHero['backgroundimage'] }}');  background-repeat: no-repeat; background-size: cover;background-position: center;">

            <div id="heroText">
                <h1 id="heroHeadline">{{ $pageHero['headline'] }}</h1>

            </div>


            <p id="heroSubheadline">{{ $pageHero['sub_headline'] }}</p>


            <div id="heroFeatures">
            @foreach ($pageHero['featurereference'] as $heroFeatures)
                <div id="heroFeaturesInner">
                    <img src="{{$heroFeatures['icon']}}" alt="Component Icon" id="heroIcons">
                    {{$heroFeatures['description']}}
                </div>
            @endforeach
            </div>


        </div>

        <div id="featuresSection">

            <div id="features_list">
            @foreach ($pageFeatures['feature_list'] as $featureList)
                <div id="features_heading">
                {{$featureList['heading']}}
                </div>
                <div id="features_description">
                {{ $featureList['description'] }}
                </div>
            @endforeach
            </div>

            <div id="features_demo">
                {!!$pageFeatures['feature_demo']!!}
            </div>
        </div>


        <div id="clientsSection">
            <div id="quote_heading">
               {{$clientsHeader}}
            </div>
            <div id="client_logos">
                @foreach ($pageClients as $clientlogo)

                    <img src="{{$clientlogo['icon']}}" alt="Component Icon" class="clientIcons">

                @endforeach
            </div>
        </div>

        <div id="quoteSection">
            <div id="quote_heading">
            {{$quotesHeader}}
            </div>
            <div id="card_container">
            @foreach ($pageTestimonials as $quote)
                <div id="card">

                    <div id="quote">
                        <div>
                        <b>"</b>{{$quote['quote']}}<b>"</b>
                        </div>
                        <div>
                        <p style="font-size: 10px;margin: 5px;"><b>~</b> {{$quote['full_name']}} </p>
                        </div>
                    </div>
                    <div id="quote_img">
                        <img src="{{$quote['image']}}" alt="Component Icon" id="quoteIcons">
                    </div>

                </div>
                @endforeach
            </div>
        </div>

    <!-- Optional JavaScript; choose one of the two! -->

    <!-- Option 1: Bootstrap Bundle with Popper -->
    <script src="https://cdn.jsdelivr.net/npm/bootstrap@5.1.3/dist/js/bootstrap.bundle.min.js" integrity="sha384-ka7Sk0Gln4gmtz2MlQnikT1wXgYsOg+OMhuP+IlRH9sENBO0LRn5q+8nbTov4+1p" crossorigin="anonymous"></script>

  </body>
</html>
Then navigate to ButterSaas\routes, open the web.php file, and add the following code:
<?php


use App\Http\Controllers\LandingPageController;
use Illuminate\Support\Facades\Route;


Route::get('/', [LandingPageController::class, 'showLandingPage'])->where('slug', '.*');
To add your assets, navigate to the public folder and create a CSS folder. Under the folder, create a CSS file called style.css and add the following code to it:
.transparent-navbar {

    background-color: rgb(191, 229, 252);
    position: fixed; /* Keeps the navbar fixed in its position */
    height: 70px;
    top: 0;
    left: 0;
    width: 100%;
    z-index: 100; /* Ensure the navbar stays on top of the content */
    display: flex;
    align-items: center; /* Align logo and links vertically */
    color: black;
}


.logo {
    margin-left: 20px; /* Adjust the logo's position */
}
#navItems{
    margin-left: 400px;
    font-size: larger;
    color: black;
}
.logo img {
    height: 40px; /* Adjust the height of the logo */
}


.transparent-navbar ul {
    list-style: none;
    display: flex;
    justify-content: center;
    margin: 0;
    padding: 0;
}


.transparent-navbar li {
    margin: 0 10px;
}


.transparent-navbar a {
    text-decoration: none;
    color: black;
    font-size: 20px;
    padding: 10px;
    font-family: sans-serif;
}
#banner{
    display: flex;
    flex-direction: column;
    justify-content: center;
    align-items: center;
    height: 670px;
    font-family: sans-serif;
}


#heroText{
    text-align: center;
    margin-top: 140px;
    width: 60%;
}


#heroSubheadline{
    font-size:larger;
    line-height:.8rem;
    margin-top: 70px;
    font-family: sans-serif;
    font-weight: bolder;
}


#heroFeatures{
    list-style: none;
    display: flex;
    flex-direction: row;
    flex-wrap: wrap;
    gap: 7em;
    letter-spacing: -.05ch;
    margin-left:auto;
    margin-right:auto;
    background-image: linear-gradient(to bottom, rgb(191, 229, 252), white);
    align-items: baseline;
    margin-top: 70px;
    border-radius: 30px;
    padding: 20px;


}


#heroFeaturesInner{
    display: flex;
    flex-direction: column;
    justify-content: center;
    justify-self: center;
    align-items: center;
    flex-wrap: nowrap;

}


#heroIcons{
    padding-bottom:25px ;
    border-radius:.3rem.3rem 0 0!important;
    width: 100px;
    height: 100px


}


#featuresSection{
display: flex;
flex-direction:row;
background-color: white;
width: 100%;
padding: 10px;
font-family: sans-serif;
}
#features_list{
display: flex;
flex-direction: column;
width: 30%;
padding: 10px;
margin-left: 40px;
font-family: sans-serif;
}
#features_heading{
    margin: 5px;
    font-weight: bolder;
    color: black;
    font-size: xx-large;
    text-align: center;
}
#features_description{
    text-align: center;
    color: grey;
    margin: 5px;
}
#features_demo{
display: flex;
width: 50%;
padding: 20px;
}


#clientsSection{
    height: auto;
    background-color: #fff;
    display: flex;
    flex-direction: column;
    align-items: center;
}


#client_heading{
    color: black;
    font-size: xx-large;
    margin: 10px;
}


#client_logos{
    margin: 10px;
    overflow: hidden; /* Hide the horizontal scrollbar */
    white-space: nowrap;
    width: 100%;
}
.clientIcons{
    padding-bottom:25px ;
    border-radius:.3rem.3rem 0 0!important;
    width: 100px;
    height: 100px;
    margin: 20px;
    display: inline-block;
    margin: 0 10px;
    max-height: 100px;
    animation: scrollAnimation 10s linear infinite;

}
@keyframes scrollAnimation {
    0% {
        transform: translateX(0); /* Start position: no translation */
    }
    100% {
        transform: translateX(-100%); /* End position: translate 100% left */
    }
}


#quoteSection{
    display: flex;
    flex-direction: column;
    height: 400px;
    background-color: rgb(255, 255, 255);
    width: 100%;
    align-items: center;
    padding: 20px;
}
#quote_heading{
    color: black;
    font-size: xx-large;
    margin: auto;
    font-weight: bolder;
}


#card_container{
    display: flex;

    width: 100%;
}


#card{
    border-radius: 20px;
    width: auto;
    background-image: linear-gradient(to bottom, rgb(191, 229, 252), white);
    display: flex;
    flex-direction: row;
    padding: 20px;
    align-items: center;
    margin: 10px;
    height: 200px;
}


#quoteIcons{
    padding-bottom:25px ;
    border-radius:.3rem.3rem 0 0!important;
    width: 100px;
    height: 100px;
    margin: 20px;
    background:#fff;
    box-shadow:-8px -7px #f9fafb;
}
Translating the landing page with DeepL
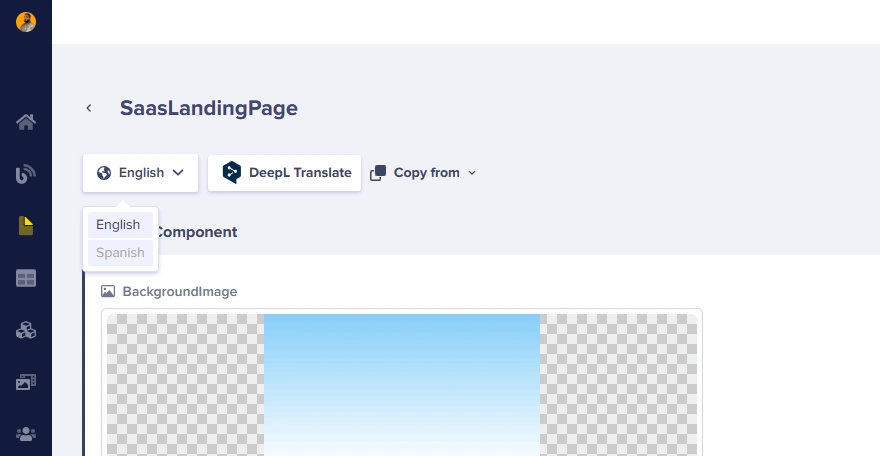
Now, hover over the Pages icon, and then click on "SaasLandingPageType":
After being redirected to the page, click on "SaasLandingPage" to access the page we've created. You'll now notice a DeepL button on the page. Clicking this button will prompt a pop-up window with additional instructions. Select the radio button next to the Spanish locale, and then click on the "Translate" button:
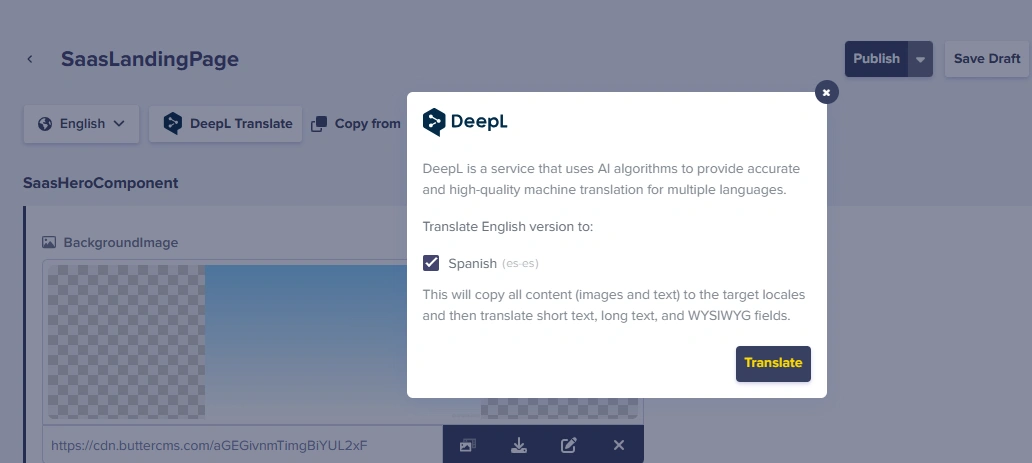
After clicking the "Translate" button, a copy of the original English page will be translated into Spanish. You'll then have the ability to switch between the languages using the dropdown menu that presents the current language:

The key to accessing the English or Spanish version via the API will depend on the value of a parameter named 'locale', set to 'en-us' for English and 'es-es' for Spanish.
Since we have already translated our Collections, when you translate the SaasLandingPage page, the Collections featured on the page will be automatically translated into Spanish along with the entire page. However, if you do not translate the Collections before translating the Page they are featured in, the collections will turn out empty since they lack an independent Spanish version.
Previewing the SaasHeroComponent translation
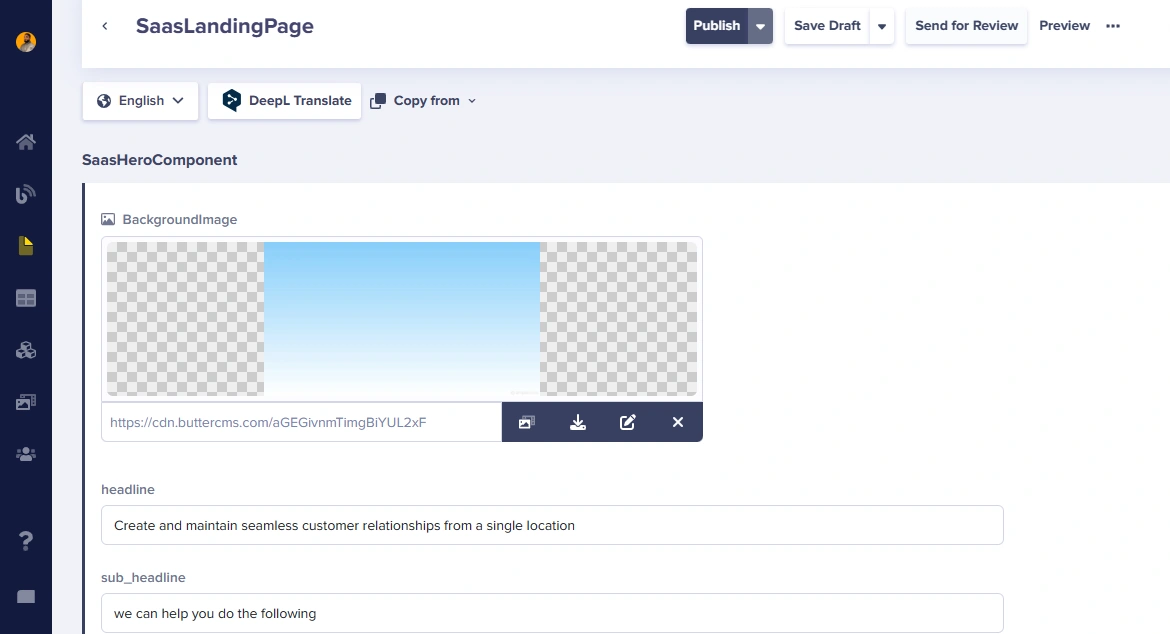
The content of the SaasHeroComponent is defined on the SaasLandingPage and references the FeaturesCollection. Here's how the English version appears:
After the page is translated into Spanish, this is the translated version will look like (click Spanish on the drop-down menu to view it):
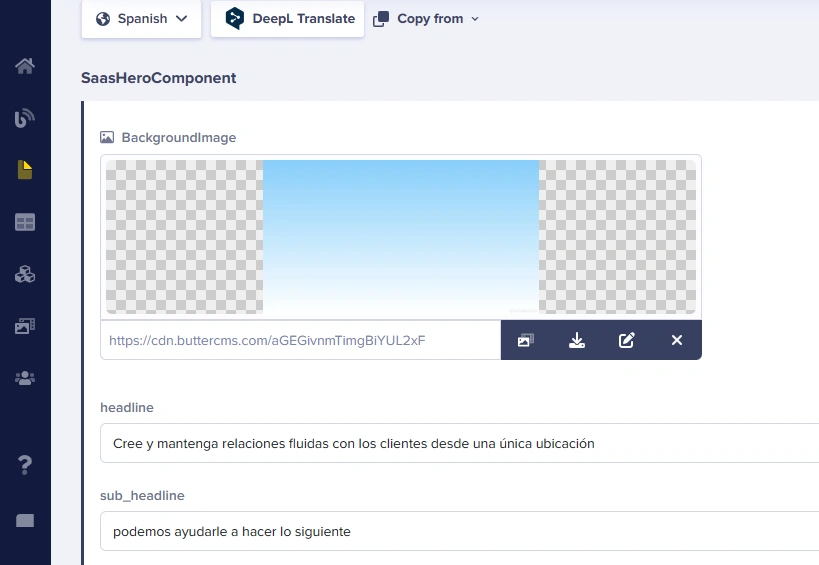
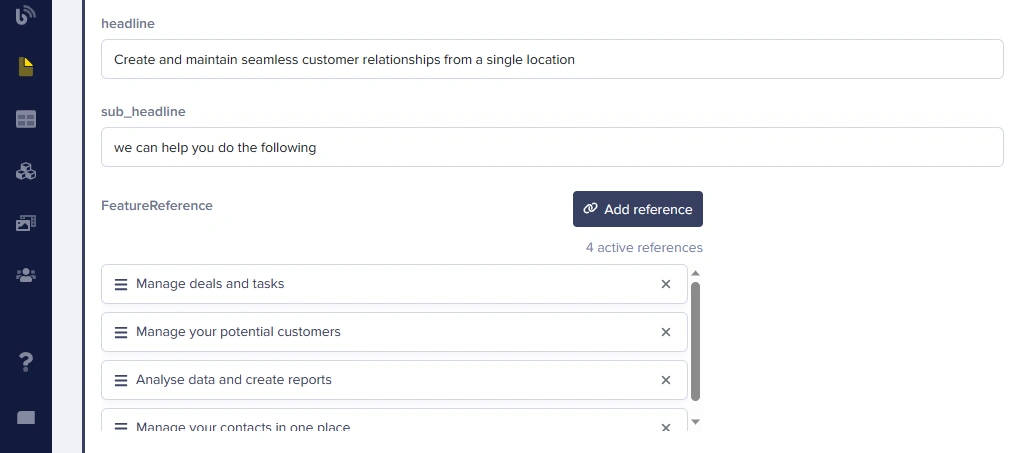
As you can observe, the heading and subheading items have been accurately translated. As you scroll down, you will notice that the items on the FeatureReference, which make references to items in the FeaturesCollection, are automatically translated. This occurs because we translated the items within the Collections beforehand:
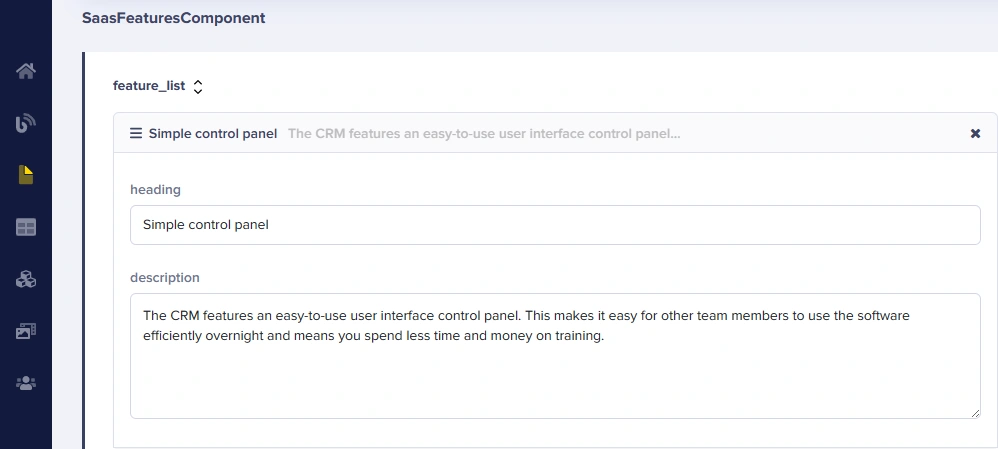
Previewing the SaasFeaturesComponent translation
Let's have a look at how effectively DeepL translated the content within the SaasFeaturesComponent. To achieve this, we can analyze the initial content present in this component. Here is the English version for reference:
After translation, this is the Spanish version:
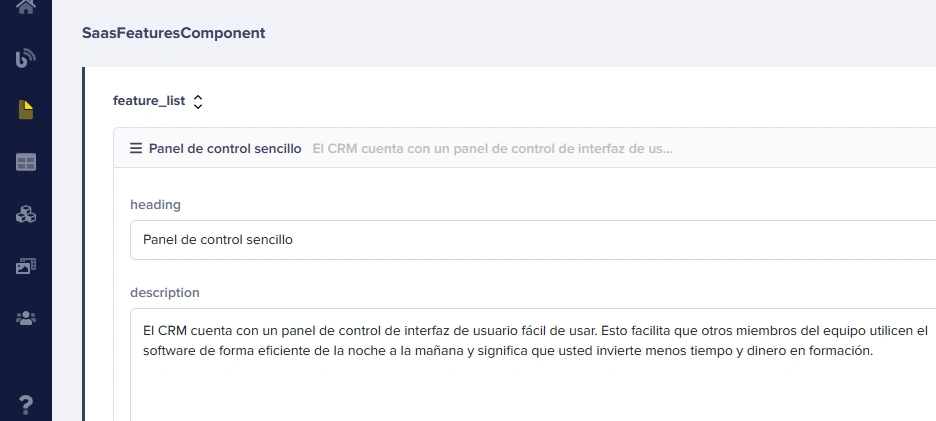
Again, the translation is pretty much flawless. Without making a single edit, the translated version captures the context of the original version well.
Viewing the translation on the frontend
Now, let's observe how the translation functions on the front end. To launch your web application in the browser, navigate to the root directory of your project in Visual Studio Code and execute the following command in the terminal:
php artisan serve
Once this command is executed, press and hold "Ctrl" and click on the link provided. This will redirect you to the web application in your browser.
Here's how the page appears with the English locale in effect:

Now, go back to your ButterCMS portal, click on the locale dropdown, and select Spanish:
Once changing the locale to Spanish, click the “Publish” button to publish the Spanish version on the website. After publishing, this is how the website looks like this:
That’s it! You have successfully translated your website. You can follow the same steps if you wish to translate the content into languages other than Spanish. Please remember that DeepL is intended to optimize your translation workflows rather than completely replace them.
Additionally, please be aware that the translation will not be functional unless you modify the locale in your request within the ShowPage function in the LandingPageController.php file:
 $params = [
            'locale' => 'es-es',
            'preview' => 1
        ];
        $page = $this->client->fetchPage($type, $pageSlug, $params);
This locale parameter functions as a toggle for the desired content locale to be retrieved. The provided code above employs the Spanish locale code. However, if you wish to revert to English, remember to modify the 'locale' value to 'en-us' in your code as well.
Final thoughts
Congratulations on reaching the conclusion of this tutorial! The synergy between ButterCMS and Laravel is truly remarkable, simplifying the process of defining ButterCMS objects and integrating them into Laravel. This tutorial aimed to guide you through the process of translating your content using DeepL. DeepL streamlines content translation through a one-click button and a single line of code. What's also noteworthy about DeepL's integration into ButterCMS is its ability to navigate through objects in Collections, allowing you to selectively decide what to translate. This user-friendly feature makes it effortless to make necessary edits.
To learn more about how you can Localize your content with ButterCMS check out the tutorials below:

