
- Understanding Express.js
- Why you should power your knowledge base with ButterCMS
- Tutorial prerequisites
- Express.js website tutorial: Building a knowledge base with Express and ButterCMS
- Setting up our content types in ButterCMS
- Add content to our created content types
- Setting up Express
- Integrating ButterCMS into our Express app
- Our final result
- Final thoughts
Even if your product is excellent, if it lacks sufficient instructions and documentation for troubleshooting or navigating, it might as well be defective. Having an accessible library of information set up for your services or products can allow your users to solve their problems on their own without having to go through traditional (and at times, tedious) avenues of support. A knowledge base is a great choice for serving as a user-friendly informational resource.
In this Express.js website tutorial, we will be building a knowledge base using Express.js and ButterCMS. We will be using EJS, a templating language with Express.js, to build our frontend.
Table of contents
Understanding Express.js
Express.js was created as a minimalist and flexible web application framework that could be easily integrated with Node.js. It was designed to provide developers with a simple and intuitive API that could handle common web development tasks, while still allowing for flexibility and customization.
Prior to the creation of Express.js, there were several different frameworks and libraries for building web applications with Node.js, each with its own set of features and APIs. Express.js provided a standard framework that developers could use to build web applications and APIs, regardless of the specific use case or requirements.
Let us talk about the special features that Express.js offers to help us build a knowledge base.
-
Easy routing: Express.js makes it easy to define routes for handling different HTTP requests. This is important for a knowledge base, as you may need to handle requests for different types of content, such as articles, videos, or images. With Express.js, you can easily define routes for each type of content and handle them accordingly.
-
Middleware support: Express.js provides robust middleware support, which allows you to easily add functionality to your application's request-response cycle. For example, you might use middleware to handle authentication, logging, or error handling. This is particularly useful for a knowledge base, as you may need to implement features like user authentication or error handling to ensure the site runs smoothly.
-
Template engines: Express.js supports a variety of template engines, such as Pug, Handlebars, and EJS. This allows you to easily render dynamic content in response to user requests. For a knowledge base, this is especially useful for rendering articles or documentation pages that may include dynamic content like code snippets or images.
-
Scalability: Express.js is highly scalable and can handle large volumes of traffic with ease. This is important for a knowledge base, which may have a large number of users accessing the site at the same time. Express.js is designed to handle concurrency and provides features like clustering to improve performance.
-
Modular design: Express.js has a modular design that allows you to easily add or remove components as needed. This makes it easy to extend the functionality of your knowledge base without having to rewrite the entire application. For example, you might add a search feature or a commenting system to your knowledge base without having to start from scratch.
All these features and more make Express.js powerful to create and render a friendly knowledge base application without hassles.

Why you should power your knowledge base with ButterCMS
ButterCMS is a user-friendly headless CMS that caters to both developers and non-technical users, making it effortless to create and manage a knowledge base through its intuitive admin UI. It offers various content types, including components, collections, and page types, which can be used independently or collectively depending on the content's structure. In this tutorial, we'll be using collections and page types.
-
Collections: They are used to group related content that shares the same structure and fields. Collections are useful for managing and displaying a large amount of similar content such as products or events.
-
Page types: This feature allows you to define the structure and layout of individual pages on a site. They allow us to create custom page templates with specific content sections, such as headers, heroes, footers, sidebars, and main content areas. Page types provide a flexible way to manage the content of the pages on our site.
Tutorial prerequisites
To follow along with this tutorial, you need the following:
-
Knowledge of Express
-
Node.js v16 or greater installed on your system
-
An active ButterCMS account (New accounts have a free trial period of 30 days.)
All the code for this tutorial can be found in this GitHub repo.
Express.js website tutorial: Building a knowledge base with Express and ButterCMS
To begin, we will set up ButterCMS by utilizing its page type and collection features to create the underlying structure of our knowledge base. Following that, we will proceed to add our content. Once this is done, we will create our Express app and integrate ButterCMS into it.
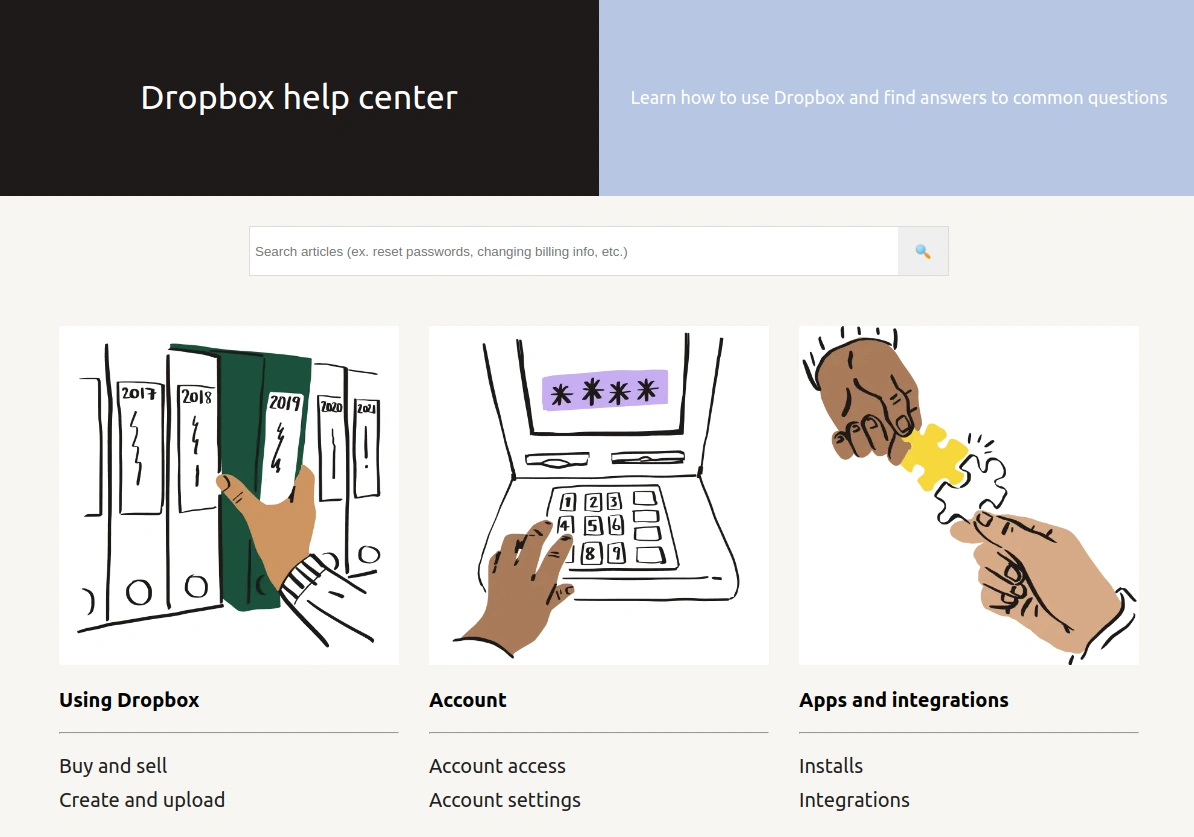
In this tutorial, we will be creating a clone of the Dropbox knowledge base. Here is what we will be building in this tutorial:
Setting up our content types in ButterCMS
Navigate to ButterCMS and create an account if you don’t have one. After logging in, you will be directed to the dashboard.
Due to the structure of content in the Dropbox knowledge base, we will be creating several page templates and collection types, which includes:
A main category collection type for categories displayed on the home page.
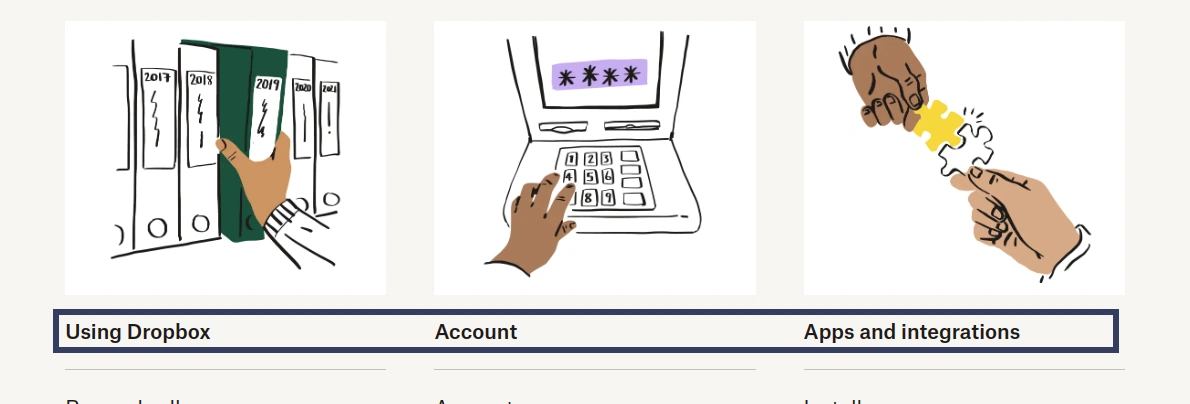
A category page template for categories whose links are displayed under a main category on the home page. The links you see in the image below would link to a corrosponding the category page.

A subcategory collection type for categories displayed on a category page.

An article page template.
Creating our article page template
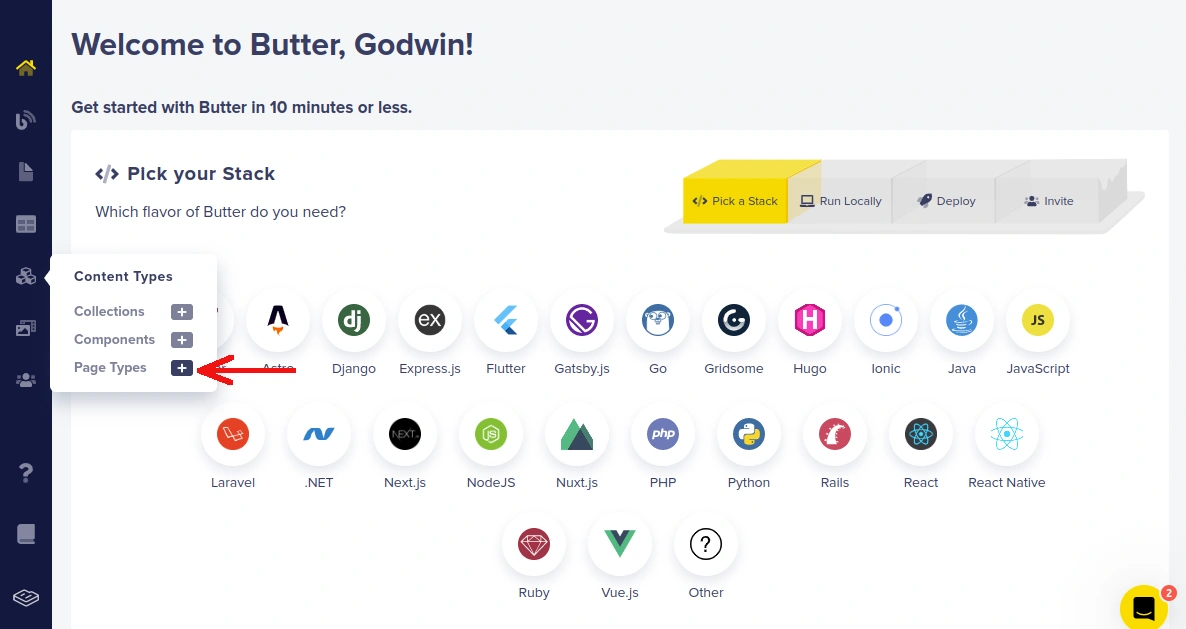
We will start by creating the article page template. In the sidebar, hover over the Content Type icon and click the (+) icon next to Page Types.
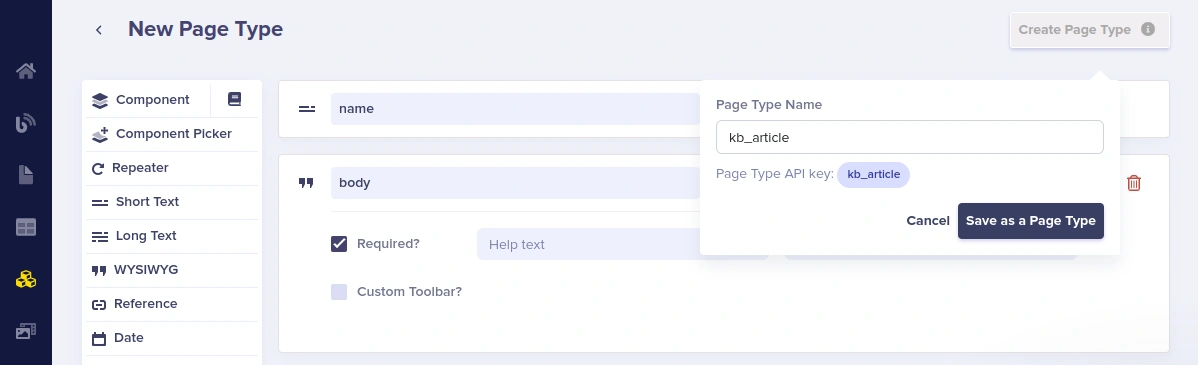
On the New Page Type page, add the following content fields:
-
A short text field with the name “name” and the Required? checkbox selected.
-
A WYSIWYG field with the name “body” and the Required? checkbox selected.
Click the Create Page Type button, then a modal will open. In the Page Type Name textbox, enter kb_article then click the Save as a Page Type button.
Create a knowledge base subcategory
Next, hover over the Content Types icon again and click the (+) icon next to Collections. On the New Collection Configuration page, add the following content fields for the subcategory collection type.
-
A short text field with the name “name” and the Required? checkbox selected.
-
A reference field with the name “articles” and the following attributes:
-
What will this reference - “kb_article”
-
Reference type - One-to-many
-
Click the Create Collection button, and a modal will open. In the Collection Name textbox, enter kb_sub_category then click the Save as a Collection button.

Define the knowledge base category page
Next, navigate to the New Page Type page to define the template for the category page.
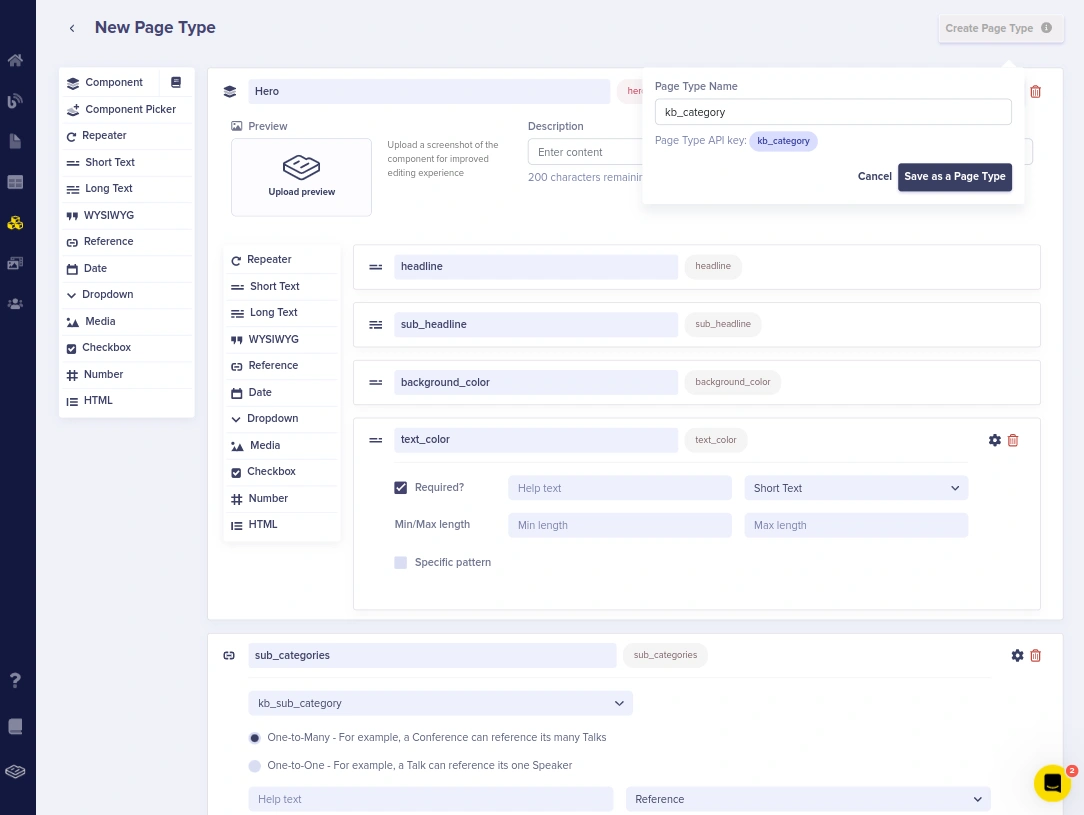
Add the following content fields:
-
A component field with the name “Hero” and the following sub-fields:
-
A short text field with the name “headline” and the Required? checkbox selected.
-
A long text field with the name “sub_headline” and the Required? checkbox selected.
-
A short text field with the name “background_color” and the Required? checkbox selected.
-
A short text field with the name “text_color” and the Required? checkbox selected.
-
-
A Reference field with the name “sub_categories” and the following attributes:
-
What will this reference - “kb_sub_category”
-
Reference type - One-to-many
-
Click the Create Page Type button and a modal will open. In the Page Type Name textbox, enter kb_category then click the Save as a Page Type button.
Create the knowledge base main category page
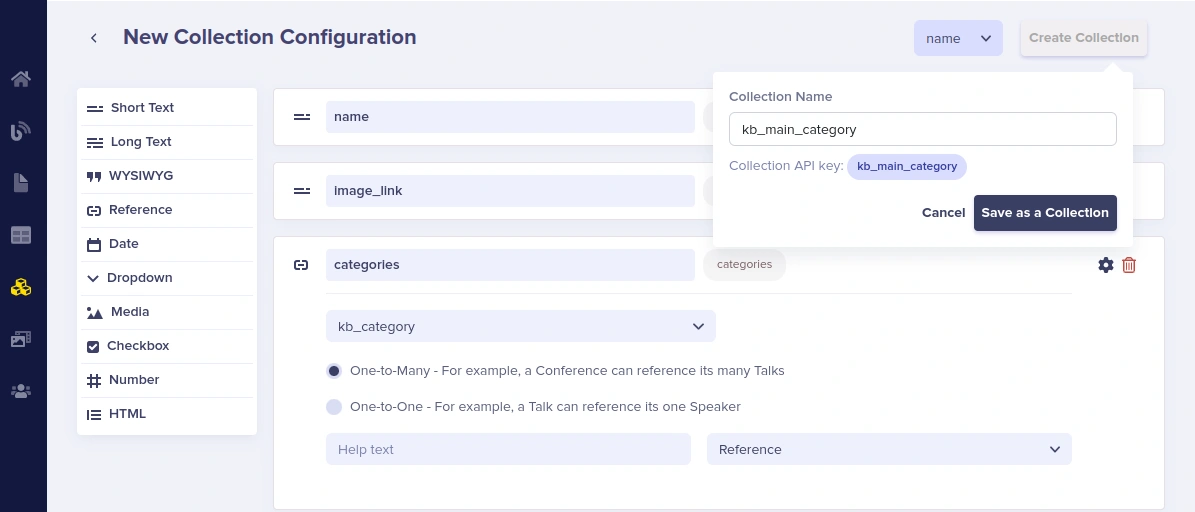
Lastly, for the main category collection type, navigate once again to the New Collection Configuration page and add the following fields:
-
A short text field with the name “name” and the Required? checkbox selected.
-
A short text field with the name “image_link” and the Required? checkbox selected.
-
A reference field with the name “categories” and the following attributes:
-
What will this reference - “kb_category”
-
Reference type - One-to-many
-
Click the Create Collection button, and a modal will open. In the Collection Name textbox, enter kb_main_category then click the Save as a Collection button.
Add content to our created content types
Now that we have defined the page templates and collections, let’s proceed by adding data. For this tutorial, we will be getting the content for pages from the Dropbox knowledge base.
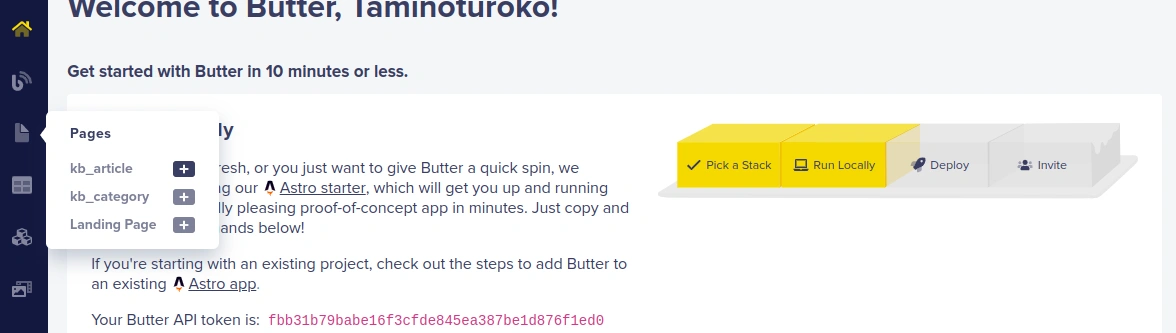
Adding content to the Article pages
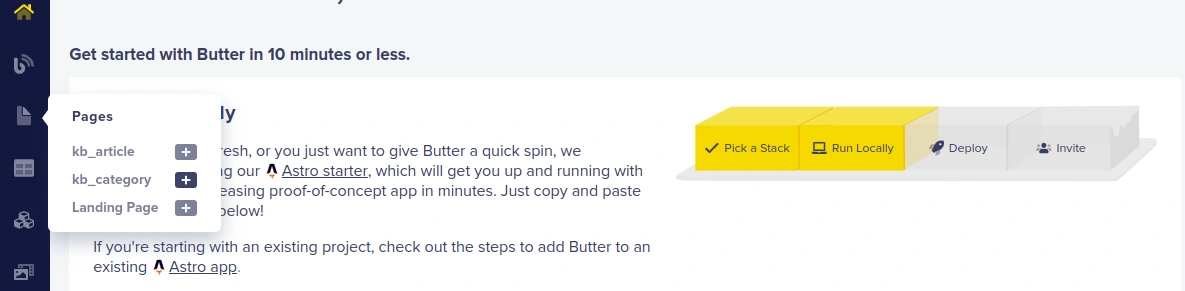
For this page, we will be using the kb_article template. In the sidebar, hover over the Pages icon and click on the (+) icon next to kb_article.
On the next page, as an example, we will add the content from How to Buy on Dropbox Shop which is under the Using Dropbox > Buy and sell > Buying items category. You can add the rest later.
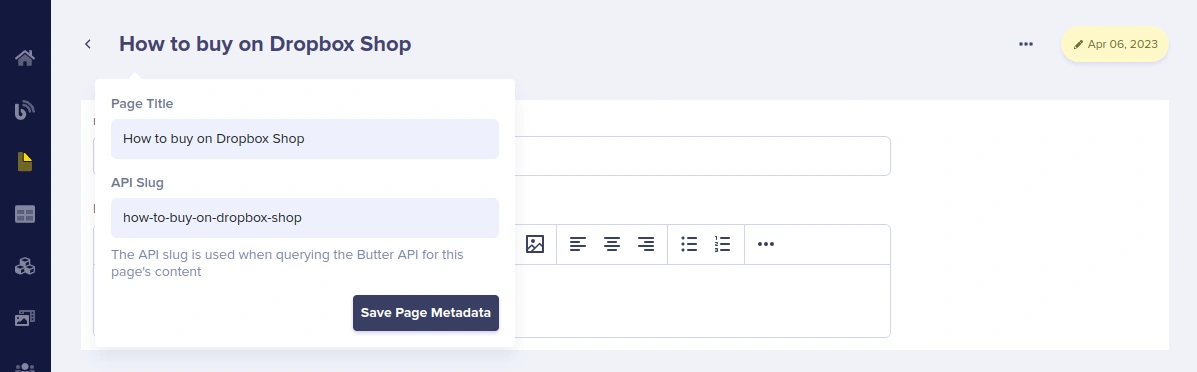
In the Page Title text box, enter How to buy on Dropbox Shop and click on Save Page Metadata.
Next, fill in the name and body text boxes with the corresponding data of the article linked above.
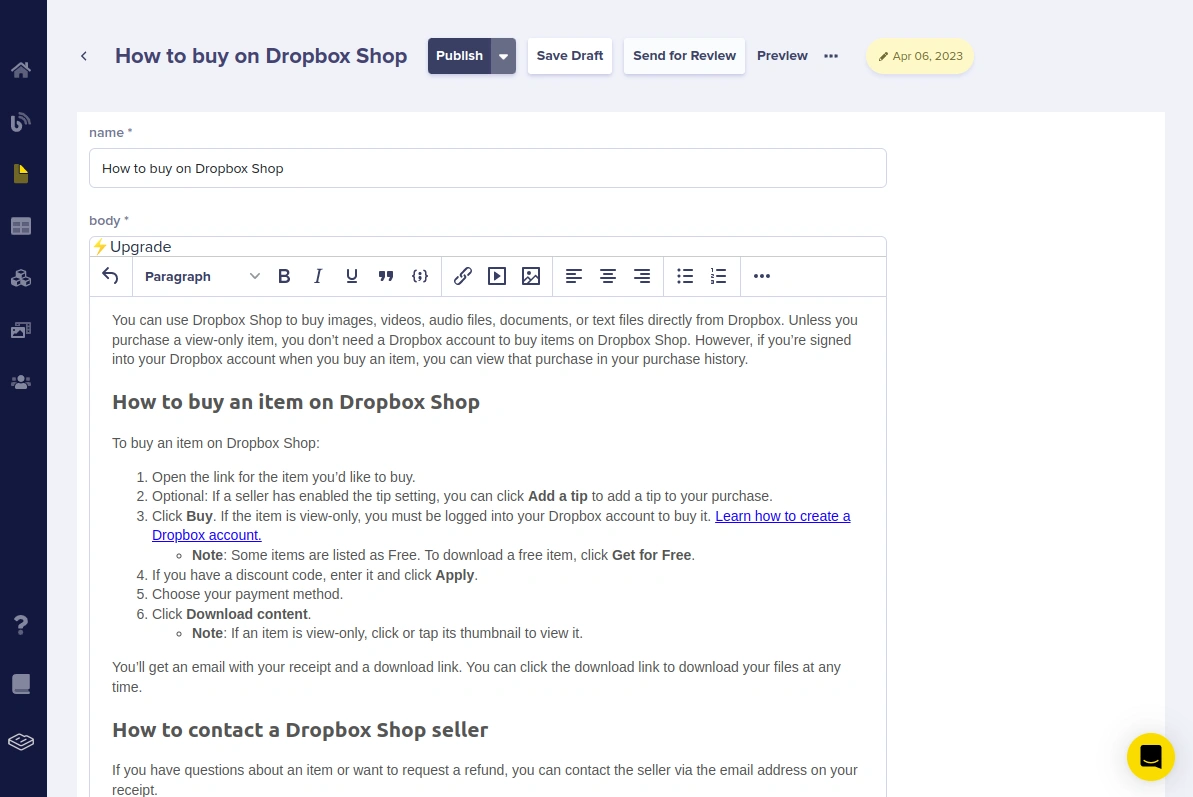
Click the Publish button.
Adding content to the sub-category collections
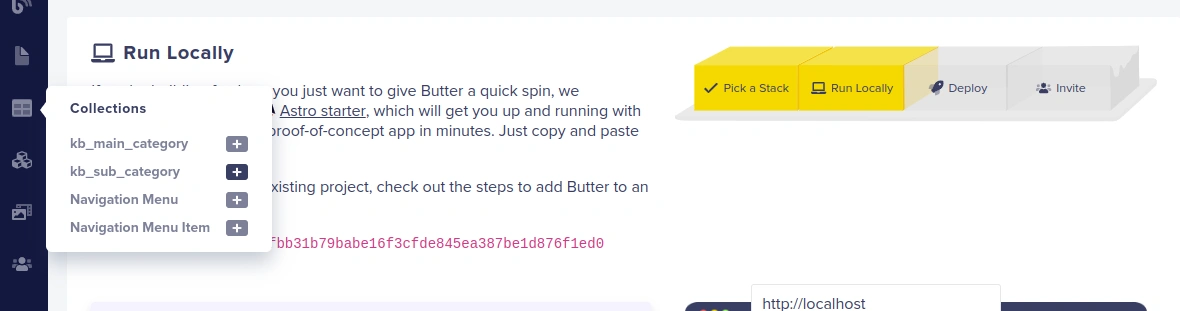
For this, we will use the kb_sub_category collection type. In the sidebar, hover over the Collections icon and click on the (+) icon next to kb_sub_category.
On the next page, as an example, we will add the Buying items sub category which is under Buy and sell. You can add the rest later.
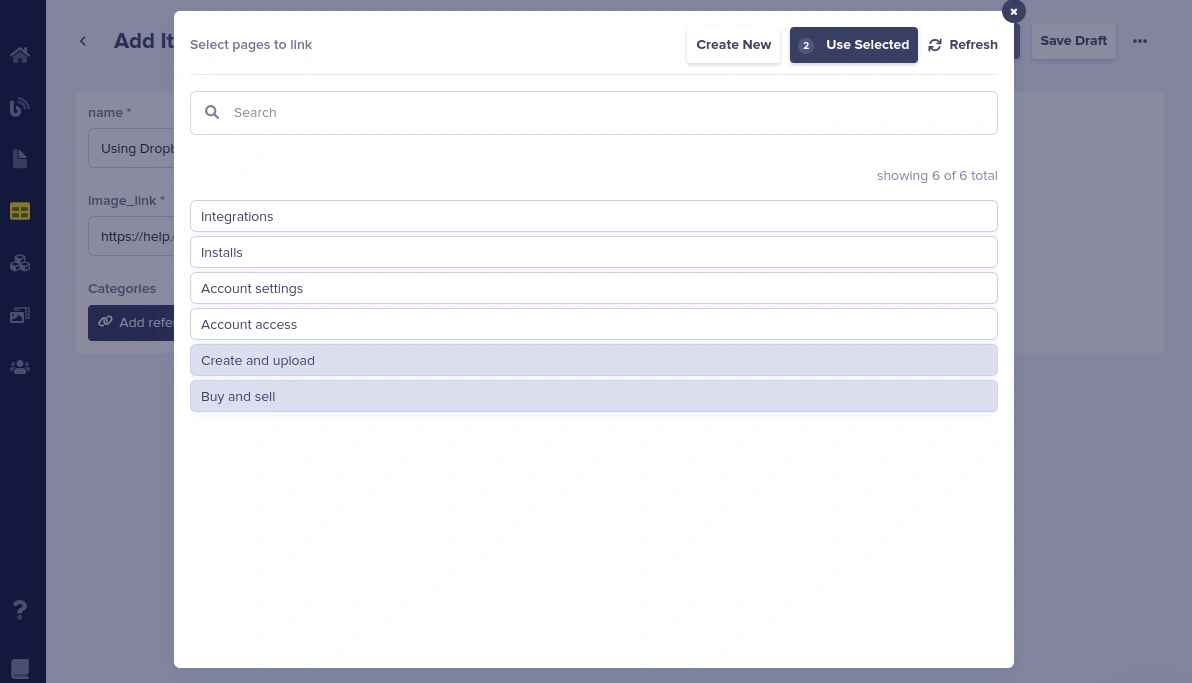
In the name text box, enter Buying items then click on the Add Reference button and a modal will open where we can select the articles to be linked to this subcategory.

Select How to buy on Dropbox Shop and click the Use Selected button.
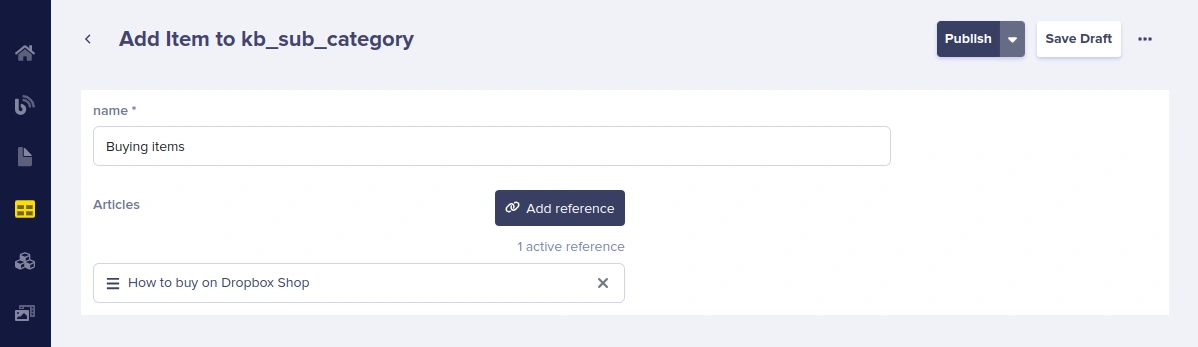
Click the Publish button.
Adding content to the category pages
For this page, we will be using the kb_category template. In the sidebar, hover over the Pages icon and click on the (+) icon next to kb_category.
On the next page, as an example, we will add the Buy and sell category. You can go ahead and add the rest later.
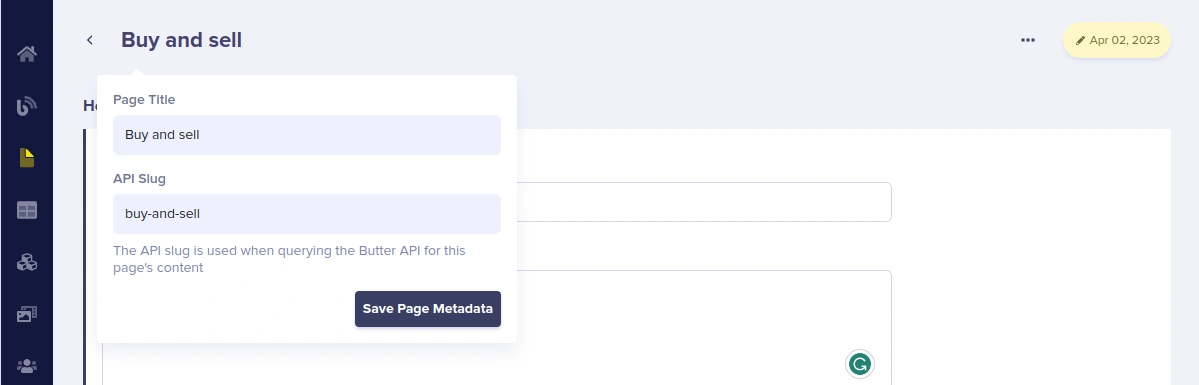
In the Page Title text box enter Buy and Sell and click on Save Page Metadata.
Next, fill in the headline, sub_headline, background_color, and text_color text boxes with the corresponding data of the category link above. Then, click on the Add Reference button and a modal will open where we can select the sub categories to be linked to this page.
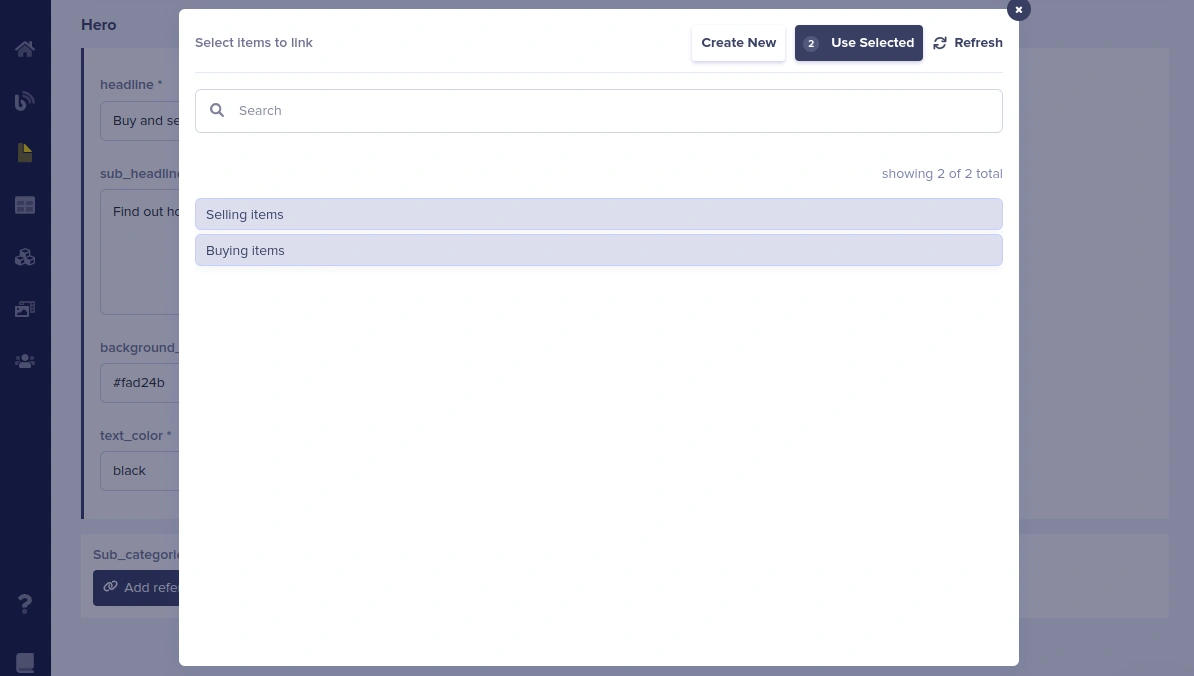
Click the Use Selected button.
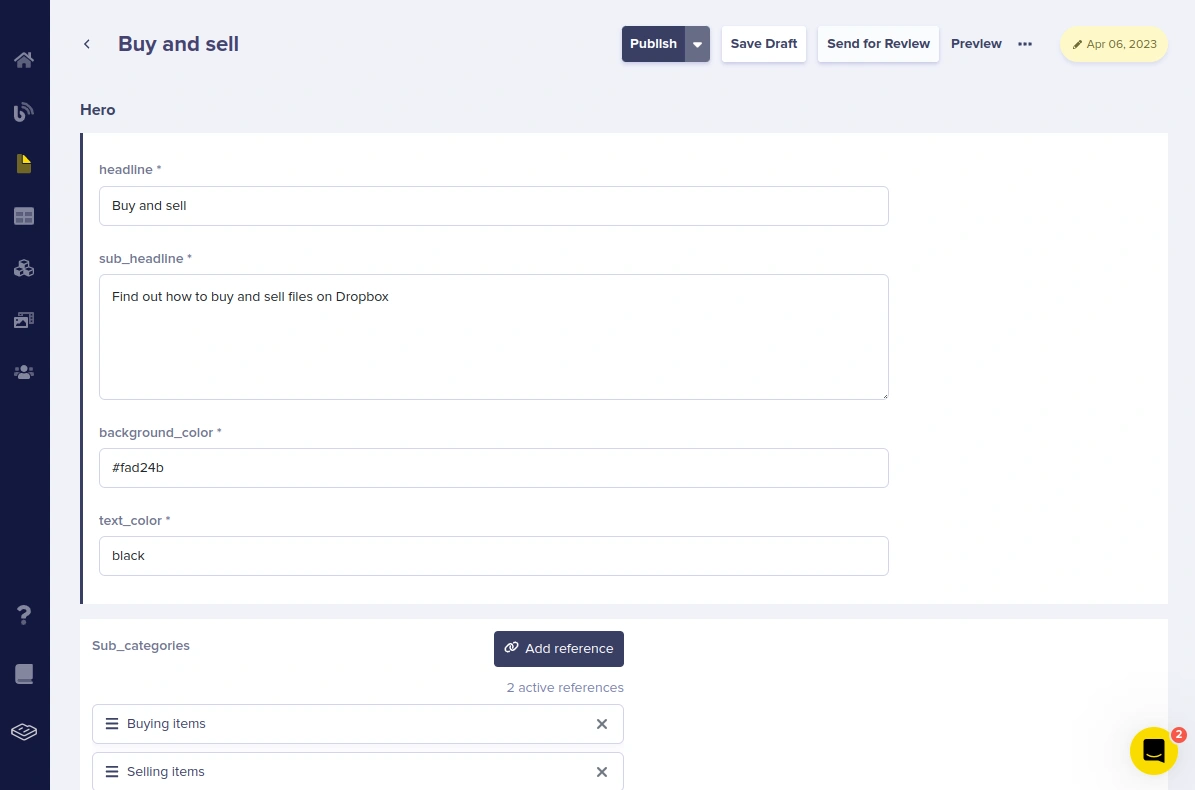
Click the Publish button.
Add content to the main category collection
For this, we will be using the kb_main_category collection. In the sidebar, hover over the Collections icon and click on the (+) icon next to kb_main_category.
On the next page, as an example, we will add the Using Dropbox main category which is the home page. You can go ahead and add the rest later.
Next, fill in the name and image_link text boxes with the corresponding data. Then, click on the Add Reference button and a modal will open where we can select the categories to be linked to this page.
Click the Use Selected button.
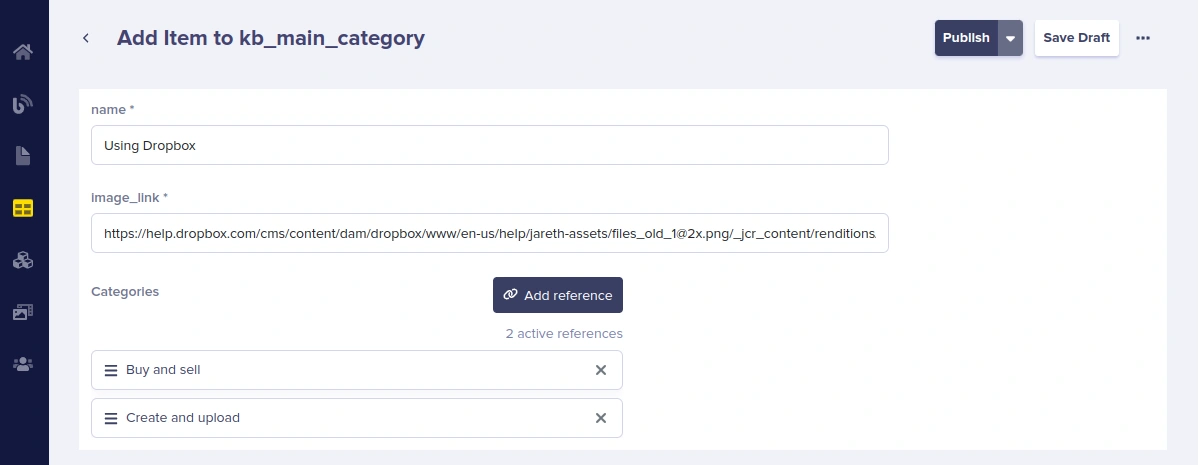
Click the Publish button. With this, we are done setting up ButterCMS.
Setting up Express
To set up Express, first, we will create a Node project. Create a folder called express-knowledge-base. Navigate to the folder in the terminal, then enter the following command:
npm init -y
Next, enter the following command in the terminal to install our dependencies:
npm i express express-partials axios ejs dotenv
Open the created project in your code editor. Below is the folder structure of our project. Using it, let’s create the missing files and folder now for convenience.
 ┣ public
 ┃ ┗ styles.css
 ┣ views
 ┃ ┣ article.ejs
 ┃ ┣ category.ejs
 ┃ ┣ index.ejs
 ┃ ┣ layout.ejs
 ┃ ┗ search.ejs
 ┣ .env
 ┣ package-lock.json
 ┣ package.json
 ┗ server.js
Now, head over to the server.js file and add the following lines of code to create an express server and set the basic configurations we need:
const express = require('express')
const partials = require('express-partials')
const axios = require('axios')

require( 'dotenv' ).config()

const app = express()

app.use(partials());
app.set('view engine', 'ejs')
app.use(express.static('public'))


app.listen(5000, () => {
  console.log('server has started')
})
With this, we can now start our Express server using node server.js.
Now, let’s create the basic HTML structure which we will use in all our pages so that we won’t have to duplicate it in all pages.
Head over to the views/layout.ejs file and add the following lines of code:
<!DOCTYPE html>
<html lang="en">
<head>
  <meta charset="UTF-8">
  <meta name="viewport" content="width=device-width, initial-scale=1.0">
  <meta http-equiv="X-UA-Compatible" content="ie=edge">
  <link rel="stylesheet" href="/styles.css">
  <script src="https://cdn.jsdelivr.net/npm/iconify-icon@1.0.7/dist/iconify-icon.min.js"></script>
  <title><%= title %></title>
</head>
<body>
    <%- body %>
</body>
</html>
The style for this tutorial is available in this repo.
Integrating ButterCMS into our Express app
Before we can start fetching data from ButterCMS, we need our Read API Key which will be attached to requests.
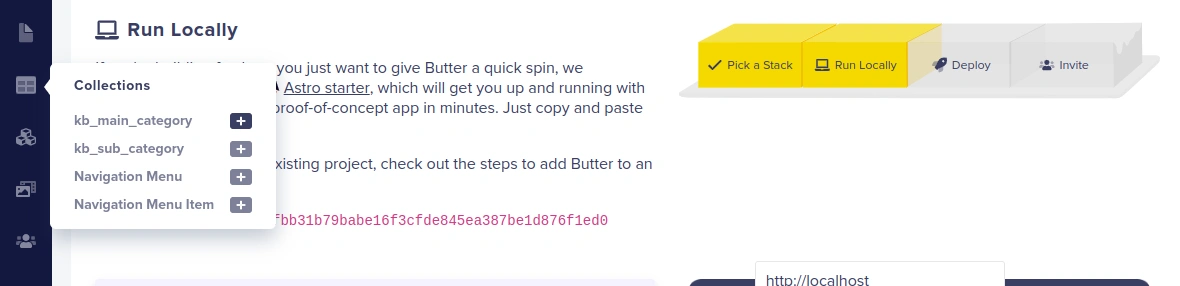
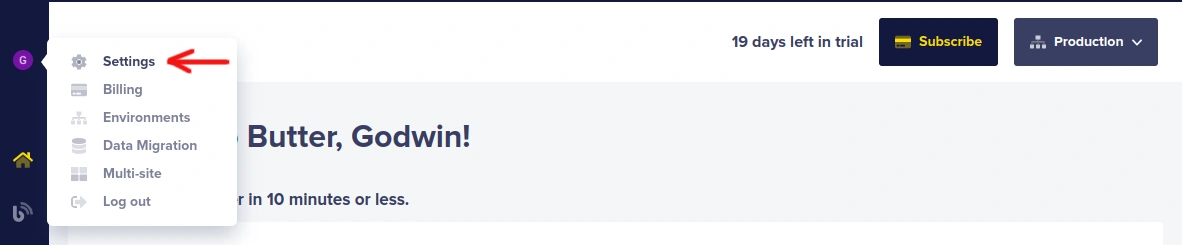
In the ButterCMS dashboard, hover over the profile icon, and a modal will open. Click on Settings.
On the next page, we will see our Read API Token.
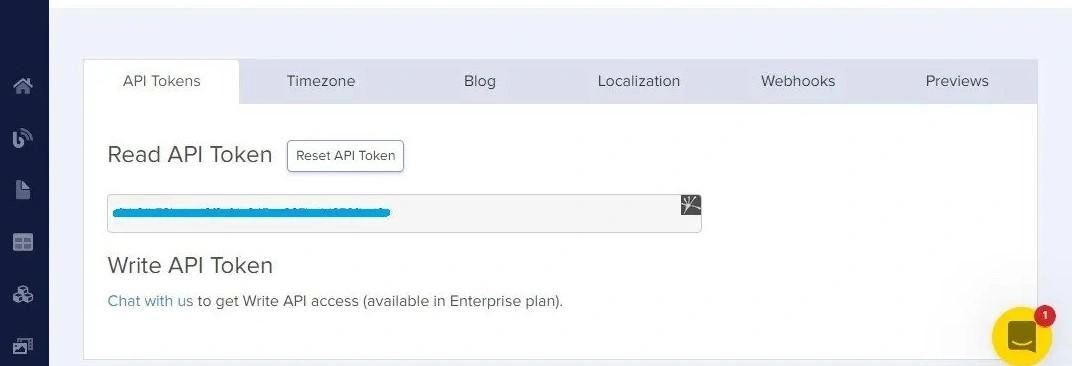
Copy it and store it in the .env file of our project like the following:
BUTTERCMS_READ_URL = <your-read-api-key>
Creating the home page
Head over to the server.js file and add the following variable and route after app.use(express.static('public')).
const BASE_URL = 'https://api.buttercms.com'

app.get('/', async(req, res) => {
  try {
    const response = await axios(`${BASE_URL}/v2/content/kb_main_category/?auth_token=${process.env.BUTTERCMS_READ_URL}`)
    const data = response.data.data.kb_main_category

    res.render('index', {
      title: 'Dropbox Help Center',
      data
    })
  }catch(err) {
    res.status(500).send('An error occured')
  }
})
Above, we created the homepage route which fetches our main categories data from ButterCMS and passes it to the index template. To display the data, head over to the views/index.ejs file and add the following lines of code:
<div class="hero">
<div>
<h1>Dropbox help center</h1>
</div>
<div>
<p>Learn how to use Dropbox and find answers to common questions</p>
</div>
</div>
<form class="search" action="/search" method="get">
<input
placeholder="Search articles (ex. reset passwords, changing billing info, etc.)"
name="query"
/>
<button>🔍</button>
</form>
<div class="categories wrapper">
<% data.forEach(mainCategory => { %>
<div class="category">
<img src="<%= mainCategory.image_link %>" alt="category"/>
<h3><%= mainCategory.name %></h3>
<hr />
<ul class="category__subCategory">
<% mainCategory.categories.forEach(category => { %>
<li> <a href="<%= category.slug %>"><%= category.name %></a> </li>
<% }) %>
</ul>
</div>
<% }) %>
</div>Now, when we open http://localhost:5000/ in our browser, we will see the following:
Creating the category page
Next, let’s create the category page. Head over to the server.js file and add the following route after the home route:
app.get('/:category', async(req, res) => {
  try {
    const response = await axios(`${BASE_URL}/v2/pages/kb_category/${req.params.category}/?auth_token=${process.env.BUTTERCMS_READ_URL}&levels=3`)
    const data = response.data.data

    res.render('category', {
      title: data.name,
      data
    })
  }catch(err) {
    res.status(500).send('An error occured')
  }
})
Above, using the slug parameter from the URL, we are fetching the corresponding category page from ButterCMS and passing the data to the category template. We attached the levels parameter in the request URL and set its value to 3. With this, the returned data will contain the content from the second reference (articles, in our case) in the reference hierarchy.
To display the data, head over to the views/category.ejs file and add the following lines of code:
<div class="categoryPage">
<div class="hero">
<div style="background-color: <%= data.fields.hero.background_color %>; color: <%= data.fields.hero.text_color %>">
<h1><%= data.fields.hero.headline %></h1>
<p><%= data.fields.hero.sub_headline %></p>
</div>
</div>
<form class="search" action="/search" method="get">
<input
placeholder="Search our help center"
name="query"
/>
<button>🔍</button>
</form>
<div class="categoryPage__categories wrapper">
<% data.fields.sub_categories.forEach(subCategory => { %>
<div>
<h2><%= subCategory.name %></h2>
<div class="categoryPage__categoriesArticles">
<% subCategory.articles.forEach(article => { %>
<a href="blog/<%= article.slug %>"><%= article.name %></a>
<% }) %>
</div>
</div>
<% }) %>
</div>
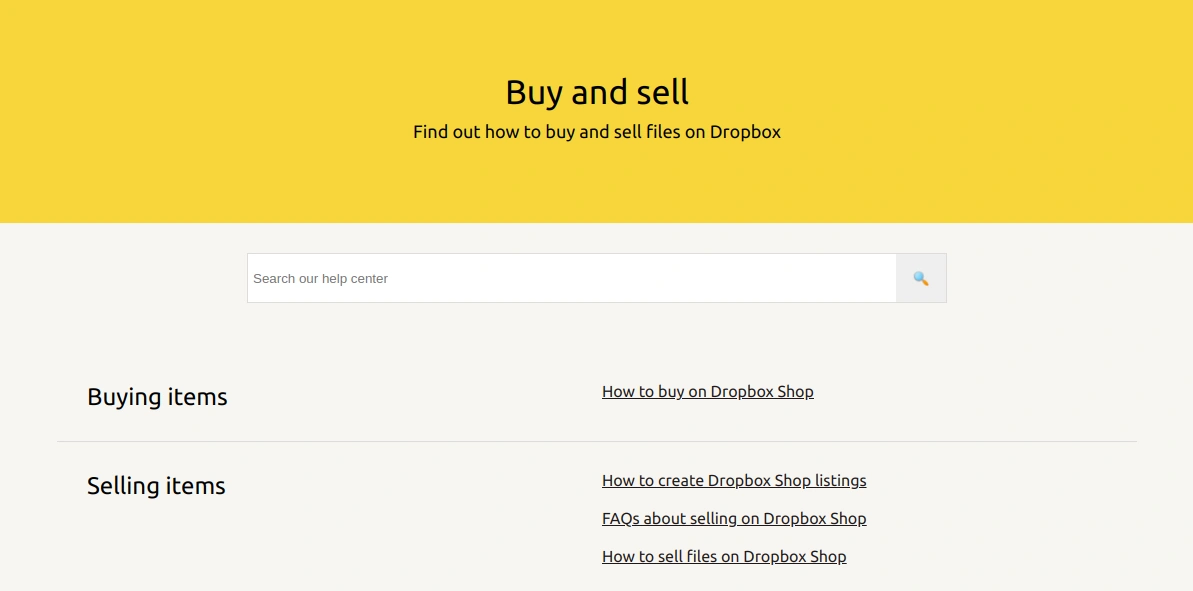
</div>Now, when we click on the Buy and sell category on the home page, we will see the corresponding page.
Creating the article page
Next, let’s create the article page. Head over to the server.js file and add the following route after the category route:
app.get('/blog/:slug', async(req, res) => {

  try {
    const response = await axios(`${BASE_URL}/v2/pages/kb_article/${req.params.slug}/?auth_token=${process.env.BUTTERCMS_READ_URL}`)
    const data = response.data.data

    res.render('article', {
      title: 'Article',
      data
    })
  }catch(err) {
    res.status(500).send('An error occured')
  }
})
Above, using the slug parameter from the URL, we are fetching the corresponding article from ButterCMS and passing its data to the blog template. To display the data, head over to the views/article.ejs file and add the following lines of code:
<div class="article wrapper">
<h1><%= data.name %></h1>
<div class="article__body">
<%- data.fields.body %>
</div>
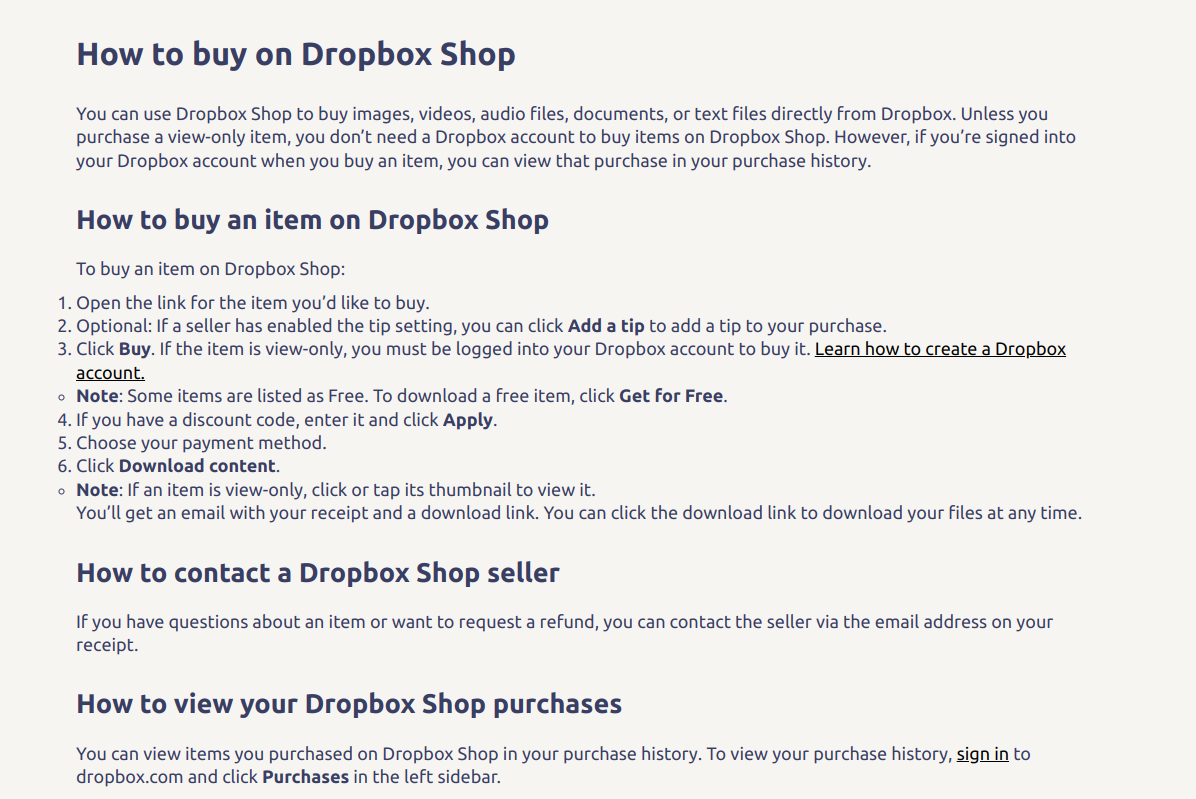
</div>With this, when we click on an article, for example How to buy on Dropbox Shop in the Buy and sell category page, we can view the full post.
Implementing search functionality
Finally, for the search functionality, head over to the server.js file and add the following route after the home route:
app.get('/search', async(req, res) => {
  try {
    const response = await axios(`${BASE_URL}/v2/pages/search/?query=${req.query.query}&page_type=kb_article&auth_token=${process.env.BUTTERCMS_READ_URL}`)
    const results = response.data.data

    res.render('search', {
      title: 'Search',
      searchValue: req.query.query,
      results
    })
  }catch(err) {
    res.status(500).send('An error occured')
  }
})
Above, using the search value which will be attached to the URL, we are fetching all matching results and passing the returned data to the search template. To display the data, head over to the views/search.ejs file and add the following lines of code:
<div class="searchPage">
<div class="searchPage__hero">
<div class="wrapper">
<h1>Search</h1>
<form class="search" action="/search/" method="get">
<input
placeholder="Search our help center"
name="query"
/>
<button>🔍</button>
</form>
</div>
</div>
<div class="searchPage__articles wrapper">
<div>
<h3>Results for: <%= searchValue %></h3>
</div>
<div class="searchPage__articlesList">
<% results.forEach(article => { %>
<div>
<a href="/blog/<%= article.slug %>"><%= article.name %></a>
</div>
<% }) %>
</div>
</div>
</div>With this, the search functionality should now be working.
Our final result
If you have gotten to this point of the article, big congratulations to you for a job well done. After all the setting up and coding, our final result should look like below:
Final thoughts
In conclusion, building a knowledge base using Express.js and ButterCMS provides an intuitive and user-friendly way to manage your content. Express.js simplifies the process of building web applications and APIs with Node.js, providing a consistent way of building web applications with a flexible and customizable API.
ButterCMS allows you to easily manage and structure your content with custom content models and API-based integration. Its SEO-friendly design and fast performance ensure that your knowledge base is easily discoverable and accessible to users around the world. With the combination of Express.js and ButterCMS, building a knowledge base has never been easier.
Enjoyed this Express.js website tutorial? Then you'll love these:

