
A knowledge base is a collection of organized and structured information that makes the information easy to find and access. It can be considered a database of information used to answer user/customer questions, solve problems, or provide guidance on a particular subject. Individuals, organizations, or communities can create and maintain a knowledge base. The information within a knowledge base may be made available in various formats, such as online, print, or software applications. Knowledge bases are often used in customer service, technical support, and other contexts where it is important to have quick and easy access to reliable information.
There are several types of knowledge bases that can be used for various purposes. Some common types include:
- Topic-based knowledge base: This type of knowledge base organizes information by topic or subject area, making it easy to find information related to a specific subject. This is what we will be building in this tutorial.
- FAQ knowledge base: This type of knowledge base is organized as a list of frequently asked questions (FAQs) and their answers. It is often used in customer service and technical support contexts.
- Decision tree knowledge base: This type of knowledge base is organized as a series of questions and answers that guide the user through a decision-making process. It can be used to help users make informed decisions based on their specific needs and preferences.
- Glossary knowledge base: This type of knowledge base is a list of terms and definitions related to a particular subject or field. It is often used as a reference tool for people learning about a new topic or for those who need to understand complex technical terms.
- How-to knowledge base: This type of knowledge base provides step-by-step instructions for completing specific tasks or processes. It is often used in training and educational contexts.
- Case study knowledge base: This type of knowledge base is a collection of case studies that illustrate how a particular product, service, or solution has been successfully used in the past. It can help demonstrate the value and effectiveness of a particular offering.
This tutorial will focus on building a "How-to" Gatsby knowledge base with ButterCMS serving as our content backend.
Table of contents
Why use Gatsby?
Gatsby is an open-source framework for building modern web applications with React. It is designed to make it easy to create fast, secure, and scalable websites and applications. Gatsby uses GraphQL and React to create static sites that are highly performant and easy to maintain. It allows developers to build and deploy websites and applications quickly and easily, with a focus on performance, security, and scalability.
Gatsby also provides a rich ecosystem of plugins and tools that can be used to extend its functionality and make it easier to build and maintain web applications. It is used by a wide range of organizations, from small businesses to large enterprises, to build websites and applications that are optimized for the modern web.
There are several reasons why someone might choose to use Gatsby to build a knowledge base:
- Performance: Gatsby is designed to create fast, performant websites and applications that load quickly and provide a seamless user experience. It uses a number of techniques, such as server-side rendering, code splitting, and asset optimization, to ensure that sites built with Gatsby are fast and responsive.
- Security: Gatsby sites are statically generated, which means that they do not require a backend server to run. This makes them more secure as there is no server to potentially be hacked.
- Scalability: Gatsby sites are designed to scale, making them suitable for large, high-traffic websites and applications. They can be easily deployed to a variety of hosting platforms, such as Netlify, AWS, and more.
- Ecosystem: Gatsby has a large and active community of developers and users, which means there is a wealth of resources and tools available to help you build and maintain your site or application.
- Simplicity: Gatsby makes it easy for developers to build and deploy modern web applications, with a focus on simplicity and ease of use. Its powerful plugin system allows developers to easily extend the functionality of their site or application, while its React-based architecture makes it easy to build and maintain.
How we'll be using ButterCMS in this tutorial
ButterCMS is a headless content management system (CMS) that allows users to create, edit, and publish content on their website or application. It is designed to make it easy for non-technical users to manage the content on their site, without requiring any coding or technical knowledge. ButterCMS provides a user-friendly interface for creating and organizing content and tools for managing media, such as images and videos. It also offers integration with a variety of other platforms and tools, such as Google Analytics, Mailchimp, and more.
It is particularly well-suited for use with static site generators, such as Gatsby, as it allows users to easily create and manage content without having to worry about building and deploying a backend server.

In this tutorial, we will be using a powerful tool from ButterCMS known as page types. Page types are essentially reusable pages you create that define the structure of a specific type of content on a website or application. They allow users to create and organize content in a consistent way, while also giving them the flexibility to customize the layout and design of their pages. Page types can be created and customized using a variety of components and fields, such as text, images, and videos, as well as custom fields that the user can define.
Page types can be used to create a variety of different types of content, such as blog posts, landing pages, product pages, and more. You can manage and edit your page types through the ButterCMS dashboard and display them on a website or application using the ButterCMS API. Let's get started building a knowledge base with Gatsby and ButterCMS in the next section.
Gatsby knowledge base: Tutorial prerequisites
The following prerequisites are needed to follow along with this tutorial:
- Node.js and npm installed on your machine
- A ButterCMS account
- Knowledge of React, JavaScript, and GraphQL
Building a knowledge base with Gatsby and ButterCMS
Create a new Gatsby application by running the command below:
npm init gatsby
Answer the prompted questions and this will create a new Gatsby application for you.
Next, we need to add TailwindCSS to our Gatsby application for styling purposes. Run the command below to install Tailwind and its peer dependencies in your application:
npm install -D tailwindcss postcss autoprefixer gatsby-plugin-postcssnpx
Run the command below to create a Tailwind.config.js file:
tailwindcss init -p
The next thing we need to do is to enable the Gatsby PostCSS plugin. In the gatsby-config.js file, enable gatsby-plugin-postcss:
// gatsby.config.js
module.exports = {
  plugins: [
    'gatsby-plugin-postcss',
    // ...
  ],
}
Next, add the paths to the Tailwind template files in the tailwind.config.js file:
// tailwind.config.js

/** @type {import('tailwindcss').Config} */
module.exports = {
  content: [
    "./src/pages/**/*.{js,jsx,ts,tsx}",
    "./src/components/**/*.{js,jsx,ts,tsx}",
  ],
  theme: {
    extend: {},
  },
  plugins: [],
}
Create a styles/global.css file in the src folder and add the @tailwind directives.
@tailwind base;
@tailwind components;
@tailwind utilities;
Next, create a gatsby-browser.js file at the root of your project and import the created styles/global.css file into it:
import './src/styles/global.css'
And with that, we are done installing TailwindCSS in our project.
Setting up ButterCMS
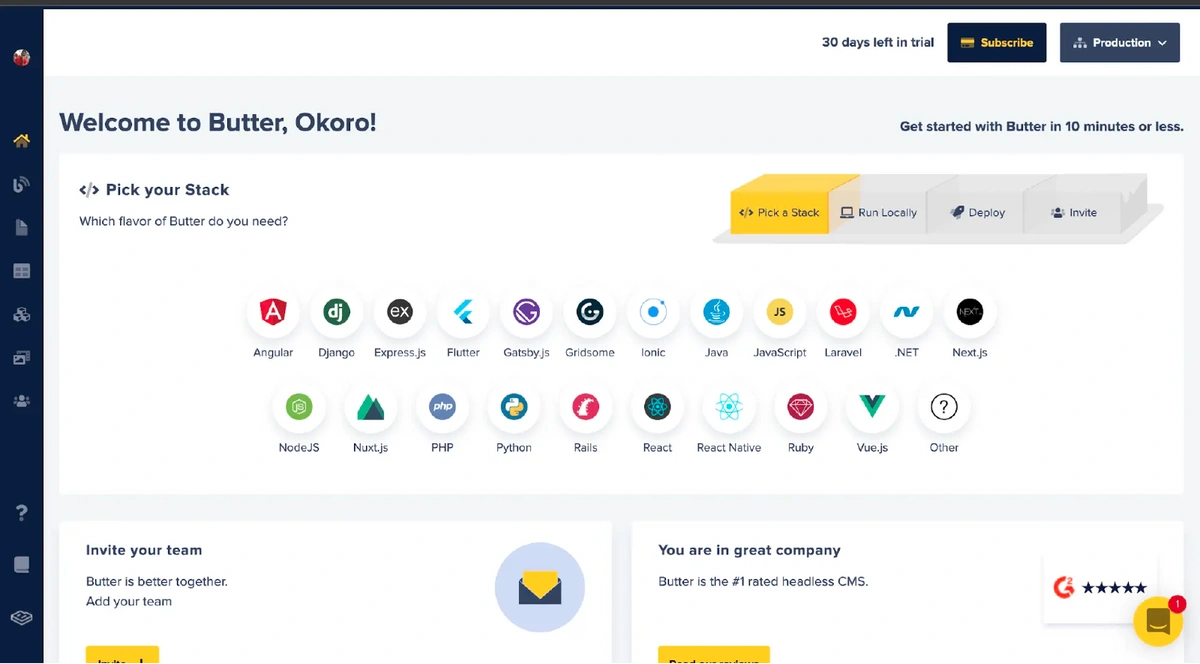
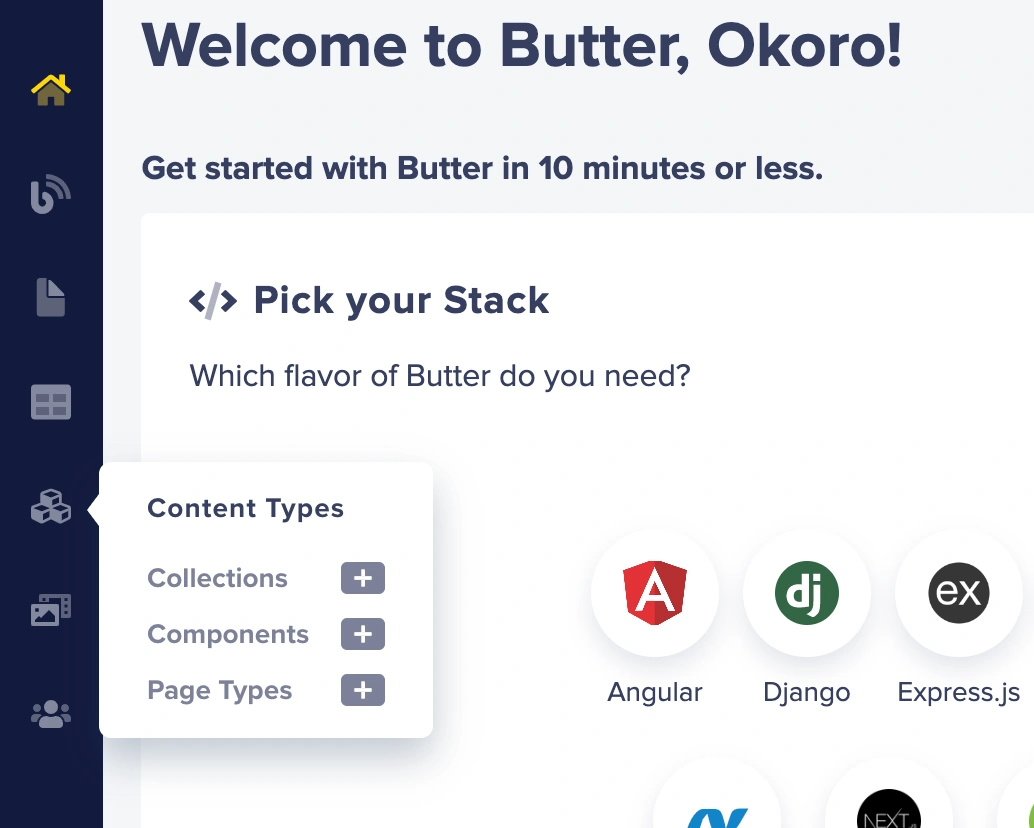
Navigate to the ButterCMS site and create an account by clicking on the link here. A dashboard that looks like the image below will be created for you.
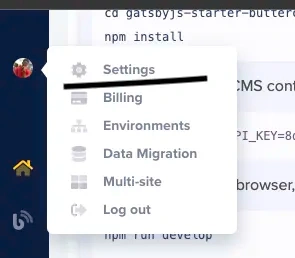
Create an API key which will be crucial for making requests to and fetching data from ButterCMS. Navigate to the Account tab and click on Settings:
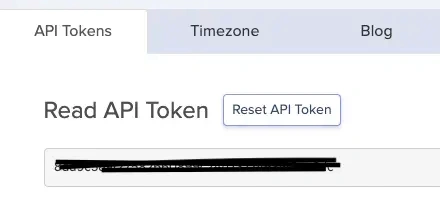
Get your API key from the API Tokens tab and store it securely.
Building the knowledge base page types
Navigate to your ButterCMS dashboard, click on the Content Types tab and then go to Page Types, as shown in the image below:
You will be directed to a page that looks like the image below:
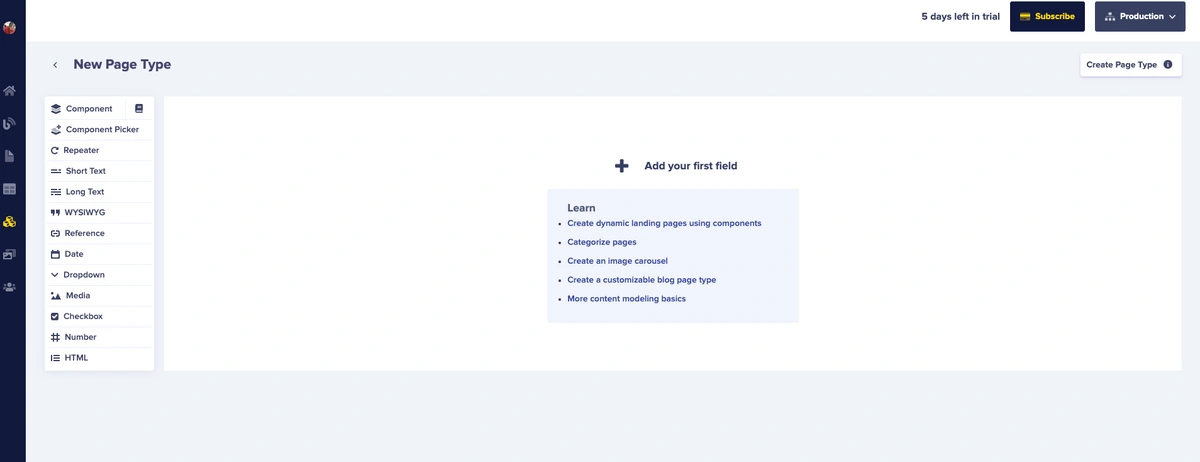
Choose the following fields for your new page type:
- A short text for the knowledge base article name
- A long text for the knowledge base article description
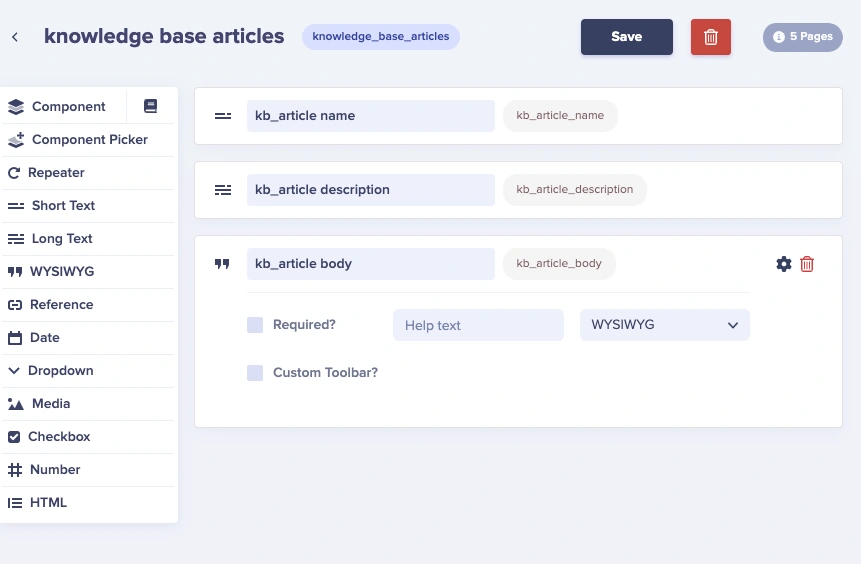
- A WYSIWYG (What You See Is What You Get) editor for the article body
Save the page type with the name of your choice. I saved mine with knowledge base articles and make sure that the created slug matches the name you will be passing into the pageTypes array in your gatsby-config.js file.
Populating the newly created page type
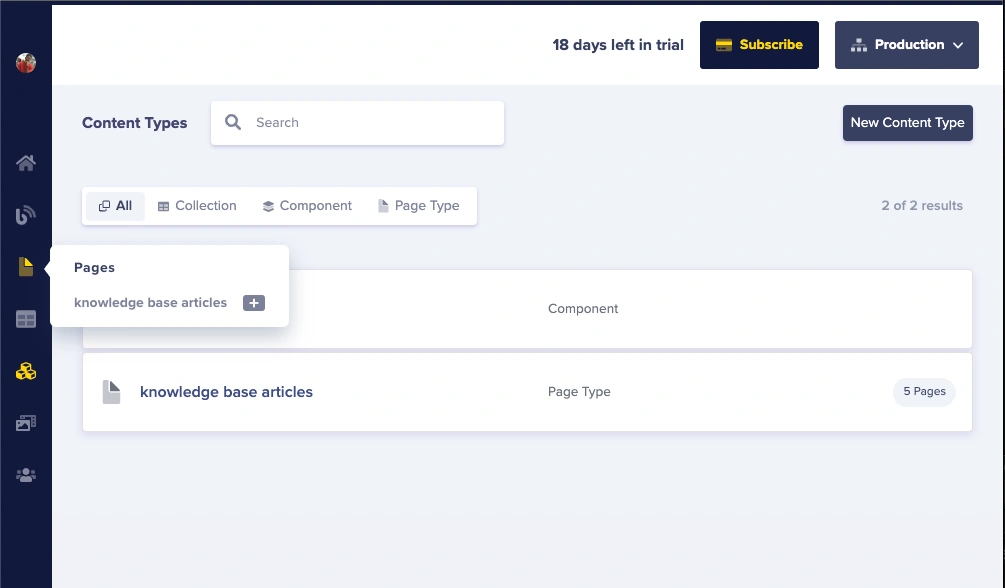
Navigate to the Pages tab and click on the newly created knowledge base articles page types, as shown in the image below:
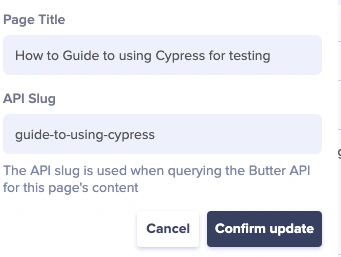
Type in the title of the page and the slug and then save them as shown in the image below:
Now populate the various sections with the data you have in mind as shown in the image below, then click Publish:
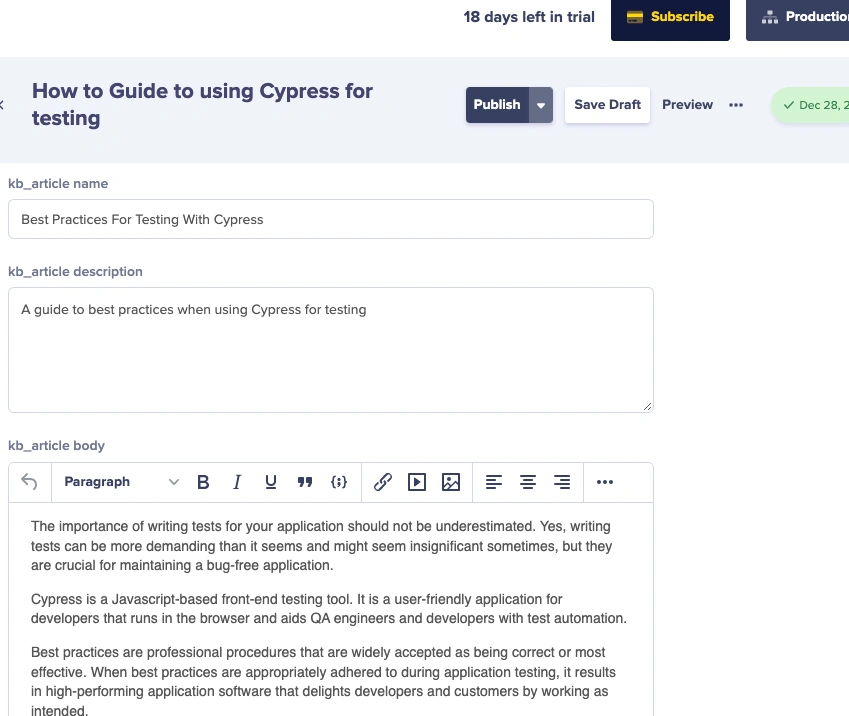
Do this for however many articles you want to do. Click on Publish and whenever you are ready, let's pull our data from ButterCMS into our application.
Building the Gatsby frontend
The next step is to install the ButterCMS Gatsby Source plugin which will be used in pulling various posts and data from ButterCMS via GraphQL. We can do that by running the command below:
npm install --save gatsby-source-buttercmsNavigate to the gatsby-config.js file, copy the code below, and paste it there.
/**
 * @type {import('gatsby').GatsbyConfig}
 */
require('dotenv').config({
  path: `.env.${process.env.NODE_ENV}`,
});
module.exports = {
  siteMetadata: {
    name: `ButterCMS knowledge base with Gatsby`,
    title: `knowledge-base-with-gatsby`,
    siteUrl: `https://www.yourdomain.tld`,
  },
  plugins: [
    'gatsby-plugin-postcss',
    {
      resolve: `gatsby-source-buttercms`,
      options: {
        authToken: process.env.BUTTER_CMS_API_KEY,
        pages: [`Knowledge base with Gatsby and ButterCMS`],
        pageTypes: [
          `knowledge_base_articles`,
        ],
      },
    },
  ],
};
We are resolving our ButterCMS plugin in the code block above. We are also pointing to the .env.development file that we will create to hold the API key that we got from ButterCMS.
Note: Please note that the name you are passing into the pageTypes array must match the name of the page type component which you will be creating in the ButterCMS dashboard.
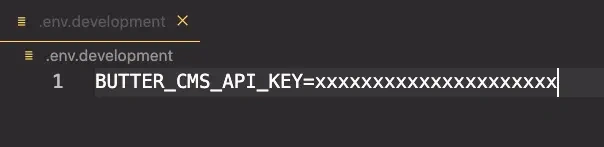
Create a .env.development file at the root of the folder and paste your API key into it. It should look like the image below:
Creating the knowledge base index page
Replace the code in src/pages/index.js with the code block below:
import React from 'react';
import { graphql } from 'gatsby';
import Box from '../components/Box';
function Index({ data }) {
  const [searchText, setSearchText] = React.useState('');
  const posts = data.allButterPage.edges;

 return (
    <div>
      <main>
        <div
          style={{
            color: 'black',
          }}
          className="py-10 bg-green-300 flex text-center align-center justify-center items-center"
        >
          <div>
            <h1 className="mb-3 text-4xl font-bold">How can I help you?</h1>
            <form
              onSubmit={(e) => {
                e.preventDefault();
              }}
              className="flex my-8"
            >
              <input
                value={searchText}
                onChange={handleChanges}
                className="shadow appearance-none border rounded w-full py-2 px-3 text-gray-700 leading-tight focus:outline-none focus:shadow-outline
                placeholder:text-center
                "
                type="text"
                placeholder="Search through the knowledge base for answers..."
              />
            </form>
          </div>
        </div>
        <div className="bg-gray-100 h-full">


          {filteredPost && (
            <ul className="mt-6 flex flex-wrap items-center justify-around sm:w-full">
              {filteredPost.map(({ node }) => (
                <li key={node.id}>
                  <Box
                    name={node.kb_article_name}
                    slug={node.slug}
                    description={node.kb_article_description}
                  />
                </li>
              ))}
            </ul>
          )}
        </div>
      </main>
    </div>
  );
}
export default Index;
export const query = graphql`
  query {
    allButterPage {
      edges {
        node {
          slug
          id
          kb_article_name
          kb_article_description
        }
      }
    }
  }
`;
The code above contains the structure of the home page of our application. We used the useState hook from React to handle the search bar state. This will be instrumental for when we want to implement search functionality for our application. We passed a handleChanges function to our input, which we will create later, that will also be used for the search functionality.
Next, we export the GraphQL query with the data we specifically requested for the Index component. We destructured the data which we then mapped through and then passed to the Box component, which we will create in the code block below:
// src/components/Box.js
import React from 'react';
import { Link } from 'gatsby';
export default function Box({ description, name, slug }) {
return (
<>
<Link
to={`/${slug}`}
className="bg-green-100 shadow-lg h-60 text-center flex justify-center items-center m-10 rounded-lg w-96 cursor-pointer hover:bg-gray-100"
>
<div className="p-10">
<h2 className="text-3xl font-semibold mb-5"> {name} </h2>
<p> {description} </p>
</div>
</Link>
</>
);
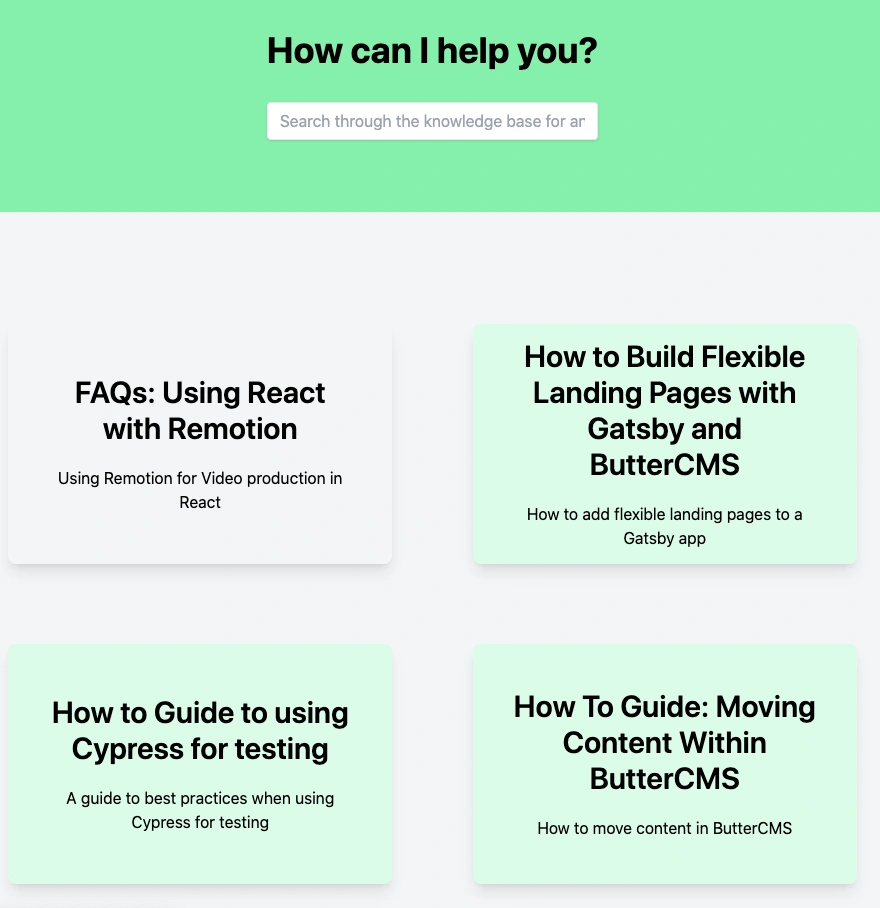
}When we navigate to the browser, we should see the content from ButterCMS getting rendered as shown in the image below:
Displaying various knowledge base articles
Create a folder in the src folder called templates/article-details.js and paste the code below into it.
// src/templates/article-details.js

import React from 'react';
import { graphql, Link } from 'gatsby';
const Index = ({ data }) => {
  const post = data.allButterPage.edges[0].node;
  return (
    <div>
      <header>
        <nav>
          <div className="h-24 flex items-center justify-center">
            <Link to="/">
              <h1 className="bg-green-400 cursor-pointer">Back to home</h1>
            </Link>
          </div>
        </nav>
      </header>
      <main>
        <div className="bg-gray-100 flex justify-center">
          <div className="mt-10 max-w-5xl bg-white p-10">
            <h1 className="text-4xl mb-10 flex justify-center">
              {' '}
              {post.kb_article_name}{' '}
            </h1>
            <div
              dangerouslySetInnerHTML={{
                __html: post.kb_article_body,
              }}
            ></div>
          </div>
        </div>
      </main>
    </div>
  );
};
export default Index;
export const query = graphql`
  query BlogDetail($slug: String) {
    allButterPage(filter: { slug: { eq: $slug } }) {
      edges {
        node {
          kb_article_name
          kb_article_body
          slug
        }
      }
    }
  }
`;
The next step is to tell Gatsby to look at this template whenever we click on an article with a specific slug. We will do this by utilizing the Gatsby createPages function.
Create a gatsby-node.js file in the root folder of our application and then paste the code below into it:
const path = require('path');
exports.createPages = async function ({ actions, graphql }) {
const { data } = await graphql(`
query {
allButterPage{
edges {
node {
slug
id
}
}
}
}
`);
data.allButterPage.edges.forEach((data) => {
const slug = data.node.slug;
actions.createPage({
path: slug,
component: path.resolve(`./src/templates/article-details.js`),
context: { slug: slug },
});
});
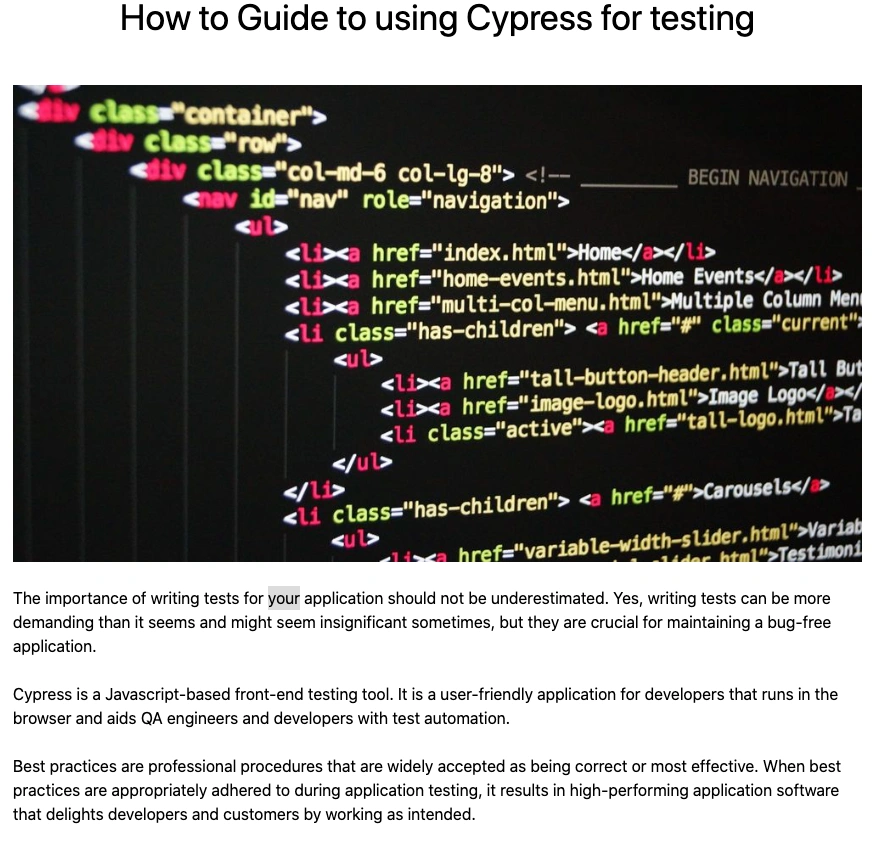
};The result of this is that when we click on an article we get directed to the unique article page. We get directed to the article shown in the image below because we clicked on How to Guide to using Cypress for testing:
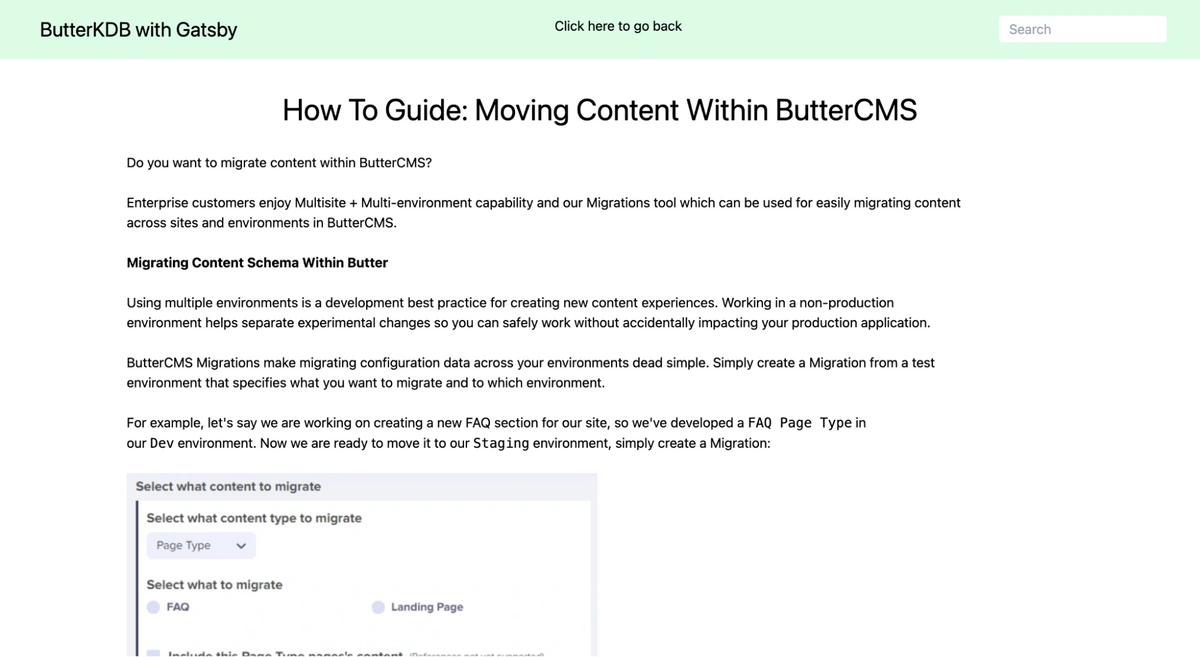
Here's another rendered page that appears when we click on How To Guide: Moving Content Within ButterCMS:
Below is a GIF showing the application:
Implementing search functionality
In the home page, we will implement search functionality which will enable readers to quickly search through our knowledge base.
// src/pages/index.js

const [searchText, setSearchText] = React.useState('');
  const [filteredPost, setFilteredPost] = React.useState('');
  const posts = data.allButterPage.edges;
  React.useEffect(() => {
    setFilteredPost(posts);
  }, [posts]);
  function handleChanges(e) {
    setSearchText(e.target.value);
    const filteredData = posts.filter(function (post) {
      return post.node.article_name
        .toLowerCase()
        .includes(e.target.value.toLowerCase());
    });
    setFilteredPost(filteredData);
  }
In the code block above, we created a state event for our post which we got from our GraphQL query. We then created the handleChanges function where we check the input of the user, match it to the post that the user is searching for, and then return that post.
The full index.js code is shown below:
import React from 'react';
import { graphql } from 'gatsby';
import Box from '../components/Box';
function Index({ data }) {
  const [searchText, setSearchText] = React.useState('');
  const [filteredPost, setFilteredPost] = React.useState('');
  const posts = data.allButterPage.edges;
  React.useEffect(() => {
    setFilteredPost(posts);
  }, [posts]);
  function handleChanges(e) {
    setSearchText(e.target.value);
    const filteredData = posts.filter(function (post) {
      return post.node.kb_article_name
        .toLowerCase()
        .includes(e.target.value.toLowerCase());
    });
    setFilteredPost(filteredData);
  }
  return (
    <div>
      <title>Knowledge Base with Gatsby and ButterCMS</title>
      <main>
        <div
          style={{
            color: 'black',
          }}
          className="py-10 bg-green-300 flex text-center align-center justify-center items-center"
        >
          <div>
            <h1 className="mb-3 text-4xl font-bold">How can I help you?</h1>
            <form
              onSubmit={(e) => {
                e.preventDefault();
              }}
              className="flex my-8"
            >
              <input
                value={searchText}
                onChange={handleChanges}
                className="shadow appearance-none border rounded w-full py-2 px-3 text-gray-700 leading-tight focus:outline-none focus:shadow-outline
                placeholder:text-center
                "
                type="text"
                placeholder="Search through the knowledge base for answers..."
              />
            </form>
          </div>
        </div>
        <div className="bg-gray-100 h-full">


          {filteredPost && (
            <ul className="mt-6 flex flex-wrap items-center justify-around sm:w-full">
              {filteredPost.map(({ node }) => (
                <li key={node.id}>
                  <Box
                    name={node.kb_article_name}
                    slug={node.slug}
                    description={node.kb_article_description}
                  />
                </li>
              ))}
            </ul>
          )}
        </div>
      </main>
    </div>
  );
}
export default Index;
export const query = graphql`
  query {
    allButterPage {
      edges {
        node {
          slug
          id
          kb_article_name
          kb_article_description
        }
      }
    }
  }
`;
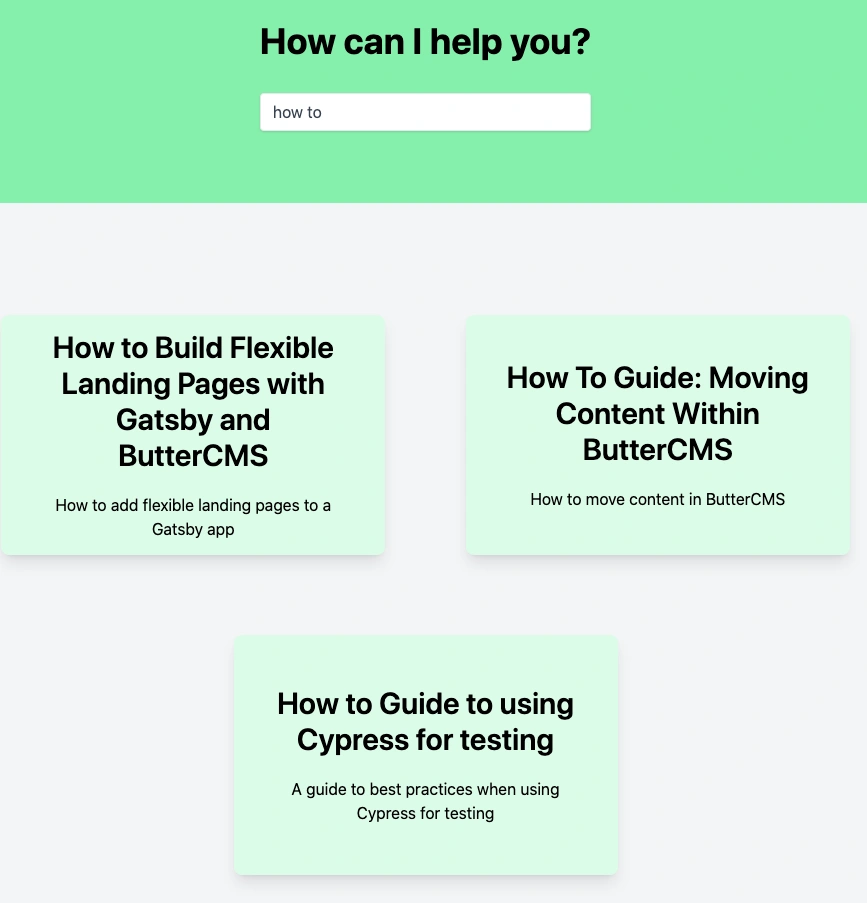
With that done, we should see our search working as shown below, where we’ve typed in “how to” in the search bar.
Final thoughts
Congratulations on getting to this point in the tutorial and creating your very own Gatsby knowledge base!
In this article, you learned how to create a knowledge base using the powerful page types which ButterCMS makes available to us. You also learned about some benefits of a knowledge base for businesses and about various types of knowledge bases. Finally, you learned how to build your own ButterCMS-powered knowledge base with Gatsby.
The code for this article can be found here.
Learn more about how you can use ButterCMS with Gatsby in the following tutorials:

