This angular blog tutorial will show you how to seamlessly integrate a blog into your Angular app using ButterCMS Blog Engine, a powerful plug-and-play blog solution. You can achieve this in four easy steps.
A blog can help immensely in many ways—without one, you're missing out on a golden opportunity to share valuable insights, engage with your audience, and boost the SEO of your site. This could leave you trailing behind competitors who effectively leverage their blogs.
But as a developer, you might recognize the challenges of adding a blog to your Angular application. ButterCMS can help you turn things around. With its easy integration, you will have your Angular blog up and running in no time.
So, let’s dive right in. See how simple it can be to create a blog with Angular.
Table of contents
Why use Angular?
Angular is a robust front-end framework developed by Google. It is used for building single-page applications (SPAs) and is known for its detailed documentation and rich support in building web and mobile apps.
These are its noteworthy features:
- Angular uses TypeScript, a strict syntactical superset of Javascript. This feature makes the apps with Angular more secure, more error-free, and easier to debug.
- Angular uses a component-based approach. This approach enables the creation of individual, self-contained code modules that can be reusable throughout the application. It makes the code easier to maintain and speeds up the development process.
In this tutorial, you will harness these features and learn to build an Angular blog website using TypeScript as the main language for Angular development.
Building a blog with Angular and ButterCMS
Before we start, make sure you have the following prerequisites:
- Knowledge of Angular
- Angular CLI installed
- Node.js and npm installed
- A ButterCMS account
The code for this tutorial can be found in this GitHub repo.
We will build a UI that displays blog posts configured in ButterCMS. The created Angular blog will allow users to search and view the details of each blog post.
Let’s discover how to create a blog with angular. This may look long, but these steps are easy enough to follow:
Step 1: Set up Angular
First, set up your Angular project.
-
In your terminal, start by cloning the repository. Navigate to your project directory and install the necessary dependencies using
npm install. -
After installation, run the development server with
ng serve. - Finally, open your browser and navigate to http://localhost:4200 to view your Angular blog example running.
Step 2: Create a blog post in Butter
Next, you will use the blog engine to create a blog post. Then, get the Read API Token, which will enable you to work with ButterCMS.
Here’s how you do it.
Head to the ButterCMS website and set up a user account. After logging in, you will be directed to the dashboard. Navigate to the blog engine by clicking the Blog Posts icon in the sidebar.

Then, create a new post by clicking on the New Post button at the top right of the page. On the next page, write your blog content with the WYSIWYG editor, fill out the rest of the inputs, and click on the Publish button at the top right of the page.
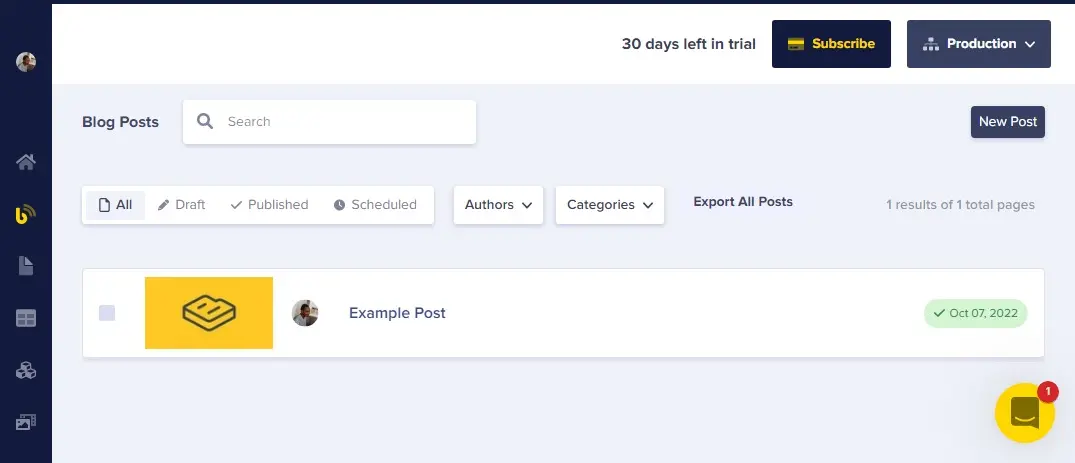
An example post has already been created, but let’s make a new one to get familiar with how it’s done.
Click on the New Post button at the top right of the page. On the next page, write your blog content with the WYSIWYG editor, fill out the rest of the inputs, and click on the Publish button at the top right of the page. You can use dummy data for this tutorial.
Below is a GIF that demonstrates the process.
Then, hover over your profile picture at the top of the sidebar. Select Settings in the dropdown that appears.
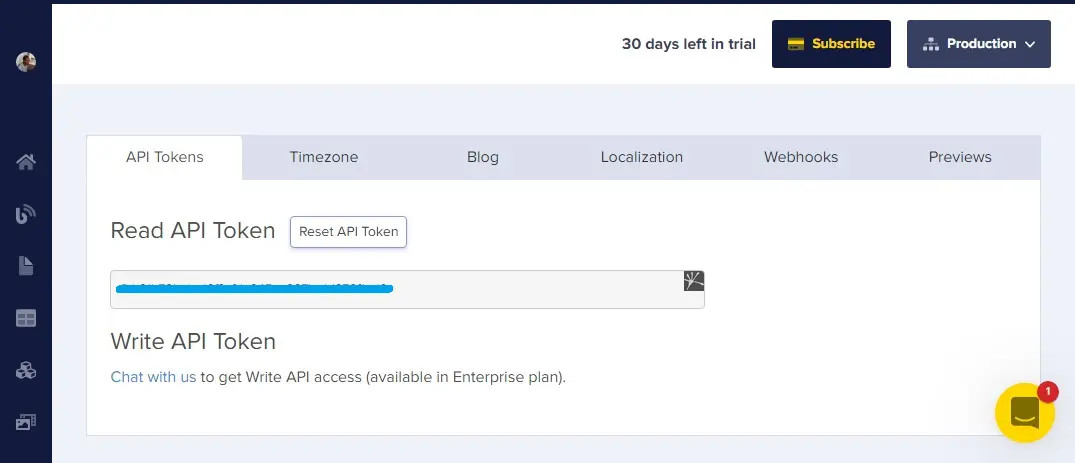
Copy the Read API token and store it in the src/environments/environment.ts file in our app, which should look like this:
export const environment = {
  production: false,
  readApiToken: "<your-read-api-token-here>"
};
Step 3: Feed blog posts to the app using the ButterCMS content API
You are now ready to use the content created with the ButterCMS blog engine. You can use the content API or ButterCMS SDK. For this tutorial, you will be using the content API.
Here’s how:
Start by displaying the blog posts on the home page. Head over to app/app.module.ts. Add the HttpClient module to your app since we will be using it for sending requests.
import { HttpClientModule } from '@angular/common/http';
imports: [
  //..
  HttpClientModule
]
Next, head over to app/pages/home/home.component.ts and add the following import:
import { HttpClient } from '@angular/common/http';
import {environment} from '../../../environments/environment'
Next, modify HomeComponent to the following:
export class HomeComponent implements OnInit {

  blogPosts:any[] = []
  searchValue = ''

  constructor(private http: HttpClient) { }

  ngOnInit(): void {  this.http.get(`https://api.buttercms.com/v2/posts/?exclude_body=true&auth_token=${environment.readApiToken}`).subscribe((res: any) => {
      this.blogPosts = res.data
    })
  }
}
Above, in the ngOnInit method using HttpClient, you will fetch all blog posts from ButterCMS and store them in the blogPosts property.
To display the blog posts, modify the home.component.html file to the following:
<div>
<h2>Angular Blog</h2>
<div class="wrapper cardList">
<app-card
*ngFor="let blogPost of blogPosts"
[slug]="blogPost.slug"
[date]="blogPost.created"
[summary]="blogPost.summary"
[title]="blogPost.title"
[image]="blogPost.featured_image"
[authorImage]="blogPost.author.profile_image"
[authorName]="blogPost.author.first_name + blogPost.author.last_name"
>
</app-card>
</div>
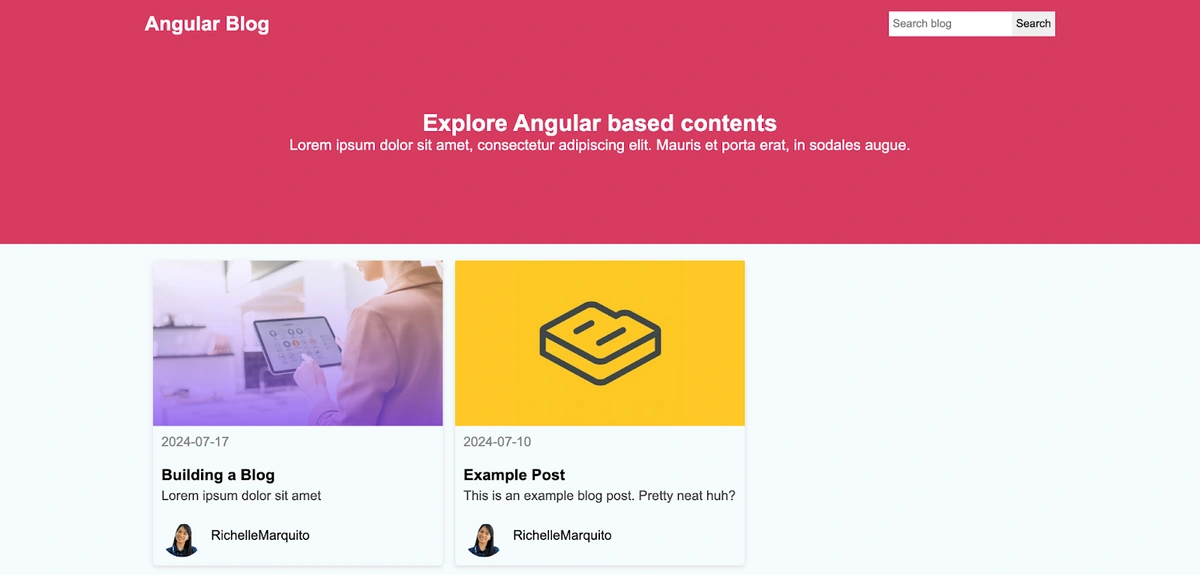
</div>The fetched blog post will be displayed, but you will notice that the dates aren’t in the right format.
To correct this, head over to app/components/card/card.component.ts and modify the ngOnInit method to the following:
ngOnInit(): void {
this.date = new Date(this.date).toISOString().split('T')[0]
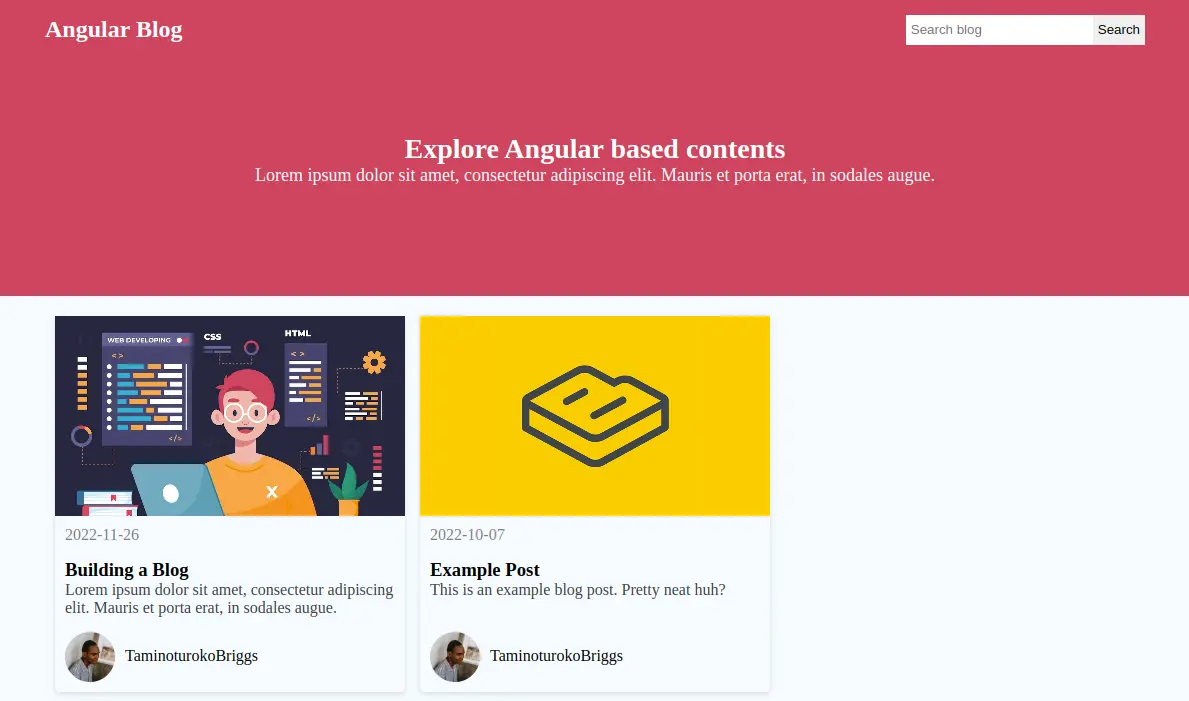
}When we open our app in the browser, we will see the following:
Now, you will make the search bar work. You will use the text entered in the search bar to filter posts by their title and display the results.
For this, you will need to create a property that will hold the filtered post used for displaying the UI rather than directly filtering the fetched posts in the blogPosts property.
First, add the following property in HomeComponent:
filteredBlogs: any[] = []
Since the filteredBlogs property will be used to display the UI, it needs to contain the fetched blog post when the app loads. To do this, modify the ngOnInit method to the following:
ngOnInit(): void {
this.http.get(`https://api.buttercms.com/v2/posts/?exclude_body=true&auth_token=${environment.readApiToken}`).subscribe((res: any) => {
    this.blogPosts = res.data
    this.filteredBlogs = this.blogPosts
  })
}
Next, let’s create the search method by adding the following lines of code after the constructor:
handleSearch() {
  this.filteredBlogs = this.blogPosts.filter((blog) => (
    blog.title.trim().toLocaleLowerCase()
    .includes(this.searchValue.trim().toLocaleLowerCase())
  ))
}
Now let’s call the above method when the search form is submitted and display the UI with the filteredBlogs property.
Head over to the HTML file home.component.html and modify the opening form tag to the following:
<form (submit)="handleSearch()">
Next, modify the rendered app-card component to look like the following:
<app-card
  *ngFor="let blogPost of filteredBlogs"
  // ...
 >
 </app-card>
The search bar should now be working.
Step 4: Display an individual blog post on the details page
Now, you will display an individual blog post on the details page.
Head over to app/pages/detail/detail.component.ts and add the following imports:
import { ActivatedRoute } from '@angular/router';
import { HttpClient } from '@angular/common/http';
import {environment} from '../../../environments/environment'
Next, modify DetailComponent to the following:
export class DetailComponent implements OnInit {

  blogPost:any
  date!: string

  constructor(
    private route: ActivatedRoute,
    private http: HttpClient
  ) { }

  ngOnInit(): void {
    const slug = this.route.snapshot.paramMap.get('slug')  this.http.get(`https://api.buttercms.com/v2/posts/${slug}/?auth_token=${environment.readApiToken}`)
    .subscribe((res: any) => {
      this.blogPost = res.data
      this.date = new Date(this.blogPost.created).toISOString().split('T')[0]
    })
  }
}
After injecting the required services by modifying the constructor in the ngOnInit() method, you will get the slug attached to the details page URL. Use it to fetch the corresponding blog post from ButterCMS.
Then, store the result in the blogPost property.
Now let’s display the blog post on the page. Modify the detail.component.html file to the following:
<div class="blogDetail">
  <h1>{{blogPost?.title}}</h1>
  <div class="blogDetail__head">
    <img [src]="blogPost?.author.profile_image" class="blogDetail__profileImg" />
    <span>{{blogPost?.author.first_name + ' ' + blogPost?.author.last_name}}</span>
    <span>{{date}}</span>
  </div>
  <img [src]="blogPost?.featured_image"/>
  <div class="blogDetail__body" [innerHTML]="blogPost?.body"></div>
</div>
When you navigate to the details page by clicking on a blog card, you will see the content of that blog post.
There are a few things that still need correction due to Angular’s view encapsulation and the HTML sanitization being carried out on HTML inserted with the “innerHTML” property, as was done in the above code.
The styling is not applied even though we added it earlier while building the UI. Also, the video under the Blog Engine Demo heading is not displaying.
To fix this, there are a few tweaks you need to make. Modify the detail.component.ts file to the following:
import {ViewEncapsulation} from '@angular/core'
import {DomSanitizer, SafeHtml} from '@angular/platform-browser';
Next, to make the styling work, add the following property to the @Component decorator:
@Component({
  // ..
  encapsulation: ViewEncapsulation.None,
})
Next, to display the video under the Blog Engine Demo heading, bypass Angular’s sanitization, which deems the iframe that inserts the video as unsafe.
To do this, add the following property to the component and modify the constructor to inject DomSanitizer. Then, update the subscribe method accordingly.
html!: SafeHtml

constructor(
 //…
 private sanitizer: DomSanitizer
) { }
Next, modify the subscribe method to the following:
subscribe((res: any) => {
  this.blogPost = res.data
  this.date = new Date(this.blogPost.created).toISOString().split('T')[0]
  this.html = this.sanitizer.bypassSecurityTrustHtml(this.blogPost.body);
})
Above, we bypass the sanitization by supplying the body of the blog content to the bypassSecurityTrustHtml method, then store the result in the html property.
Now, you need to display the value of the HTML property rather than directly displaying the body of the blog’s content. In the detail.component.html file, modify the div with the innerHTML property to the following:
<div class="blogDetail__body" [innerHTML]="html"></div>
With this, the example post on the details page should now look fine:
Final thoughts
That's all there is to it in this blog tutorial. We've covered how to build a fully functional Angular blog with ButterCMS. This powerful combo allows you to manage your content effortlessly and enhances your website's capabilities. All of these are without the hassle of hard coding.
Creating a blog with Angular is easy with ButterCMS.
Ready to get started? Sign up for a free trial with ButterCMS and start building your Angular blog today.