Deploying and managing PHP or Laravel applications can be a time-consuming and labor-intensive process. Developers have always needed a platform designed to work seamlessly with Laravel that can automate the tasks involved in setting up servers, managing servers, and deploying applications. Luckily, this platform has taken shape in the form of Laravel Forge, which effectively handles all of these processes automatically.
In this article, we will explain what Laravel Forge is, how it works, what it offers, and why you should use it. You will also learn how to deploy an application using Laravel Forge and DigitalOcean as a hosting provider.
Table of contents
What is Laravel Forge?
Laravel Forge is a tool designed to make provisioning, server management, maintenance tasks, and monitoring as easy as possible, regardless of the framework used to develop an application (e.g., WordPress or Laravel). It provides a simple UI dashboard for application deployment—removing the complexity of deploying servers.
Laravel Forge enables developers to provision multiple server types (such as load balancers, database servers, worker servers, cache servers, web servers, and so on) and quickly create servers on various server providers such as AWS, DigitalOcean, Linode, and others.
Laravel Forge provides easy flexibility by allowing you to switch service providers at any time without affecting your server configurations.
How does Laravel Forge work?
As a server management tool, Laravel Forge installs the software required to run your PHP applications by connecting to your server via SSH.
Laravel Forge creates, deploys, manages, and maintains a website for users after they have done the following:
-
Created a Forge account
- Chosen a subscription plan (Hobby, Growth, or Business)
-
Chosen a server provider like DigitalOcean or AWS and provided authentication details.
-
Chosen a server type like app server or database server
-
Set configuration for the new site, such as providing a name, choosing a PHP version, and selecting a database provider like MySQL
-
Connected the application source code to Forge via source controls like GitHub
Benefits of Laravel Forge
Laravel Forge has many benefits for deploying PHP applications, making it an ideal platform for rapid application deployment. Among these benefits are:
-
Security: To secure applications, Forge provides security measures such as allowing developers to set up firewalls, obtain and use SSL certificates, and receive security updates. To handle security, Laravel Forge automatically updates the application's software components. The automation alerts the user when a software update is available and allows the update with a single click. For maintenance, Forge employs tools such as the task scheduler, which regularly schedules maintenance tasks such as database backups, software updates, and so on.
-
Fast deployment: Forge supports automatic deployments to various hosting platforms such as DigitalOcean, AWS, and Linode. You can have your projects up and running with just a few clicks.

-
Provisioning: Forge can automatically provision your server with configurations such as adding your credentials, server OS, or database when you select the appropriate service provider and server type. As a result, Forge relieves developers of the stress of provisioning their servers—a time-consuming process that includes mundane tasks such as server configuration and software installation. Provisioning requires a significant amount of technical knowledge and expertise in areas such as network security and server administration, which Laravel Forge handles.
-
Monitoring: The user interface of Forge is transparent as it allows you to monitor the status of your server and its performance.
-
Server configuration: Forge handles server configuration and reduces the hassle of configuring your servers by automatically activating the configurations. This includes server configurations such as installing application software components, providing options for managing SSL certificates (for example, Let's Encrypt), managing databases, or configuring Git repositories for deploying code changes.
Laravel Forge pricing
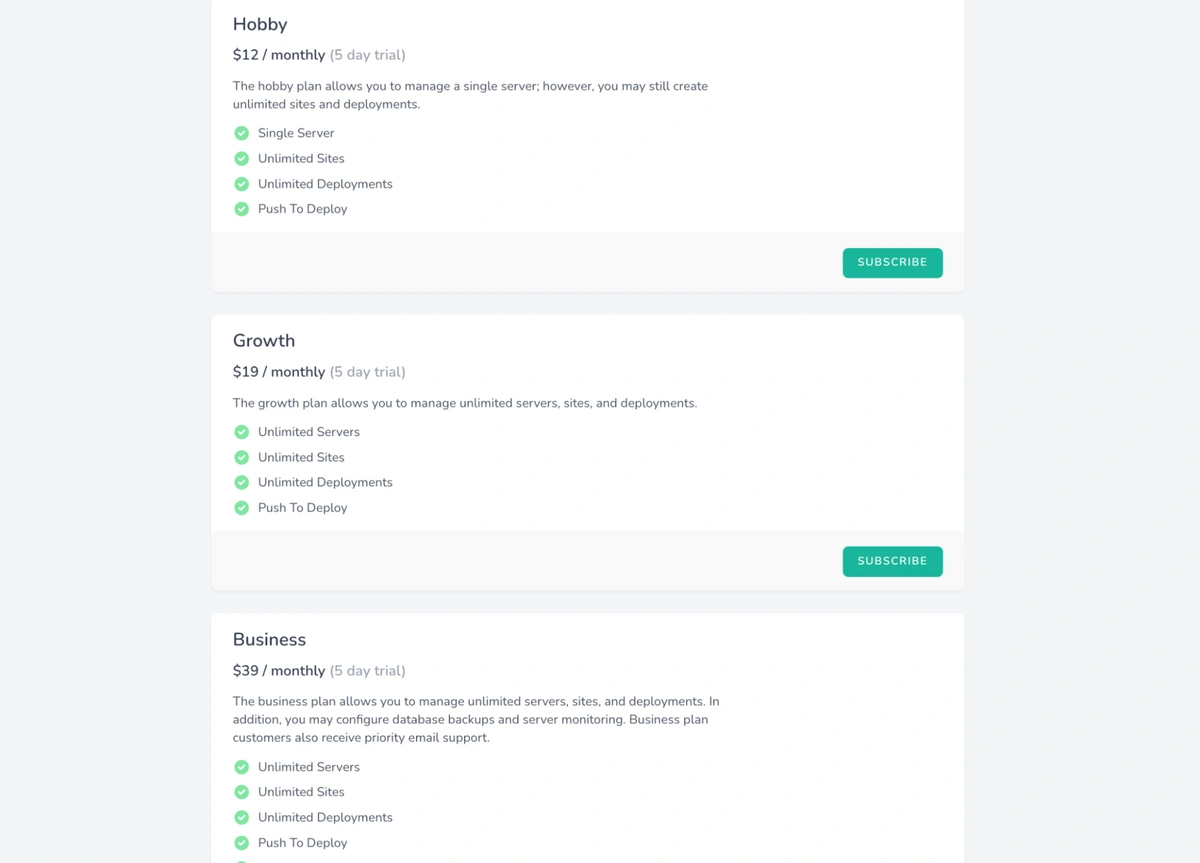
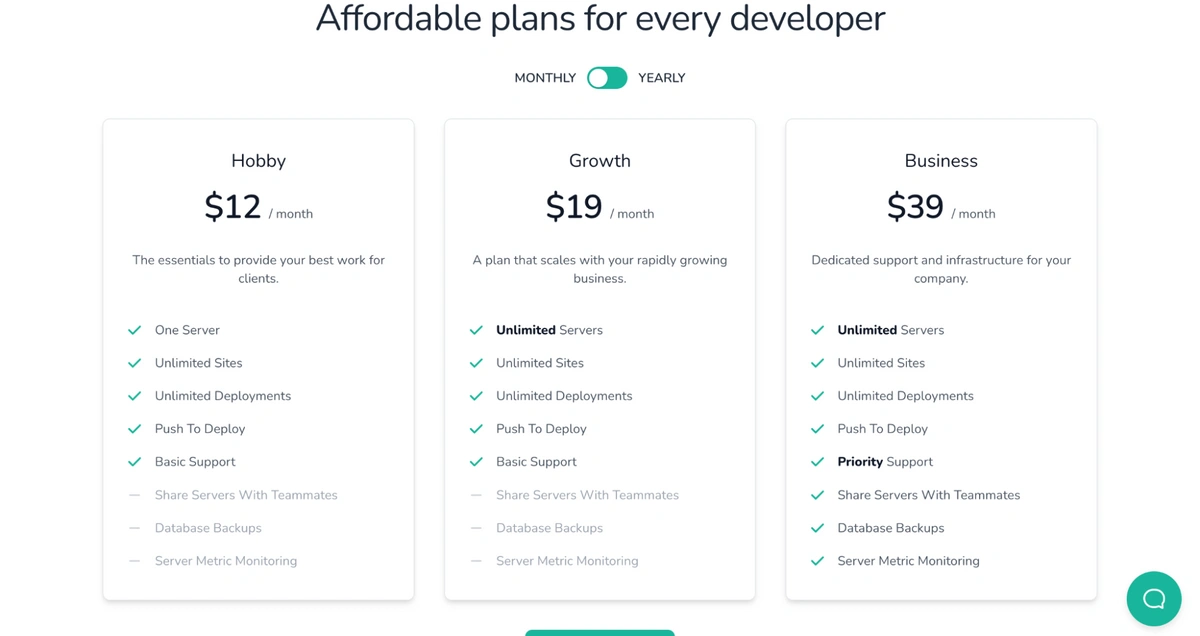
To use Forge, you’ll need to pay for its services, including payment for your service provider (e.g. DigitalOcean) and the provisioning. To gain access to these offers, you must subscribe to Laravel Forge. The subscription plans are listed along with their prices according to the services they offer, including:
-
Hobby ($12 per month): This plan allows the provisioning of a single server, running an unlimited number of sites, and deploying the sites an unlimited number of times.
-
Growth ($19 per month): This plan allows the provisioning of an unlimited number of servers with an unlimited number of sites and unlimited deployments.
-
Business ($39 per month): This plan comes with an additional number of features which include allowing the creation of automated database backups, installing a server monitoring agent on your server (which allows you to be notified when your server resources hit a defined threshold), sharing your servers with your teammates with a feature called Circles, and offers priority support.
You can easily manage your subscription by navigating to your user profile and selecting billing from the dropdown menu:
Who is Laravel Forge for?
Laravel Forge is commonly used by developers responsible for creating, managing, and deploying PHP applications using the Laravel framework. Most developers find Forge useful because of its variety of features for automating and simplifying their work (such as automated deployments and database backups).
Businesses looking to host and deploy Laravel applications on a low budget and with scalability in mind can use Laravel Forge, which offers a variety of subscription plans ranging in price from low to high. Companies that want to host Laravel applications in a secure environment can use Laravel Forge.
Additionally, organizations that want to concentrate on building software rather than maintaining deployment solutions while still maintaining control over their servers find Laravel Forge very helpful in managing their quick deployment. Companies like Spatie, Chipper CI, SpartnerNL, and more use Laravel Forge.
Laravel Forge can also be used by businesses that want to quickly spin up single or multiple servers in a reliable environment without interacting directly with the server(s). Businesses that struggle to spin up new servers, configure Nginx, and set up SSL can also avoid stress by using Laravel Forge.
Tutorial: Deploying a Laravel app with Forge
Here, we’re going to walk through the steps taken to deploy a Laravel application with Forge using DigitalOcean as the service provider.
Prerequisites
To follow along with the tutorial, ensure that you have the following:
-
Domain name
Creating a Forge account
To deploy a Laravel application with Forge, the first thing to do is to create an account and log in as follows:
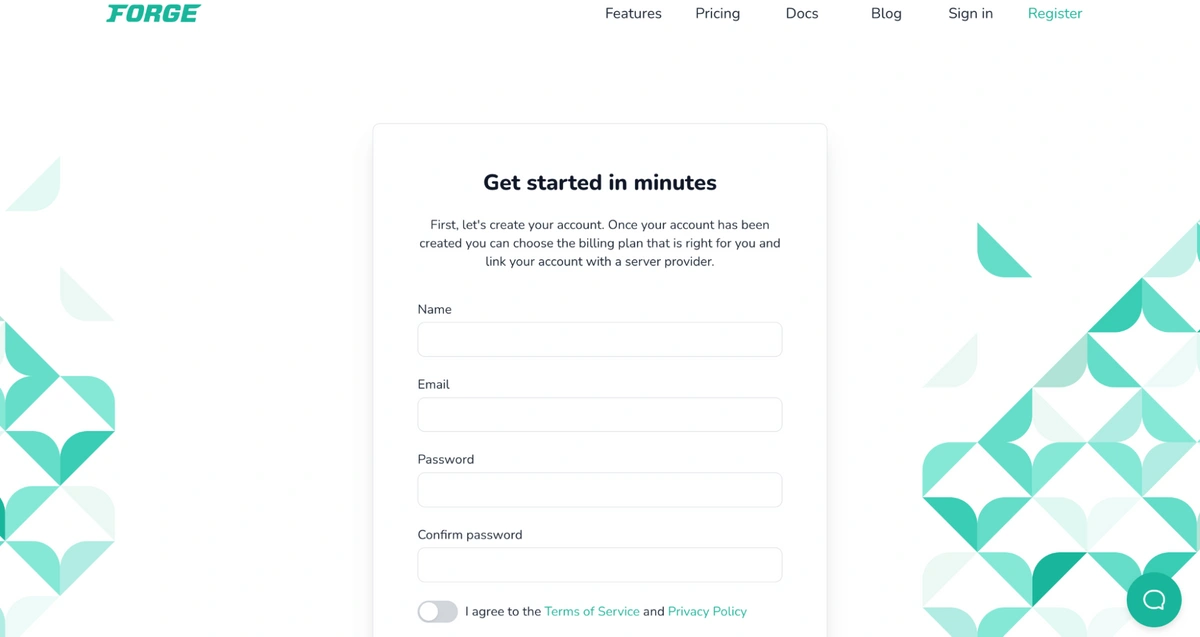
After logging in, navigate to the billing page and choose one of the subscription plans. Once you have subscribed, your Forge account will be ready for you:
Connecting to your service provider
Now that you have a Forge account, choose and connect to a service provider from the list of options available. For this tutorial, we will use DigitalOcean, so ensure you have an account with them. However, you can choose to connect to multiple service providers at once.
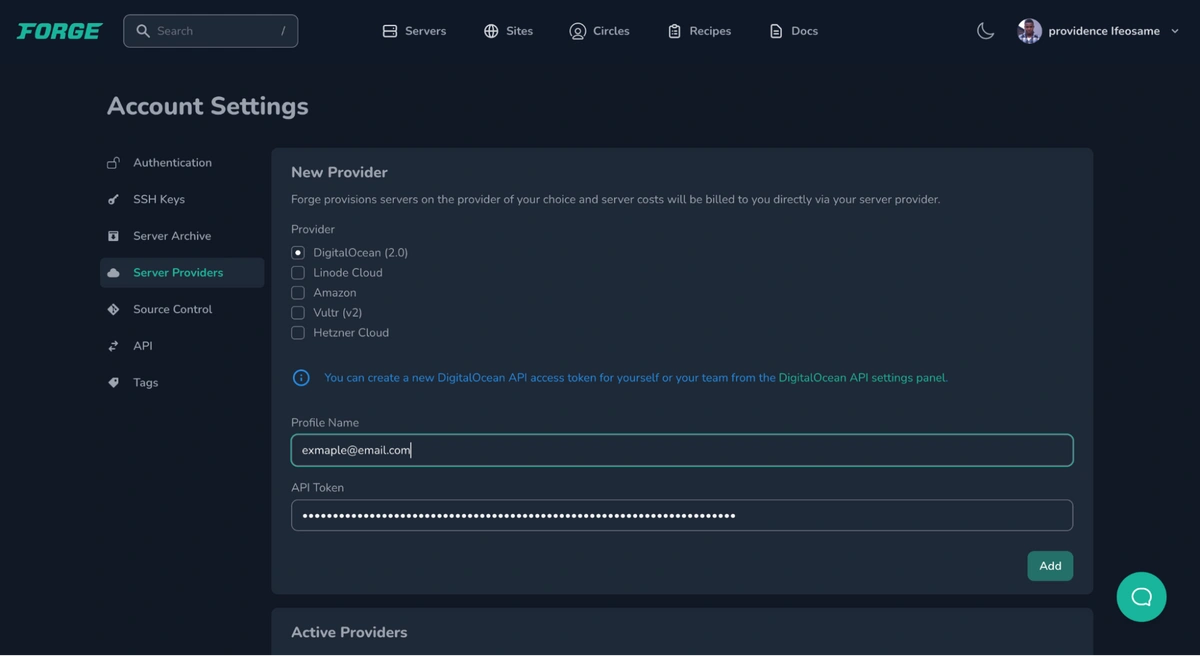
On your Forge account, navigate to Account in the drop-down menu and select Service Providers on the left-hand side of the menu:

For Laravel Forge to connect to your service provider, you need to provide an API token. To retrieve your API token from DigitalOcean, click the green highlighted text in the screenshot above that says DigitalOcean API settings panel, which links to DigitalOcean. You will be redirected to a page to sign in to your account as follows:
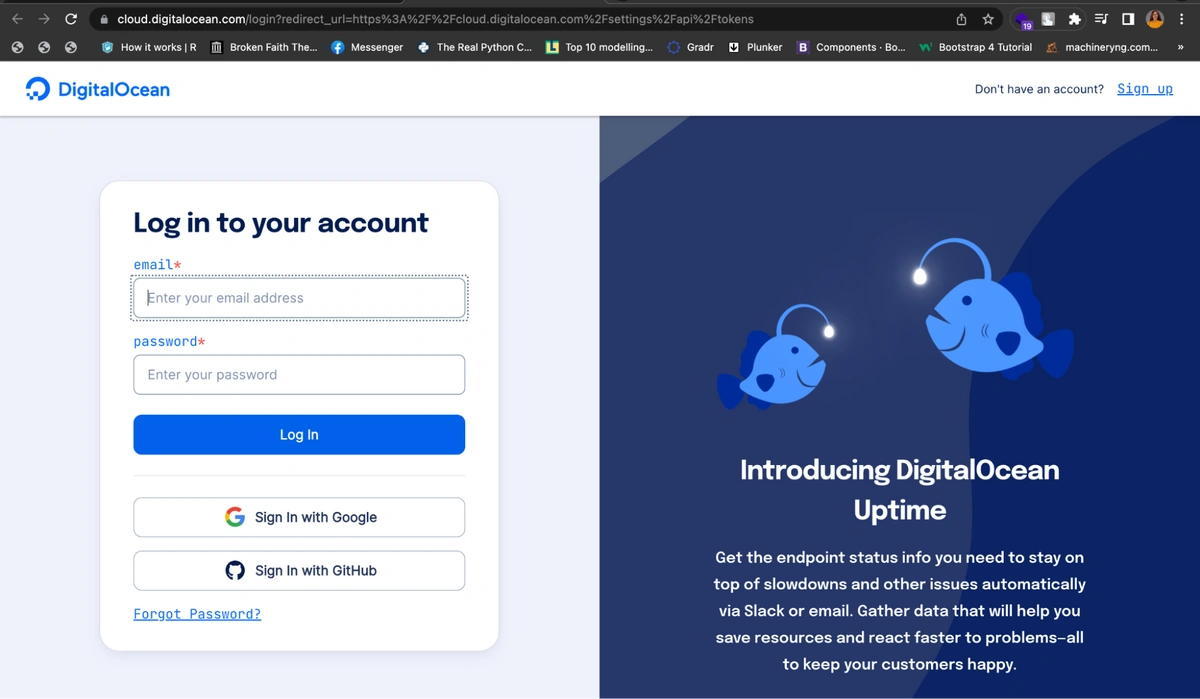
Once you’ve signed in, your DigitalOcean dashboard should look as follows:
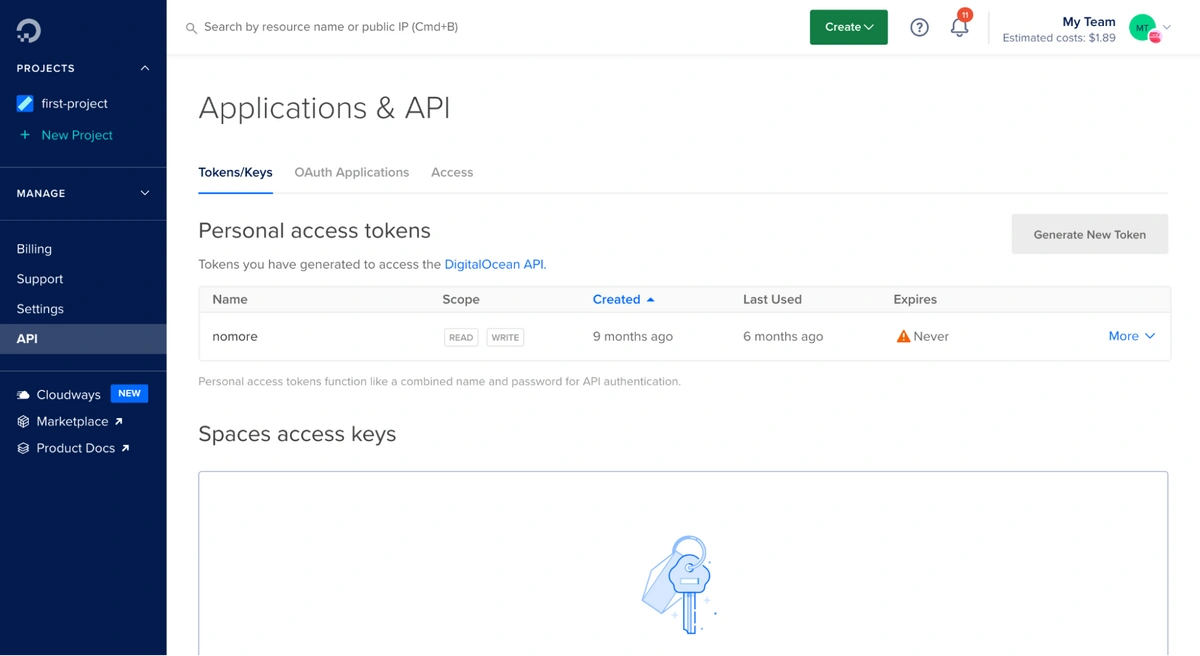
Click on Generate New Token and generate your new access token by giving it a name and selecting your preferred expiry date among the options:
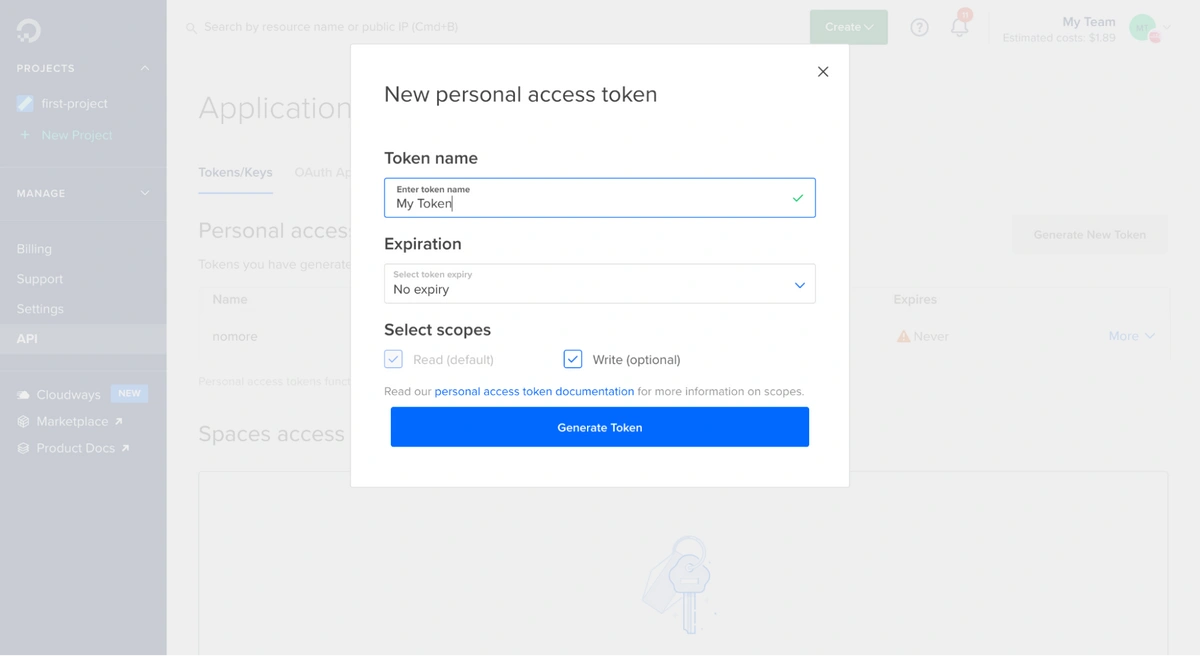
Once you click Generate Token, your API token, My Token, will be created and displayed as follows:
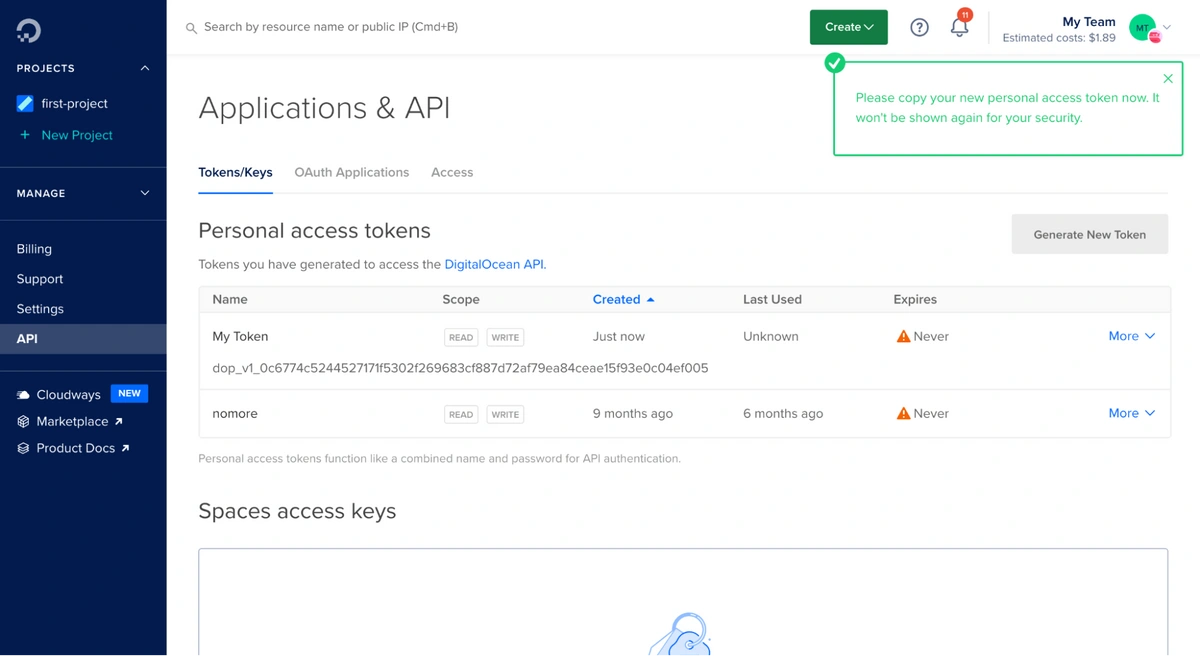
Copy your token and go back to your Forge account and paste the API token along with the email you used to register on DigitalOcean as follows:
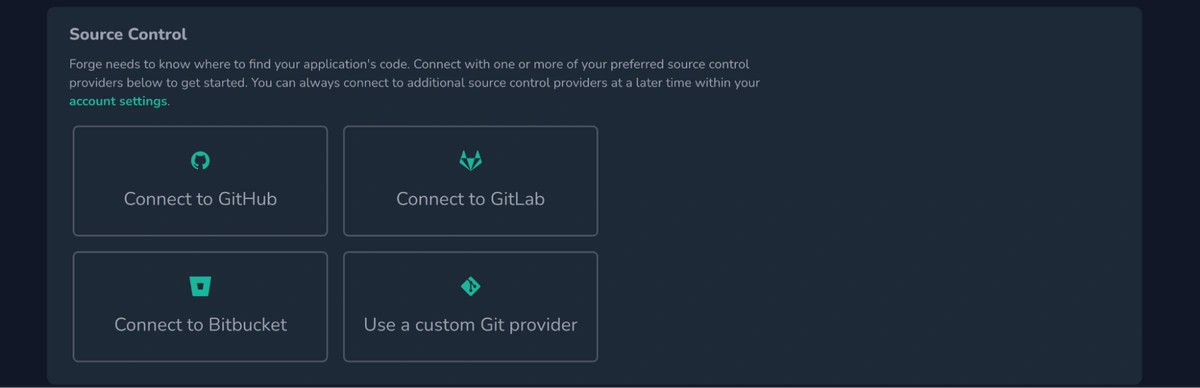
Ensure that you have connected your GitHub account by navigating to the Source Control settings:
Creating the server
Now that you have successfully connected your service provider, Laravel Forge will handle creating your droplet and server configurations on DigitalOcean, saving you the stress of doing that yourself. Click Servers, then select your service provider DigitalOcean as follows:

Once you select the provider, the following will be displayed on your screen:
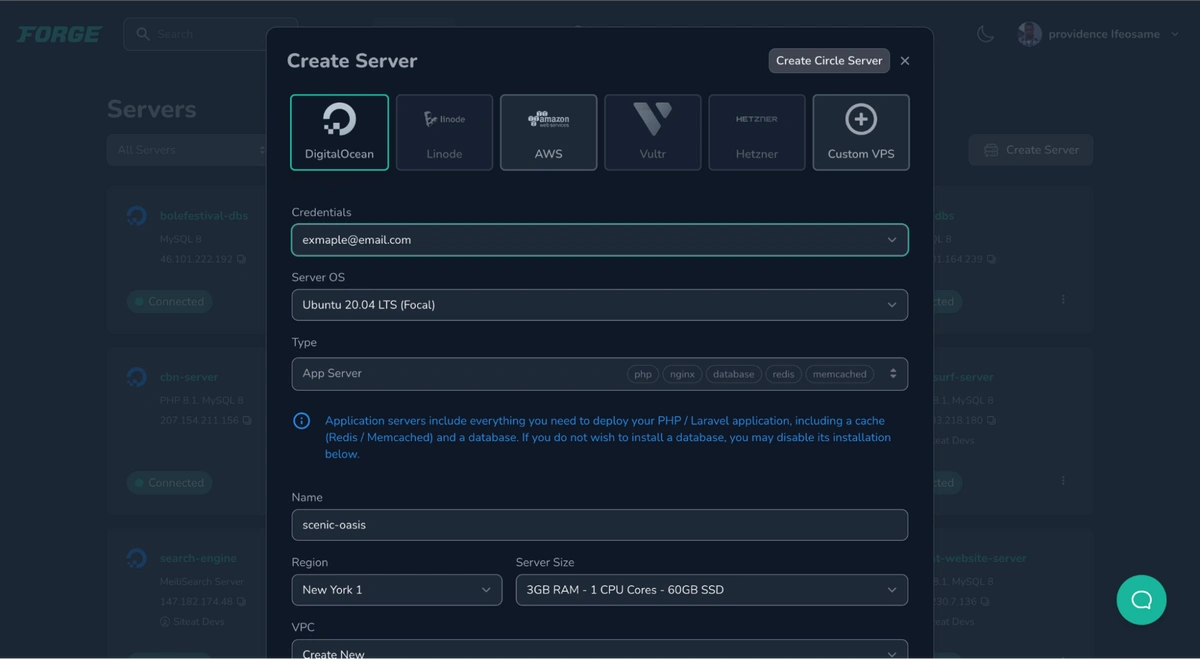
Use the following steps to set the configuration:
- Credentials: Select the email of the account where you want to deploy the server.
- Server OS: Select your desired Operating System (OS) for the server. We will be using Ubuntu 20.04 LTS (Focal) for this tutorial.
- Type: Select the type of server that suits your application, which refers to what you want to be installed on your server. Depending on your application’s needs, Forge provides the following server options. For this tutorial, we are using App Server:
- App server - provides everything a full-blown application needs, such as PHP, Nginx, database, Redis, etc.
- Web server - backend software which includes PHP and Nginx.
- Worker server - comprises scripts that run PHP code in the background.
- Database server - manages only databases.
- Cache server - configured to have only caches such as Redis and Memcached.
- MeiliSearch server - processes advanced search for queries.
- Load balancer - for performing distribution of network traffic.
- Region: Choose a region where you want your server installed. It’s best practice to choose a region close to the server's end users.
- Server size: Choose a server size that is suitable for the application workload.
- VPC: Create a Virtual Private Cloud to secure your application’s resources.
- Name your VPC
- PHP version: Choose the latest version.
- Database: For this tutorial, choose the latest MySQL (8.0).
- Name your database “forge”
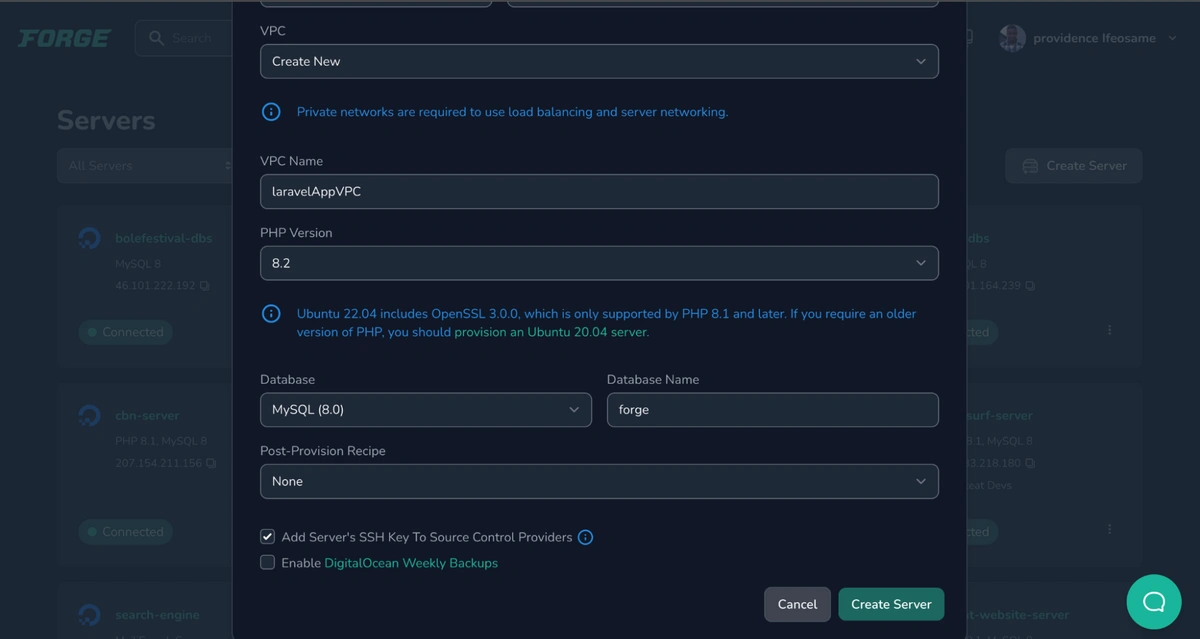
Ensure that all your configurations are correct and set, then click on Create Server.
Provisioning your server
After creating your server, Forge starts provisioning:
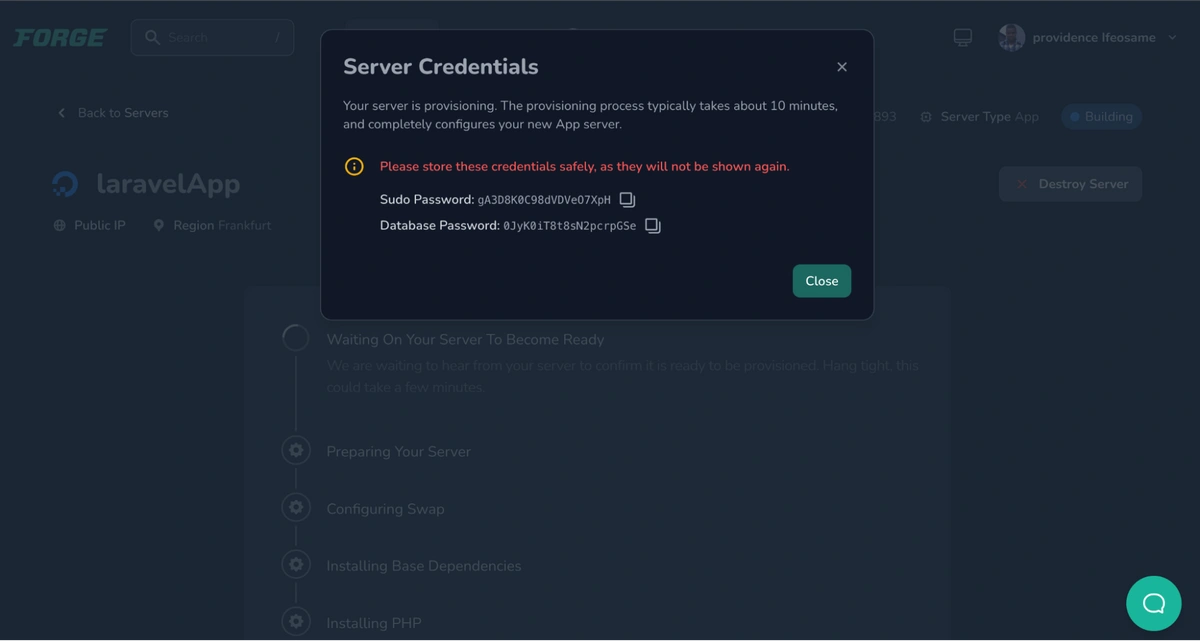
Then, it displays the provisioning progress as follows:
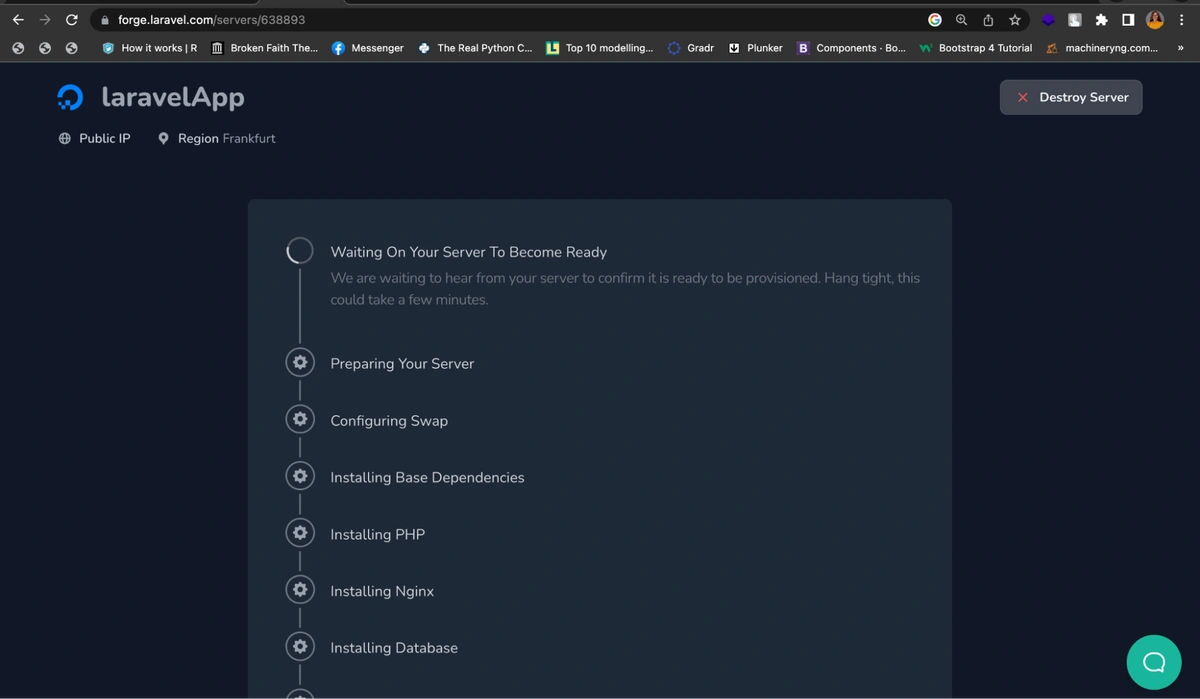
You can monitor the provisioning progress as it goes from one stage to the other as follows:
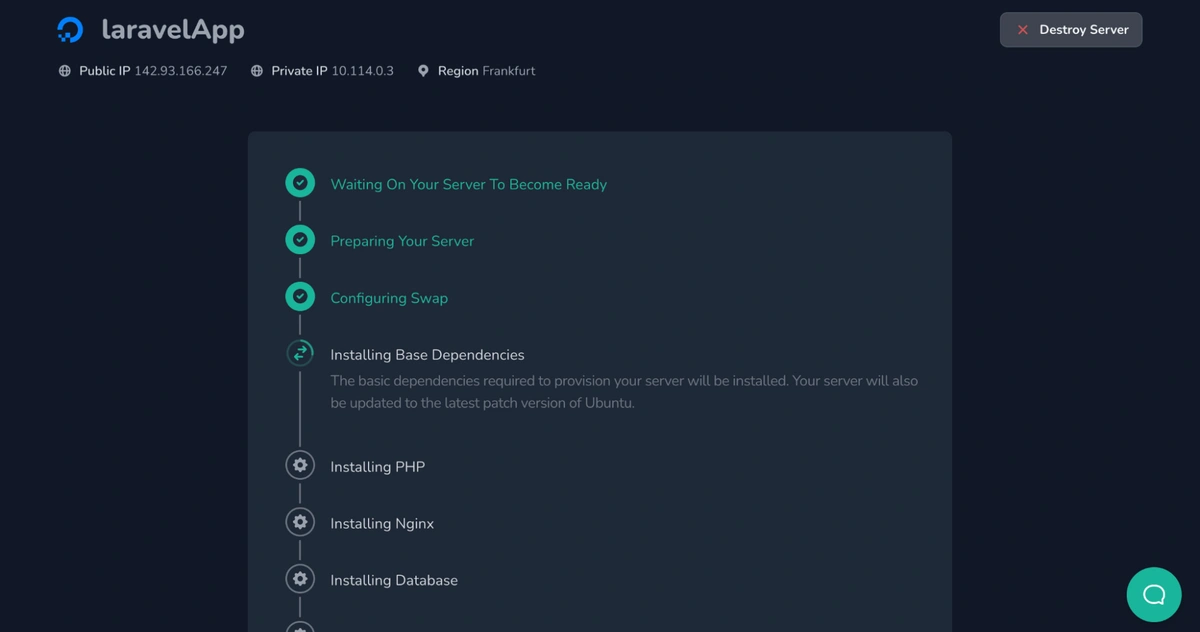
Wait until the provisioning completes and proceed to the next step.
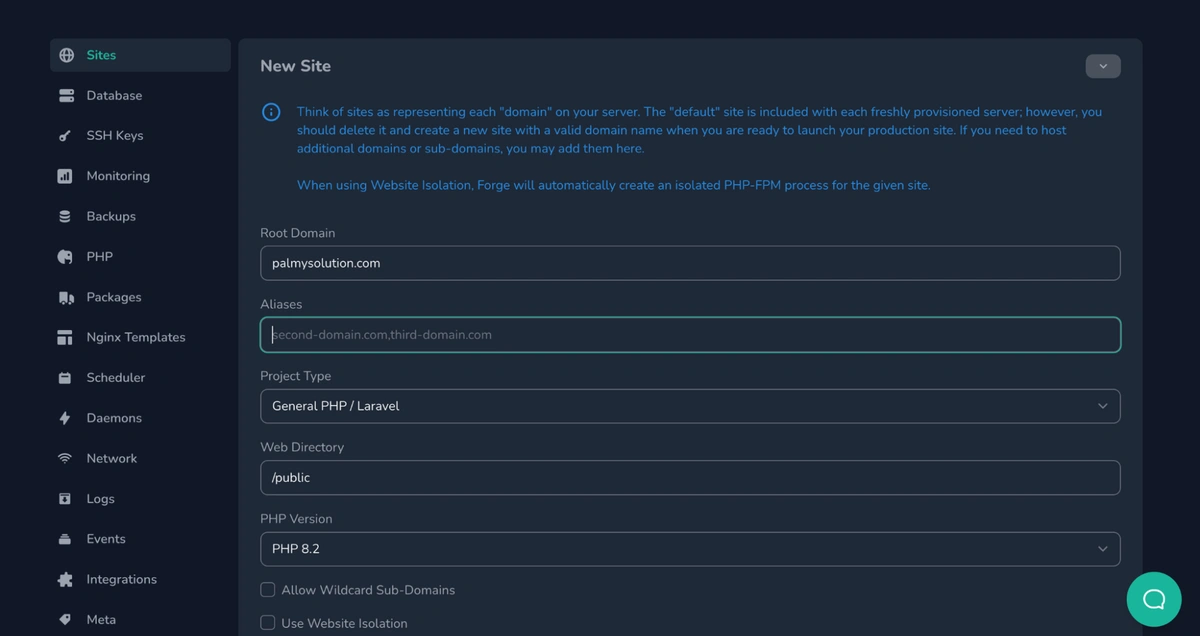
Adding your domain
Once the provisioning completes, you’ll be provided with the following screen to add your domain:
Click Create Database and enter a database name. Then, click Add as follows:

Once you click Add, the site begins installation:

Adding our project
We will be using a GitHub repository for this tutorial. Clone this project to follow along. On Forge, choose GitHub, enter your repository name, and choose your branch:
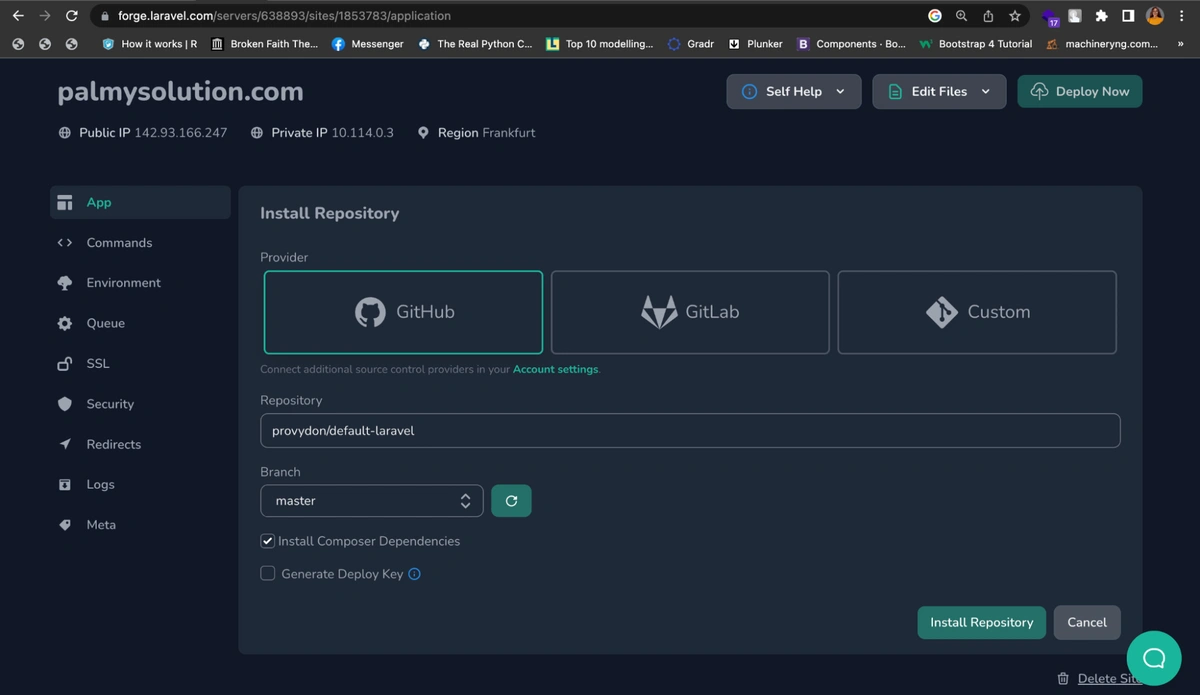
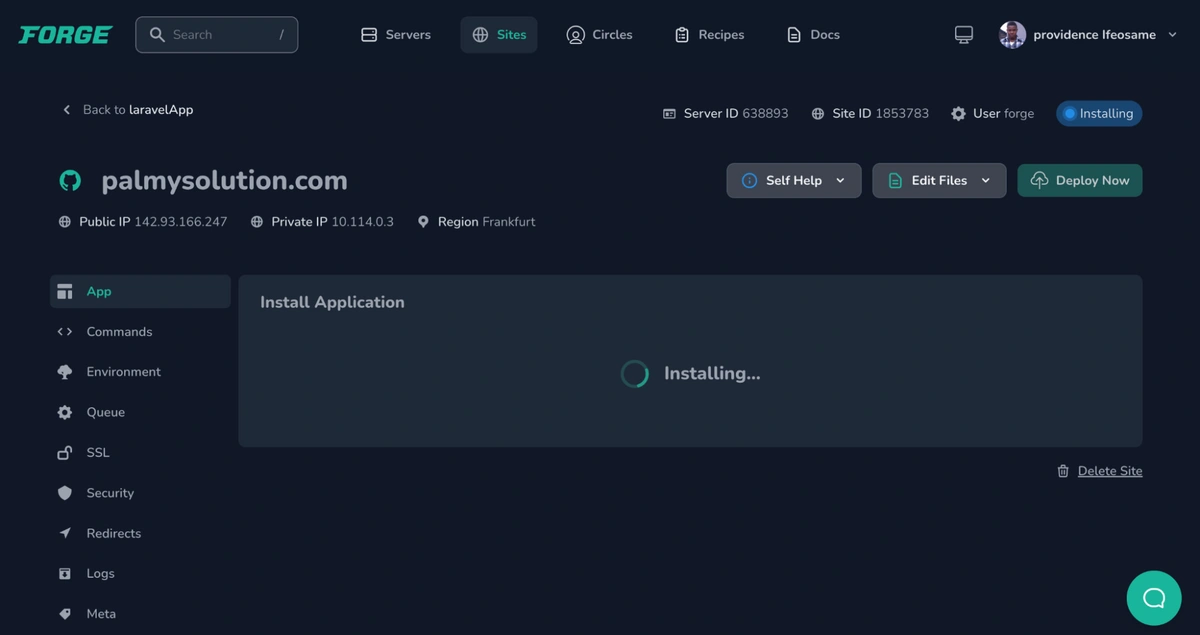
Then, click Install Repository and your application begins installing as follows:
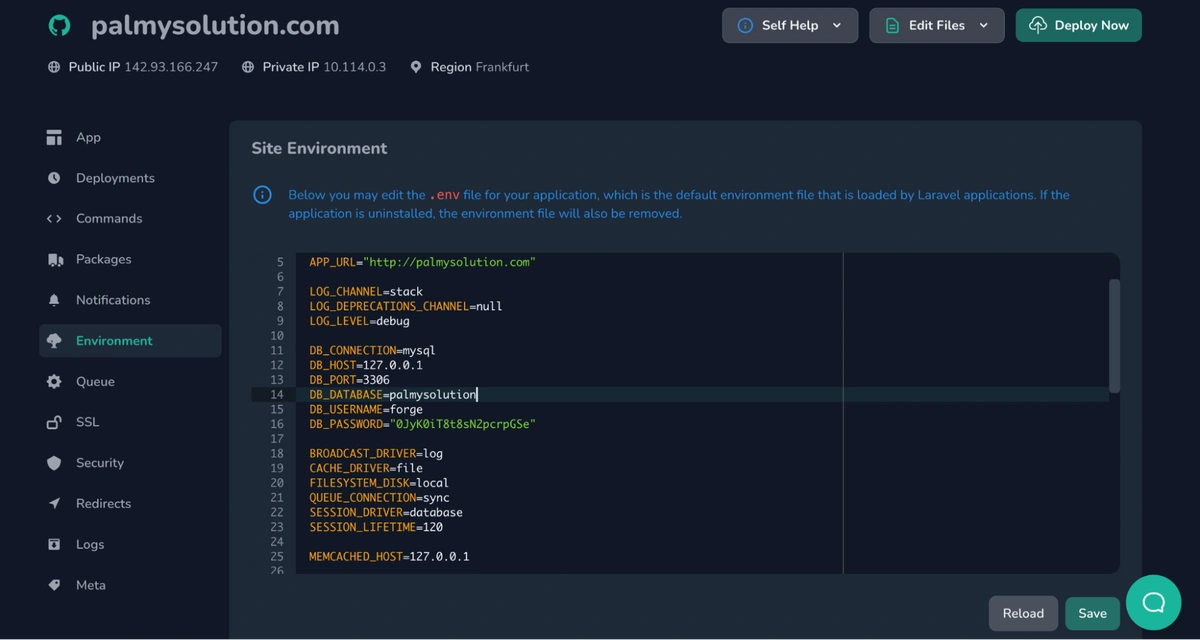
Setting environment variables
Next, cross-check your environments and ensure that the database name is the same as what you set. Click on Environment and, after cross-checking, click on Save:
Deploying the app
To deploy your application, go to Deployments and click the Deploy Now button on the top right-hand corner of the screen:
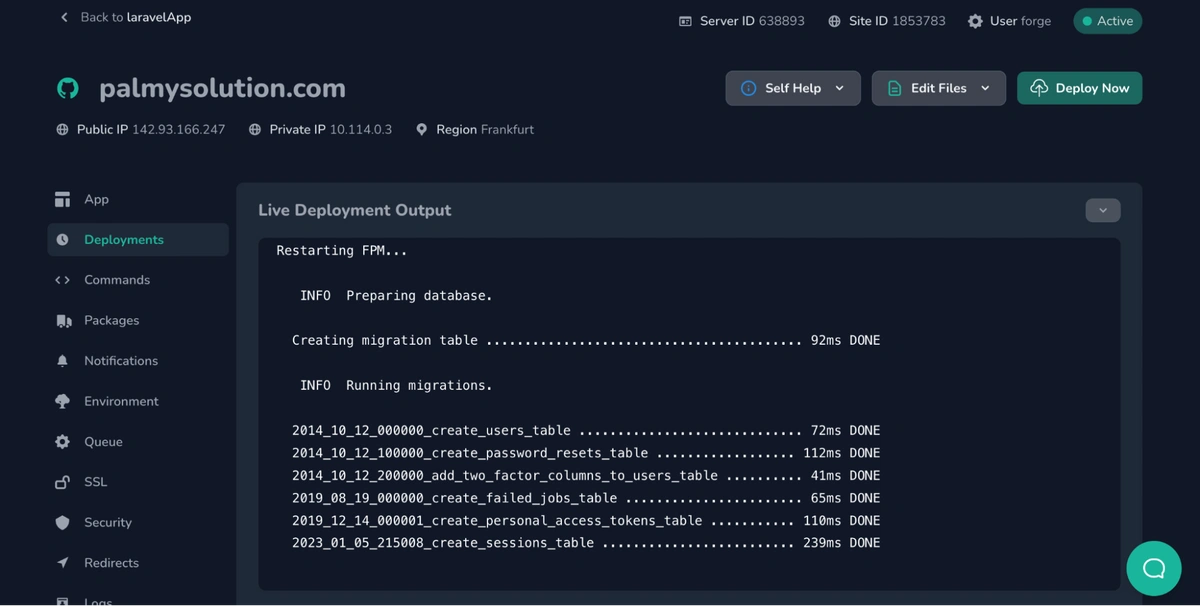
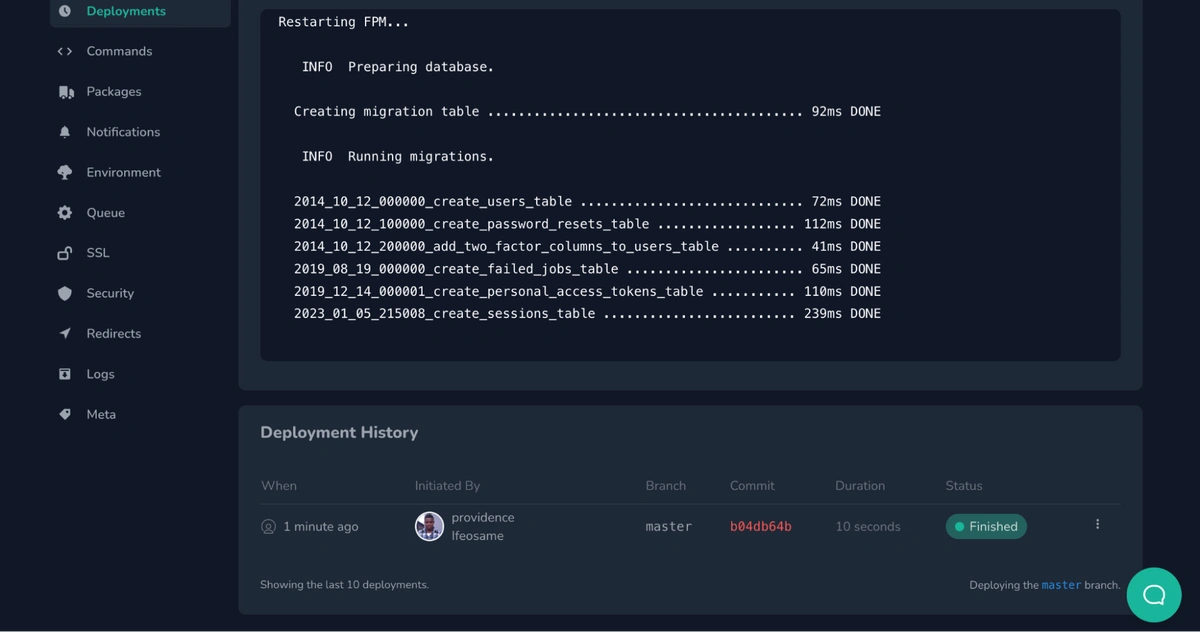
To ensure that your application has been deployed, check the live deployment output on the screen. Also, check under the Deployment History to see your latest deployment that is displayed with the green Finished status as shown below:
Configuring SSL
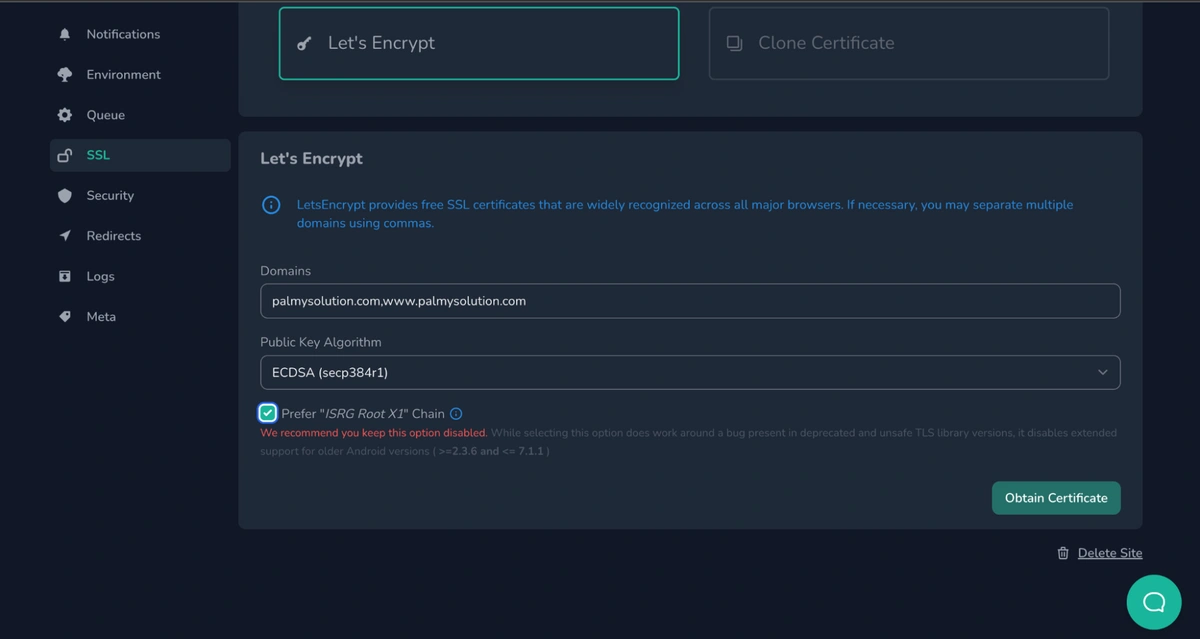
Next, you need to configure SSL for the site. Navigate to SSL and choose Let’s Encrypt from the options:
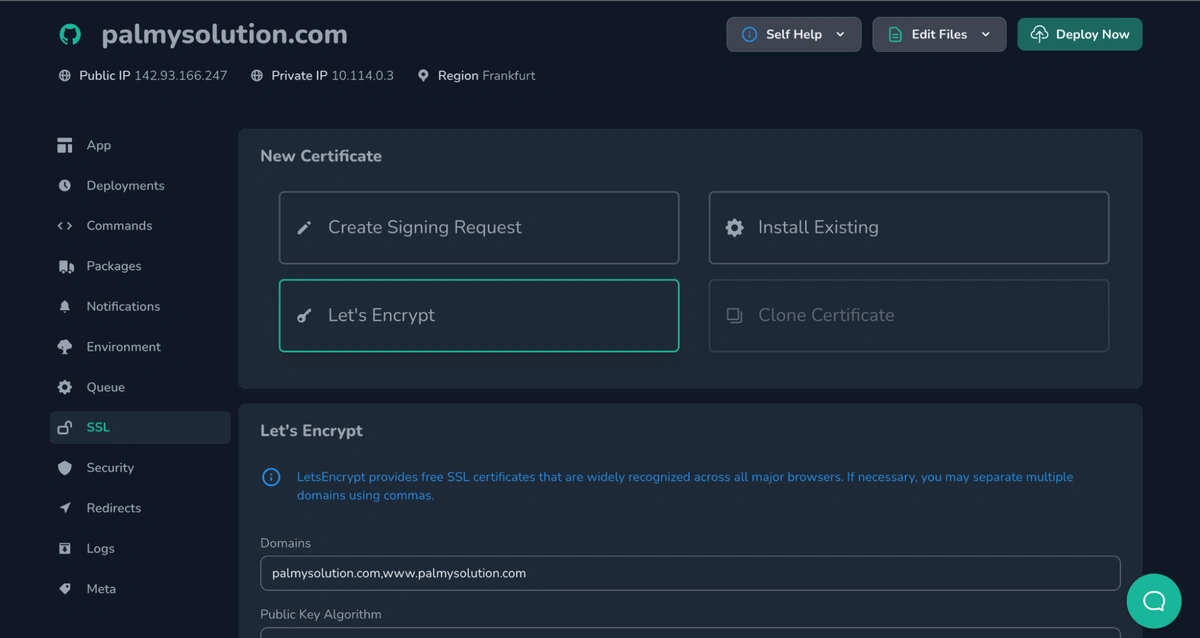
Next, enter your domains and public key algorithm, and you can click the Prefer “ISRG Root X1” Chain. Then, click on Obtain Certificate:
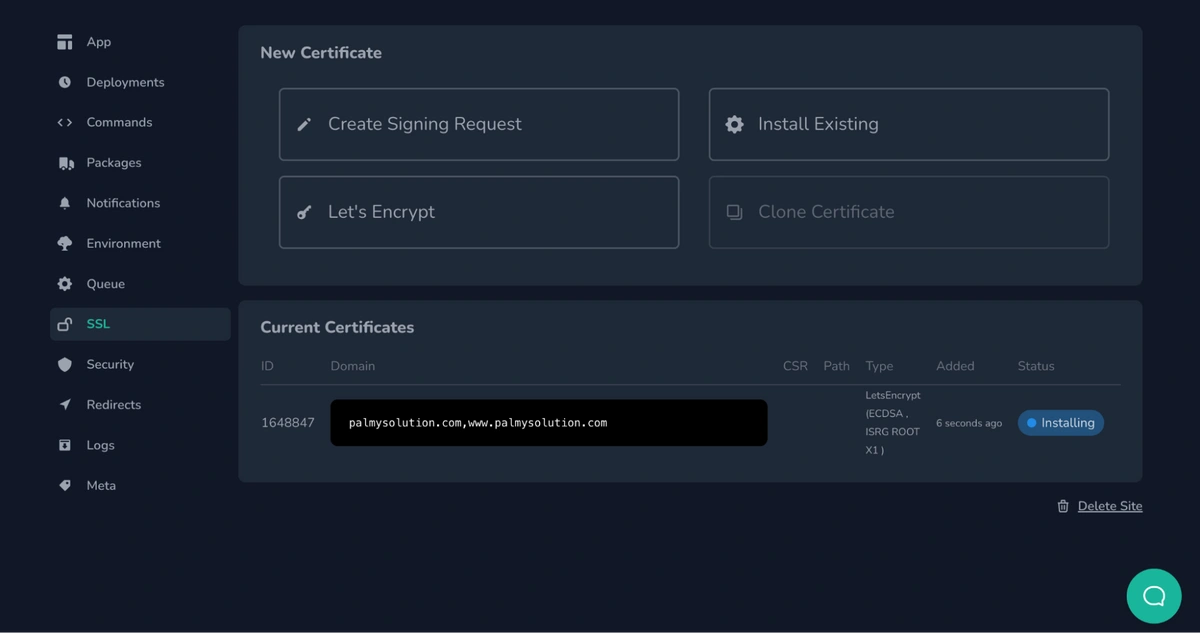
Afterward, wait for the installation to complete, which can be viewed below in the Status. If the installation is delayed, it usually means the DNS has not propagated to the IP. However, you can wait a while, from 30 minutes to 2 hours, before you propagate again:
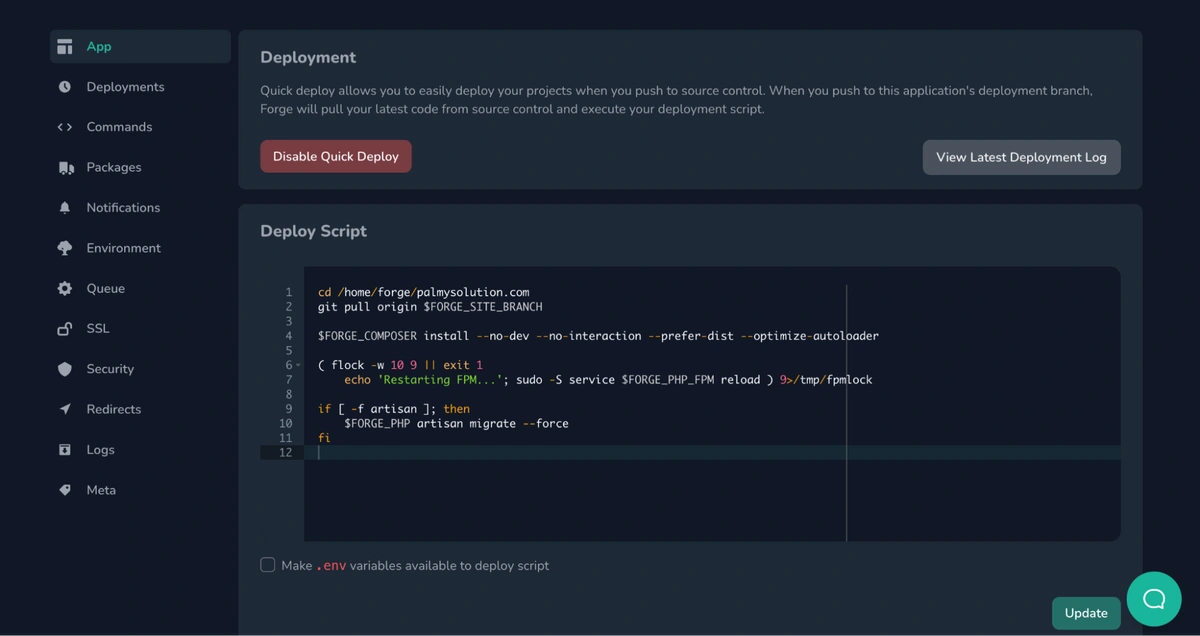
To enable automatic deployments, go to App and click on Enable Quick Deploy:
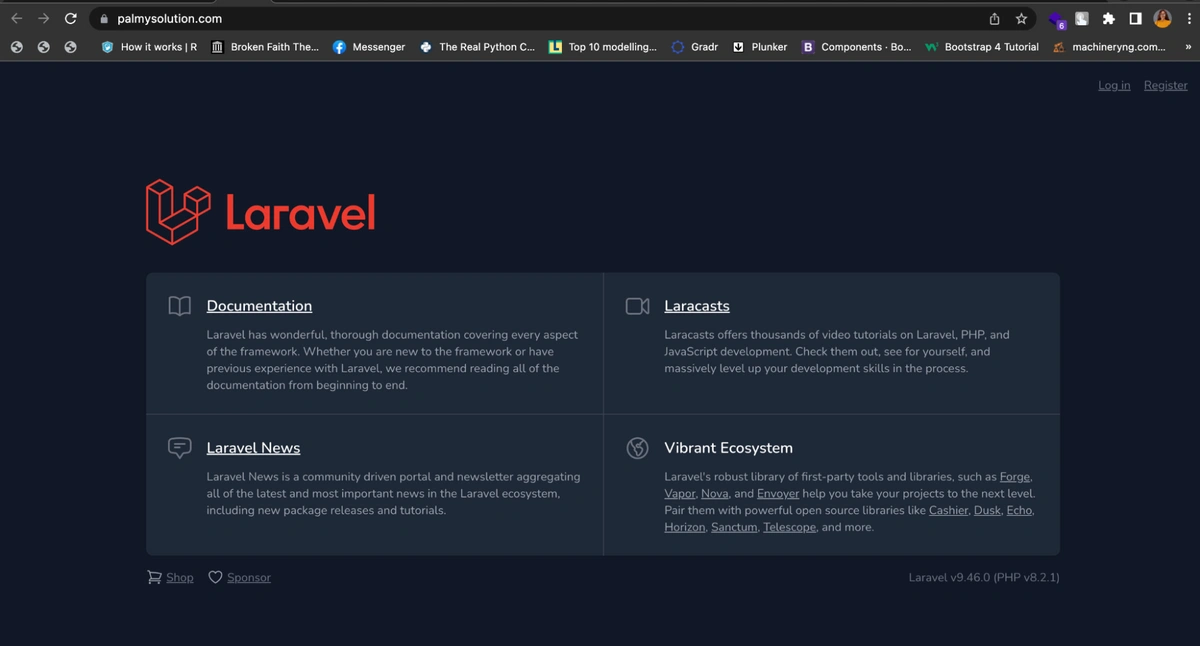
To view the deployed application, click on the website name written boldly at the top-left corner of your screen as follows:

Once you do that, your site will be up and running:
Laravel Forge alternatives
There are several other tools that work similarly to Laravel Forge with various benefits. They include:
-
Ansible: This is a free and open-source configuration management and orchestration tool for automating application deployment, including Laravel projects. It can manage remote servers and writes automation scripts in a simple, human-readable language.
-
Deployer: This is a free and open-source PHP deployment tool for automating the deployment of PHP applications, including Laravel projects. It has a simple configuration syntax and can be extended with plugins.
-
Cloudways: This is a cloud-based hosting platform that allows you to install Laravel and other PHP frameworks with a single click, as well as other features like automatic backups, staging environments, and team collaboration.
-
Heroku: Heroku is a cloud platform that makes it simple to deploy and run applications, including those written in Laravel. It provides Heroku Postgres, a managed database service.
Final thoughts
You’ve come to the end of this article where you learned about Laravel Forge, including its use cases. We covered how it works, why you should be interested in using it, and how to deploy a PHP application using Laravel forge. Laravel Forge offers a wide range of benefits, including fast and easy deployment, security, provisioning, server configuration, and much more.
To learn more about how you can use Laravel with other technologies, such as headless CMS like ButterCMS, check out the tutorials below: