

Building a good landing page is crucial for any business looking to succeed online. It's the first point of contact between your brand and potential customers, and it can make or break a sale. A well-designed landing page can create a strong first impression, build trust, and increase conversions.
In this tutorial, we will guide you through the process of building a simple business landing page using Hugo and ButterCMS. We'll cover everything from integration to content configuration and provide you with tips and tricks to help you make the most out of these powerful tools.
Whether you're a seasoned developer or just starting, this tutorial will equip you with the knowledge and skills to create a stunning landing page that captures leads and grows your business. Let's get started!
Table of contents
Why use Hugo?
There are several reasons why you might choose to use Hugo when building website landing pages, including:
-
Speed: Hugo is known for being extremely fast and efficient because it uses its own templating engine called Go Templates, which is very fast and efficient. The templates are precompiled during the build process, which means that pages can be rendered quickly without any additional processing overhead making it ideal for building large websites with complex structures and many pages.
-
Simplicity: Hugo has a simple and straightforward structure that makes it easy to use because it has fewer dependencies and requires less processing power than other static site generators. This simplicity also makes it easier to use and maintain.
-
Customization: Hugo has a large and growing collection of themes that you can use to customize the look and feel of your site. You can also use Hugo's powerful configuration options to change the way your site works and appears.
-
Flexibility: Hugo is designed to be flexible with the help of its robust templating system and themes, and can be used for a wide range of projects, from personal blogs to large business websites. It's easy to extend and customize because Hugo allows developers to create custom taxonomies to organize content in unique ways, so you can build a site that fits your specific needs.
-
Static sites: Hugo generates static sites, which means that your site will be fast, secure, and scalable. Static sites are easy to host and maintain, and they don't require the use of a database or server-side processing, making them ideal for smaller sites or sites with limited resources.
Overall, Hugo is a great choice for anyone looking to build high-quality, professional-looking websites and landing pages quickly and easily. Whether you're a beginner or an experienced developer, Hugo offers a flexible and scalable solution for building custom landing pages and websites.

Why use ButterCMS?
ButterCMS is a headless content management system (CMS) that can be used with Hugo to manage your content. ButterCMS provides a user-friendly interface for creating and managing content, and it integrates seamlessly with Hugo to allow you to publish content to your site quickly and easily.
By using ButterCMS in conjunction with Hugo, you can take advantage of the best of both worlds. ButterCMS provides a simple and intuitive way to manage your content, while Hugo generates the HTML pages for your website, providing fast and efficient performance.
ButterCMS offers a number of features that make it a great choice for Hugo users. Here are the ButterCMS features we will be using in this tutorial:
- Content modeling: ButterCMS allows us to define custom content types for our website, which can include any fields we want. This makes it easy to manage and organize our content while providing the flexibility to handle any type of content we might need like pages, rich media support, and components. (In this tutorial, custom content types are used to define different types of content that the website needs to display. We created components that are building blocks for our landing page. We also made use of ButterCMS’s user-friendly and intuitive page editor to create and manage this content.)
-
Content API: ButterCMS provides a powerful API that allows us to retrieve our content in various formats, including JSON and RSS. This makes it easy to fetch our content from Hugo and use it to generate dynamic pages and templates.
-
Rich text editing: ButterCMS includes a rich text editor that allows us to create and edit our content using a variety of formatting options, including bold, italic, and headings. This makes it easy to create high-quality content that looks great on our website.
-
Media library: ButterCMS includes a media library that allows us to upload and manage images, videos, and other files for our website. This makes it easy to manage all of our media assets in one place and use them in our content as needed.
Tutorial prerequisites
Below are the main requirements you need to follow along with this tutorial:
-
A ButterCMS trial account
-
A code editor such as Visual Studio Code or Sublime
-
Basic knowledge of JavaScript
-
Node.js installed on your system
-
Knowledge of Hugo
We will be following this business theme design from the official Hugo themes site. This is the design we’ll be basing this tutorial on. The code for this tutorial can be found in this GitHub repo.
Setting up our landing page in ButterCMS
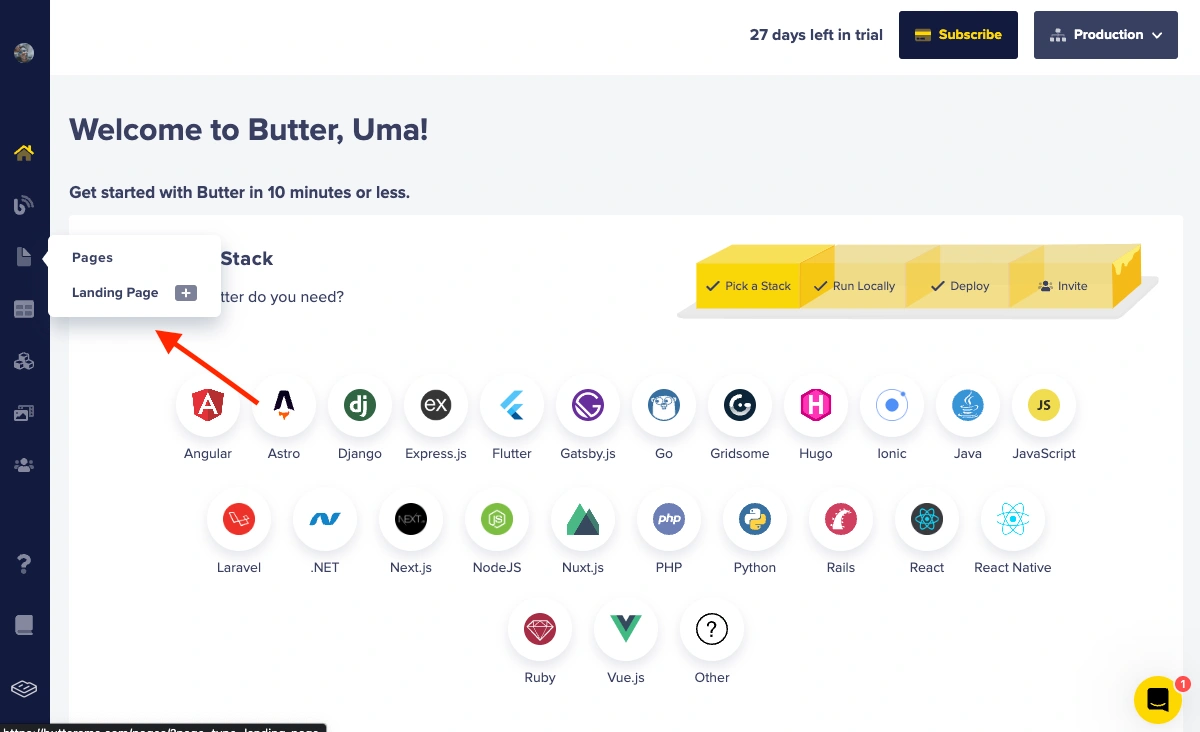
Once you have created your ButterCMS account, you will be redirected to your account Homepage dashboard.
To create a landing page, select Landing Page in the Pages menu.
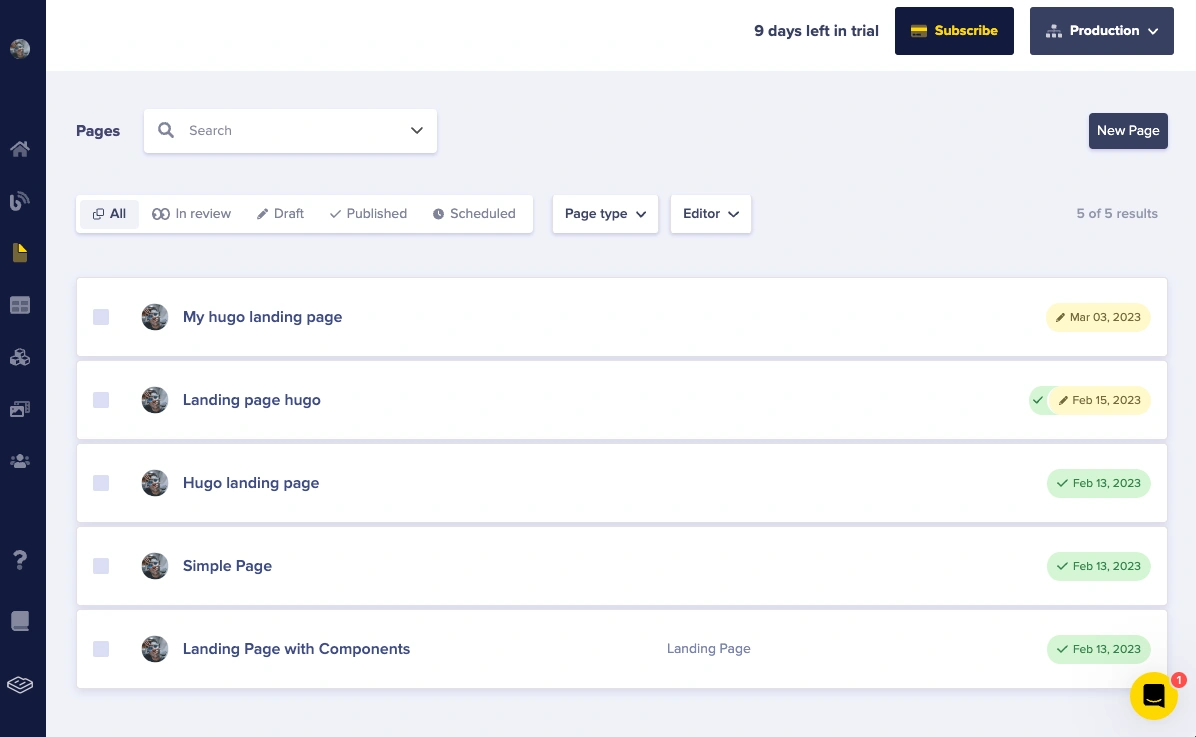
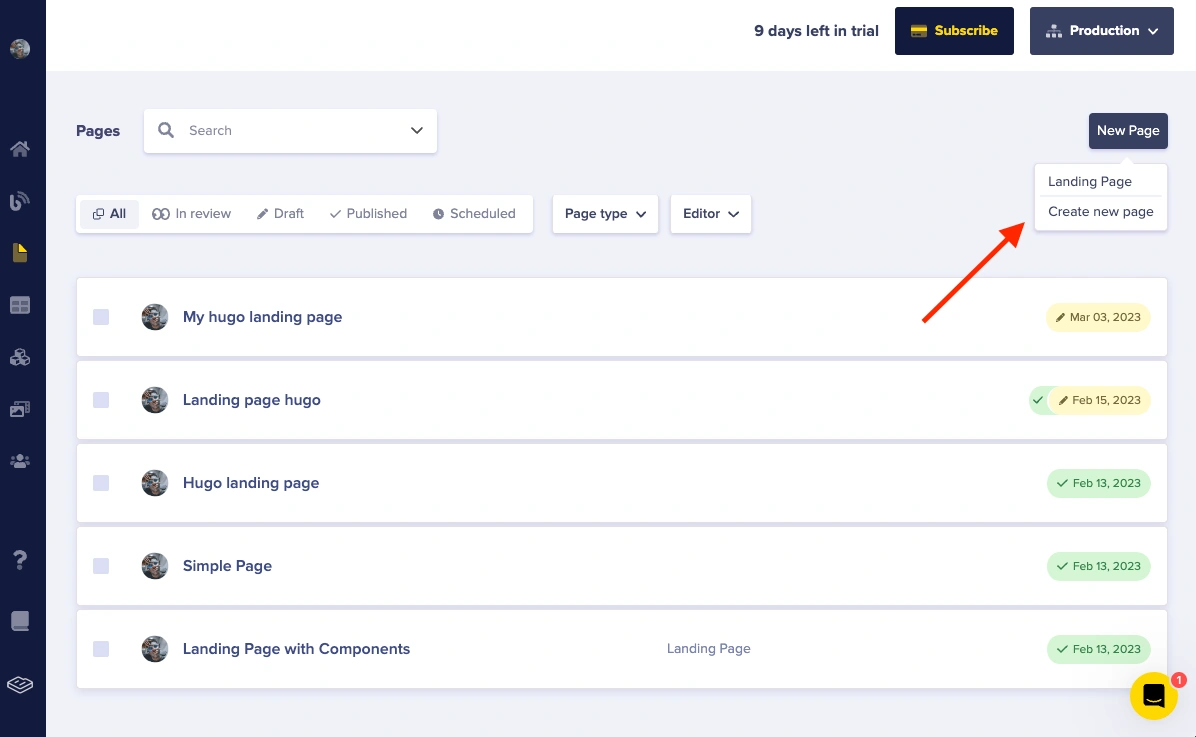
In the image below, you can see existing landing pages. In the top right corner, there is the New Page button. Click on it to create a new page.
We want to create a custom page from scratch, so we will go with the Create New Page option.
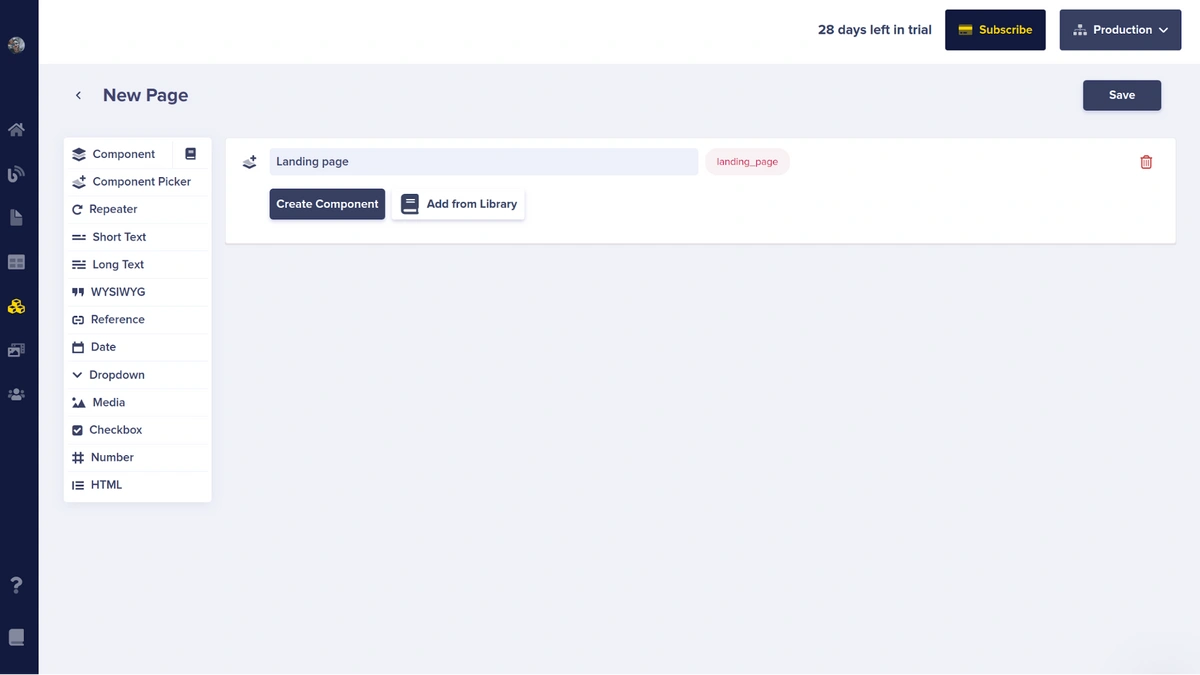
Upon clicking the Create New Page button, you will be directed to the New Page configuration page where you can start configuring and modifying the schema of your new page.

We will use components to build our page structure on the new page.
Components in ButterCMS function as reusable units that you may insert into your pages, allowing you to not have to start from scratch every time you want to construct a page. For instance, if you create a component that handles page headers, you can reuse that header component on other pages where you need a header. This way you don't have to reconstruct it every time you create a new page and can instead select it from the component library. This not only saves you time but also ensures consistency throughout your website.
Additionally, ButterCMS allows you to customize these components to fit your specific needs, giving you greater control over the design and functionality of your website.
The landing page we will be building will contain these six components:
-
A navigation component
-
A hero component
-
Services
-
Main service
-
Testimonials
-
Contact
For each of these sections, we will be creating a component in ButterCMS. Let’s get started!
Adding components to our landing page
Click on Component Picker in the left menu on the page builder and give it the name of the "Landing Page".
Creating our Navigation component
We haven’t created any components yet, so we’ll click on the Create Component button to start creating our component. If you have an existing component created already, you can just click on the Add from Library button to add your already-created component.
Here, we’ll be creating the Navigation component first. After clicking on Create Component, we’ll see a component dropdown like this:
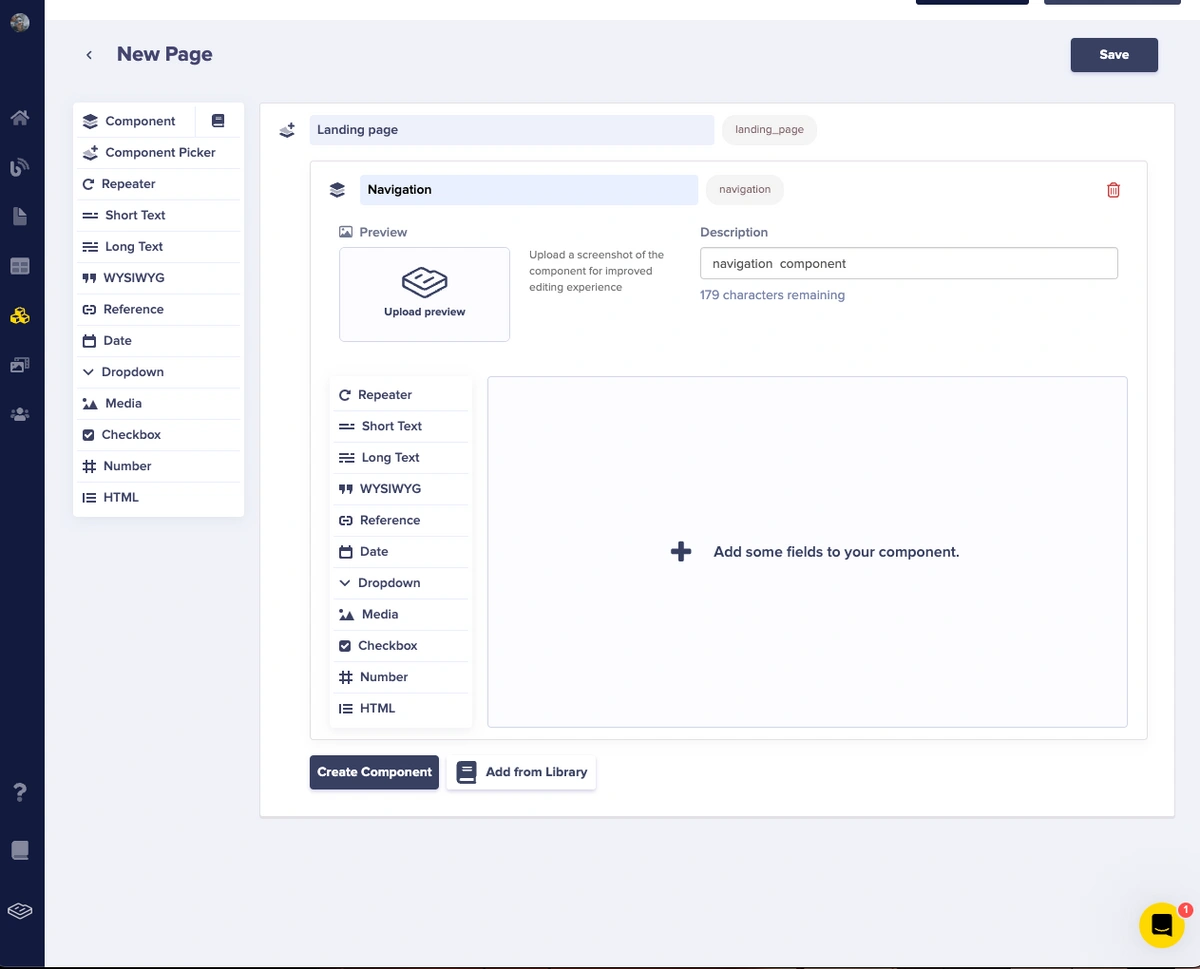
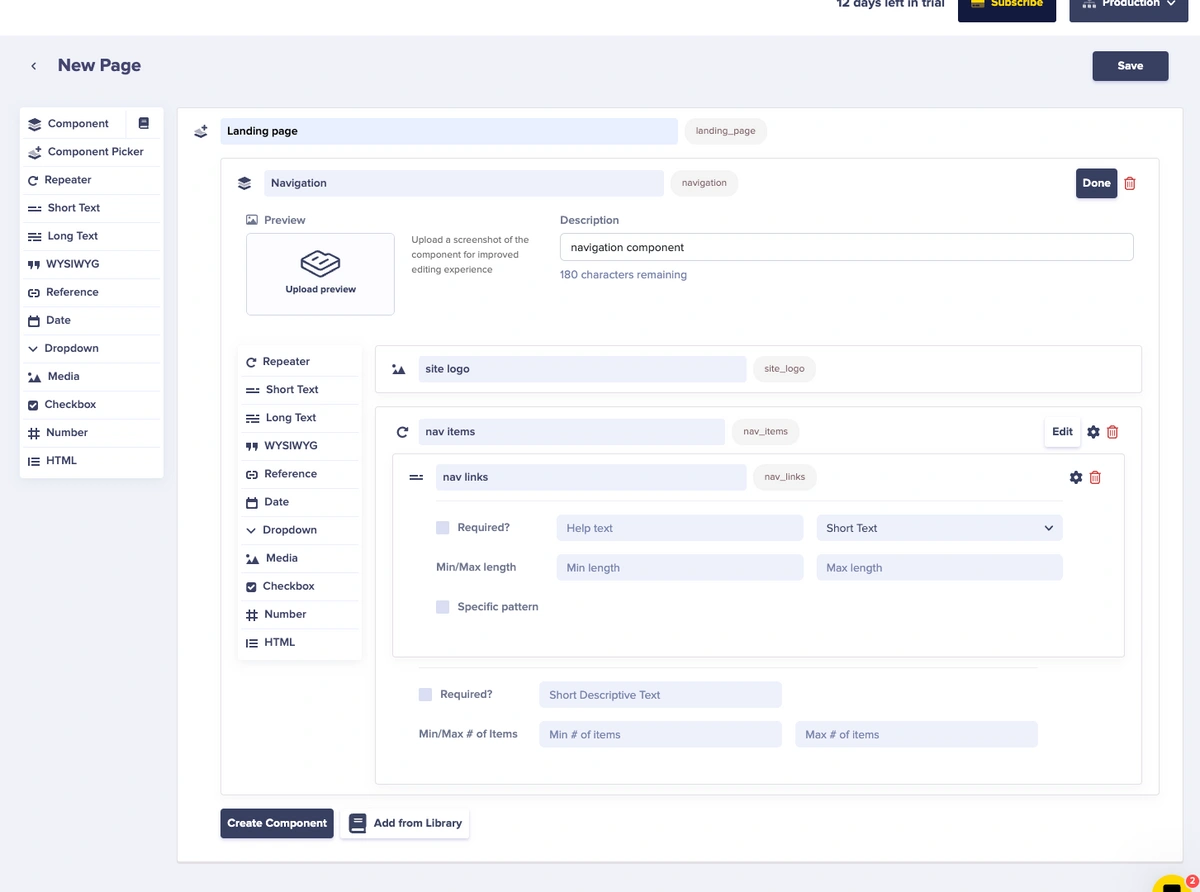
From the image above, we have given the Navigation component the name “Navigation”. Now, let’s add some fields to this component. Select:
-
Media for the site logo
-
Repeater field: The repeater field named nav items contains:
-
Short text for nav links
Creating our Hero component
As we planned earlier, we’ll be creating six sections. So, click on the Create Component button and we’ll get another component dropdown where we can choose the custom fields we want as suits our content model. Let’s create our Hero component:
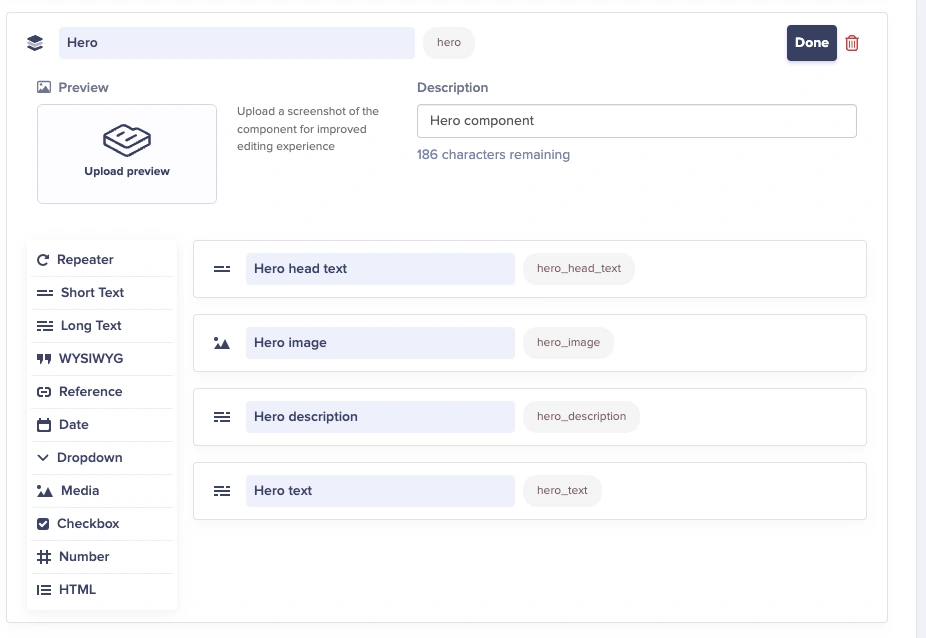
From the image above, we have given the Hero component the name “Hero”. Now, let’s add some fields to this component. Select:
-
Short text for the Hero head text
-
Media for the Hero image
-
Long text for Hero description
-
Long text for Hero text
Creating our Services component
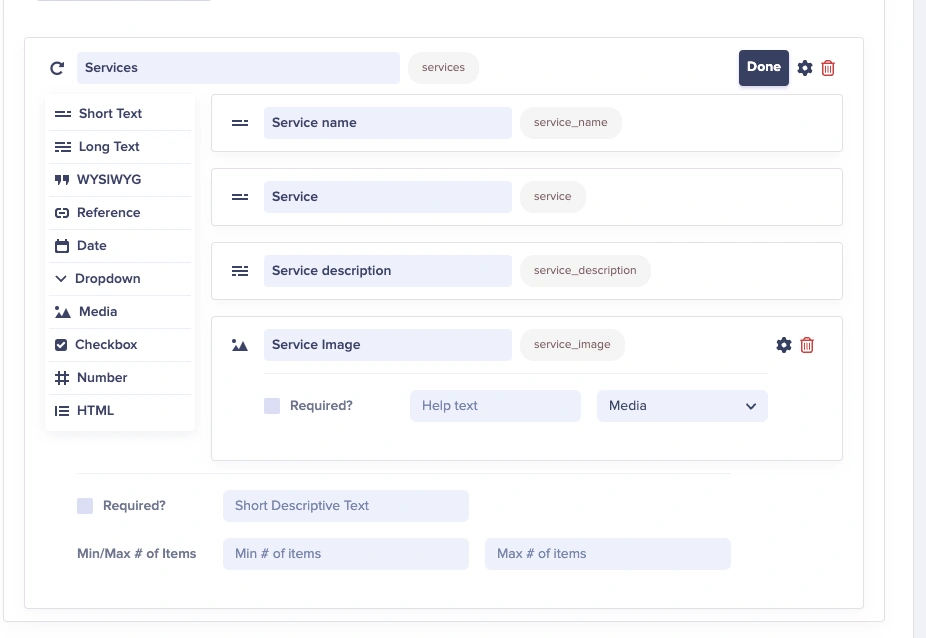
From the image below, we have given the Services component the name "Services”. Now, let’s add some fields to this component. First, click the Create Component button. We’ll be using a repeater field so we can repeat the services component.
-
Short text for the Service name
-
Short text for Service
-
Long text for Service description
-
Media for Service image
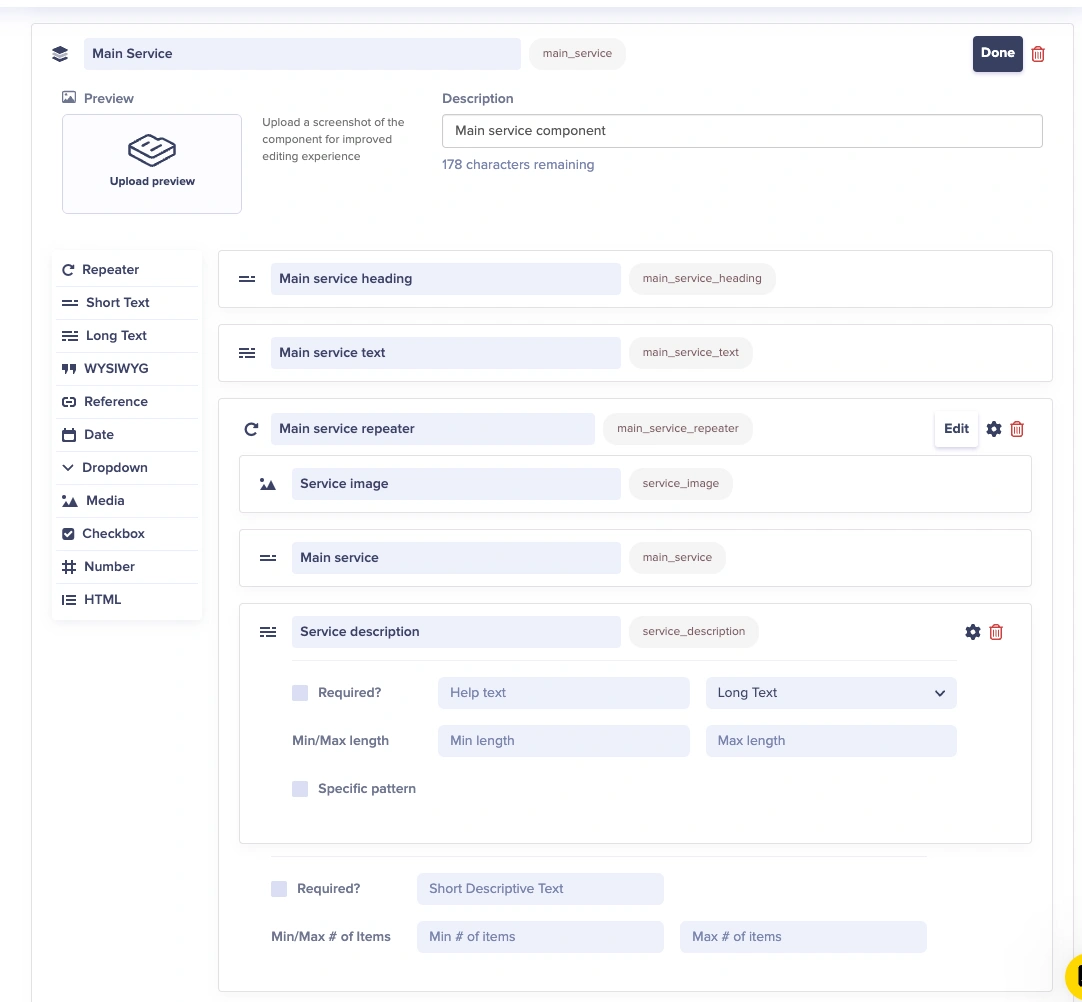
Creating our Main Service component
From the image below, we have given the Main Service component the name `”Main Services”. Now, let’s add some fields to this component. First, click the Create Component button.
For our main services, we’ll add the following fields:
-
Short text for Main service heading
-
Long text for Main service text
-
Repeater field: The repeater field named Main service repeater contains:
-
Media for Service image
-
Short text for Service name
-
Long text for Service description
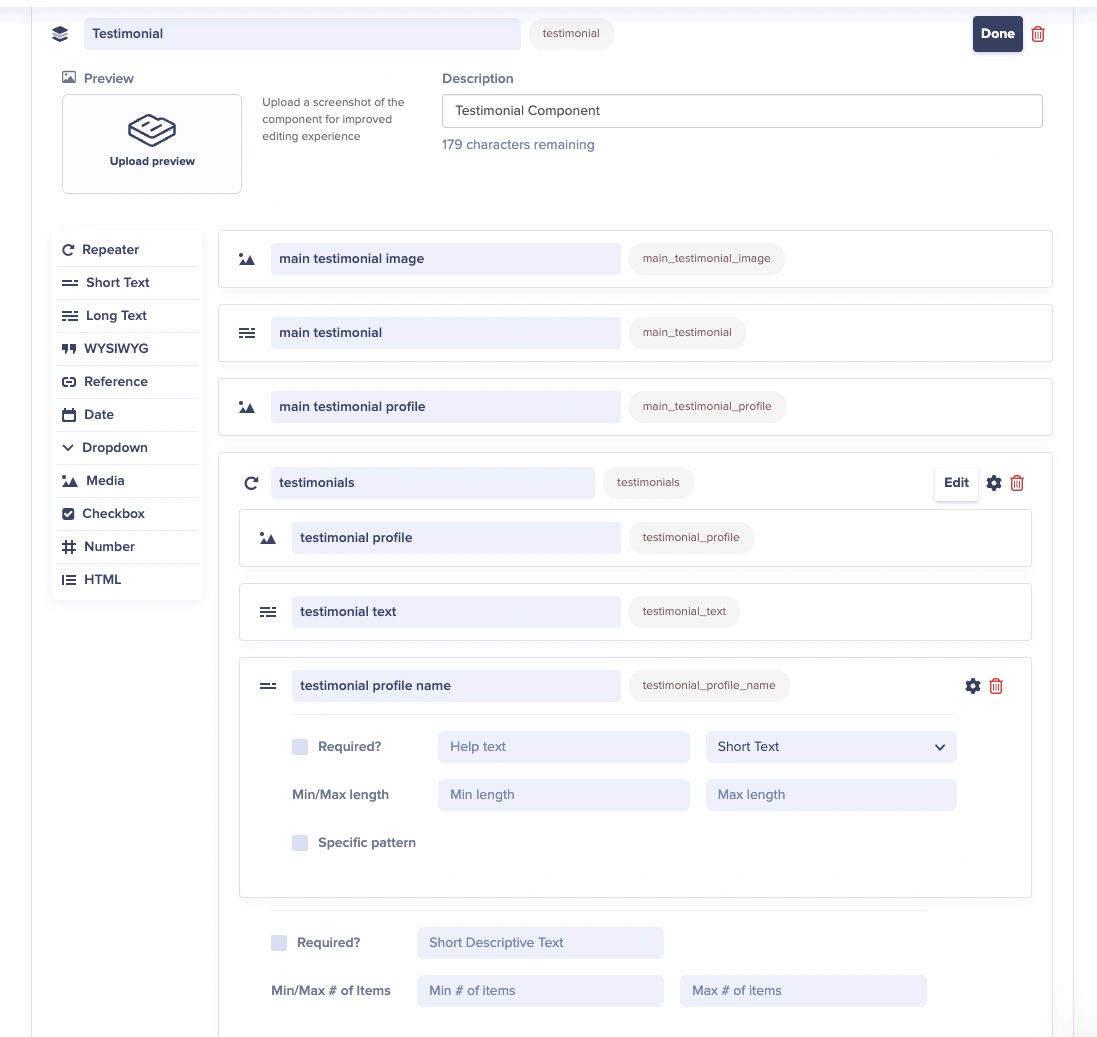
Creating our Testimonial component
From the image below, we have given the Testimonial component the name “Testimonial”. Now, let’s add some fields to this component. First, click the Create Component button.
For our testimonial component, we’ll add the following fields:
-
Media for Main testimonial image
-
Long text for Main testimonial
-
Media for main Testimonial profile
-
Repeater: The repeater field named testimonials contains:
-
Media for Testimonial profile image
-
Long text for Testimonial text
-
Short text for Testimonial profile name
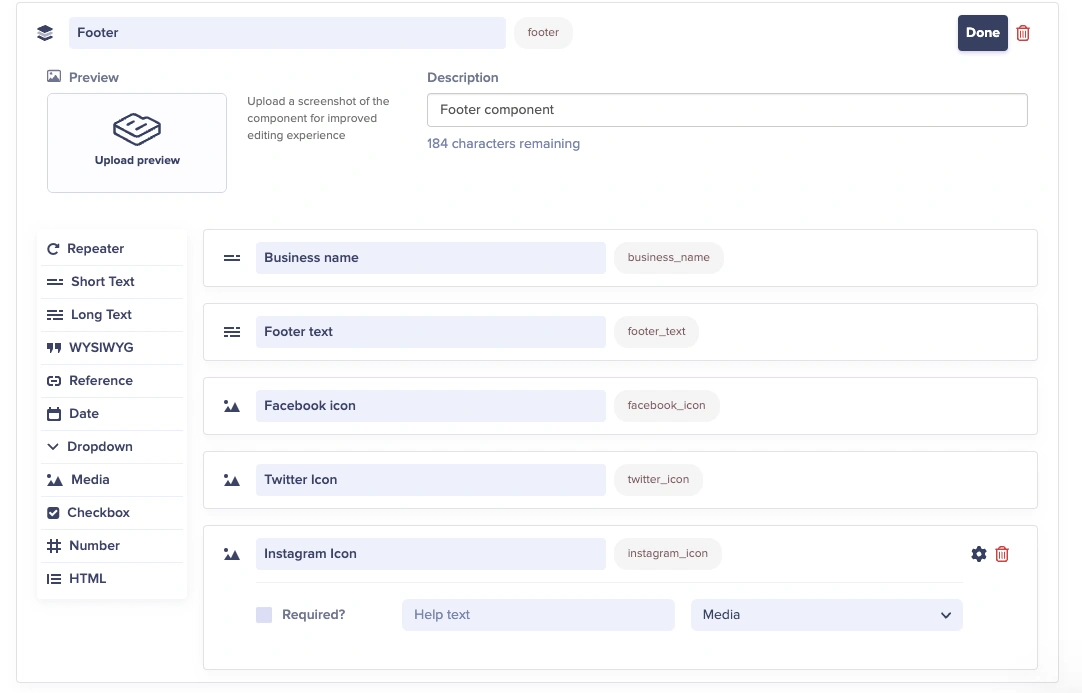
Creating our Footer component
From the image below, we have given the Footer component the name ”Footer”. Now, let’s add some fields to this component. First, click the Create Component button.
Here is what our footer fields look like:
-
Short text for Business name
-
Long text for Footer text
-
Media for Facebook icon
-
Media for Twitter icon
-
Media for Instagram icon
Building our page with our custom components
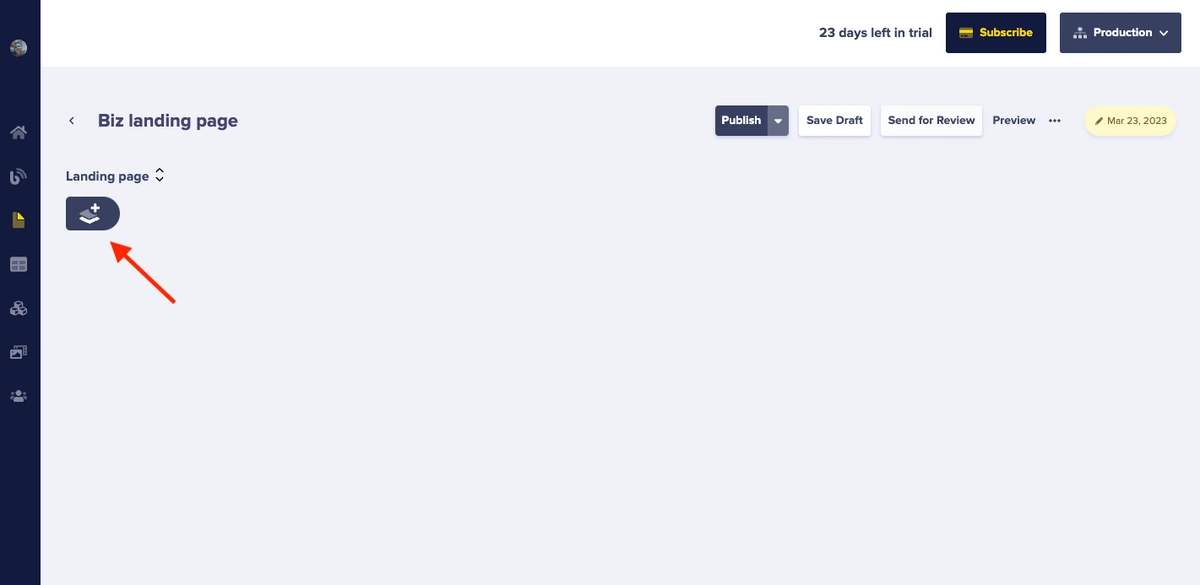
When we are done creating all our components, click on the Save button at the top right of our page. it leads us to our page editor where we can give our page a name and add our components and content.
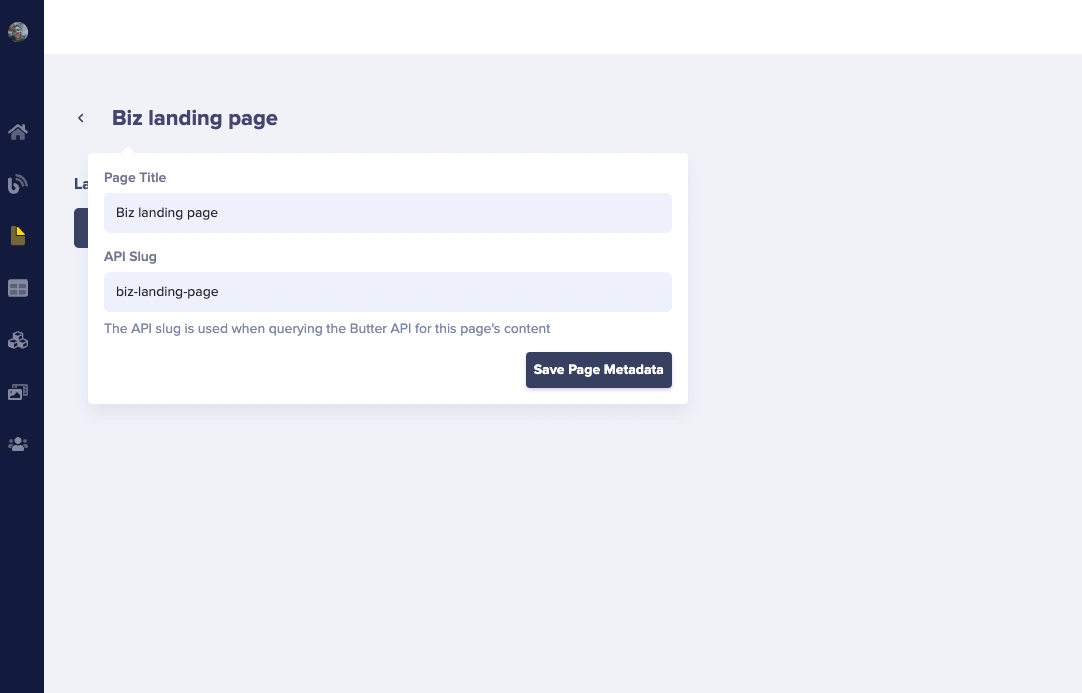
Here, we gave our page the name “Biz landing page”. Click on Save Page Metadata after naming the page, and then we are redirected to our page editor. Click on the Component Picker button indicated by the arrow.
You've saved components to a component picker which enables you to select them from the Component Library. The six components we will be selecting are:
-
Navigation
-
Hero
-
Services
-
Main service
-
Testimonial
-
Footer
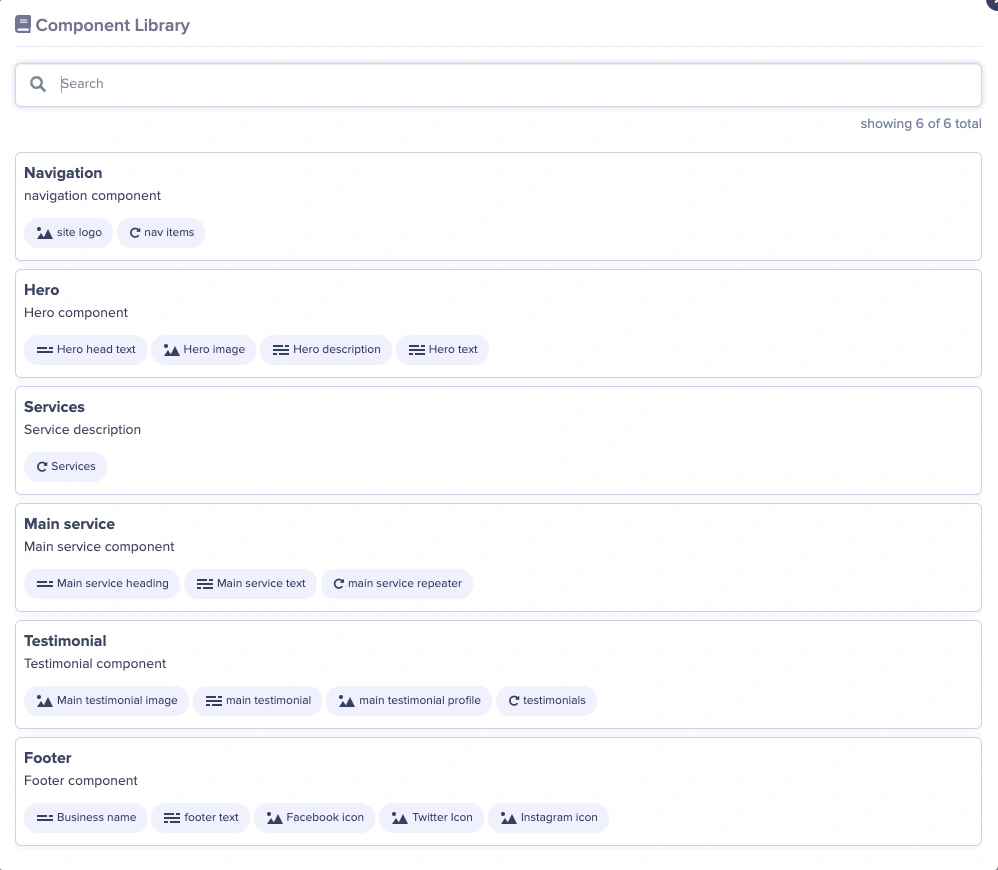
All we need to do from here is click on the components you want on our landing page. After you’ve added all the components to the page. You can now start putting the required information into the fields. This is what the page will look like after you’ve added all your information:
When we are done filling in the required content we want on our site, click the Publish button at the top-right of the page to publish our document.
After publishing, we are done with the ButterCMS side of things. Let’s start building the Hugo landing page.
Setting up our Hugo project
Building a landing page with Hugo is an excellent choice for anyone looking to create a high-quality, professional-looking website quickly and easily. Hugo is a fast and flexible static site generator (SSG) that makes it easy to create custom landing pages without any coding required. In this article, we'll take a step-by-step approach to building a landing page with Hugo, including installing the necessary software, choosing a theme, customizing your page content, and publishing your site to the web.
Install Hugo
The first step in building a landing page with Hugo is to install the software on your computer. Hugo is a free and open-source static site generator that's available for Windows, macOS, and Linux. You can download the latest version of Hugo from the official website (https://gohugo.io/).
Once you've downloaded the software, follow the installation instructions for your operating system to get Hugo up and running on your computer.
Create a new site
With Hugo installed, it's time to create a new site. To do this, open a terminal or command prompt and run the following command:
hugo new site my-landing-page
This will create a new Hugo site in a directory named "my-landing-page". This directory will contain the files and directories required to build your site, including the themes, content, and configuration files.
Choose a theme
Hugo has a large and growing collection of themes that you can use to customize the look and feel of your site. To choose a theme, go to the Hugo themes website (https://themes.gohugo.io/) and browse the available options. In our case, we’ll be using the hugo-scroll theme. Download it and extract its contents to the themes directory within your Hugo site or run the command to add the theme as a git submodule.
git clone https://gitlab.com/writeonlyhugo/up-business-theme.git themes/up-business-theme
Configure the theme
With your theme installed, it's time to configure it to suit your needs. To do this, open the config.toml file within your Hugo site and make any necessary changes. This file contains the configuration options for your site, such as the title, base URL, and menu items.
File structure
Our Hugo landing page structure now looks like this:
Biz_landing_page/
├── archetypes/
│   └── default.md
├── assets/
├── content/
├── data/
├── layouts/
├── public/
├── static/
├── themes/
    └── up-business-theme
└── config.toml
Integrating ButterCMS into our landing page
In this section, we’ll look at how we can integrate ButterCMS into our Hugo application we just spun up. We will use Hugo's built-in support for JSON data and ButterCMS's JSON API to retrieve and display your content. Here's how to do it.
First, we’ll write a script in Go that makes a request to our ButterCMS API to retrieve our content.
To do this, create a main.go file at the root of your directory, and paste the following code:
package main
import (
"encoding/json"
"fmt"
"net/http"
"io"
)
func main() {
url := fmt.Sprintf("<your-buttercms-api-token")
resp, err := http.Get(url)
if err != nil {
fmt.Printf("Error making HTTP request: %s", err)
return
}
defer resp.Body.Close()
if resp.StatusCode != http.StatusOK {
fmt.Printf("Error fetching content: %d %s", resp.StatusCode,
resp.Status)
return
}
var data struct {
Data json.RawMessage `json:"data"`
}
if err := json.NewDecoder(resp.Body).Decode(&data); err != nil {
fmt.Printf("Error decoding response: %s", err)
return
}
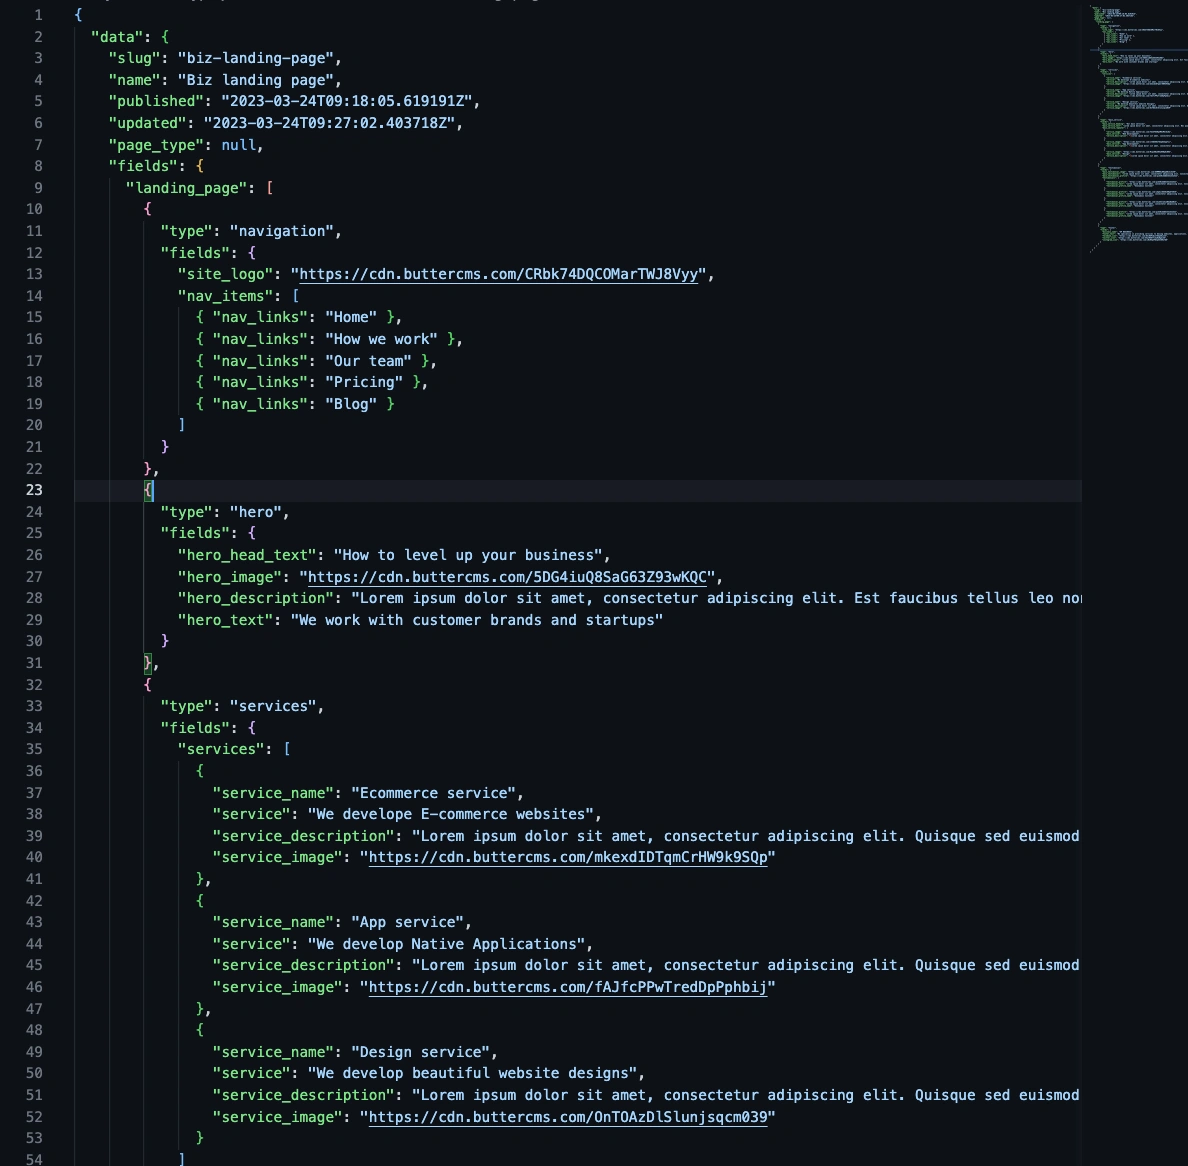
// Do something with your data her
fmt.Printf("%s", data.Data)
}
From the code, we are using Go’s built-in net/http package. All you have to do is add your ButterCMS API token to the code in line 11. (To find your ButterCMS API token, go to your dashboard settings and you can retrieve it.)
The http.Get() function makes a GET request to the ButterCMS API endpoint for your content type, passing your API key in the URL. The response is returned as an HTTP response object, which you can read from the response body.
In this example, we're using the json package to parse the response body into a struct that has a Data field of type json.RawMessage. This allows you to handle the response data in a more flexible way, without having to define a strict data structure.
Note that you'll need to import the encoding/json and net/http packages before running this code.
Storing our ButterCMS content
Since Hugo allows different data types, JSON included, we’ll be saving our response data we got from the API call to ButterCMS as a JSON file. To do that, add the following code to the above main.go file after the last comment.
In your Go code that makes the GET request to the ButterCMS API endpoint, after parsing the response data, you can write the data to the JSON file using the encoding/json package:
// Assuming `data` is the JSON data fetched from the ButterCMS API

// Open the JSON file for writing, creating it if it doesn't exist
file, err := os.OpenFile("data/my_content_type.json", os.O_WRONLY|os.O_CREATE|os.O_TRUNC, 0644)
if err != nil {
    fmt.Printf("Error opening JSON file: %s", err)
    return
}
defer file.Close()

// Write the JSON data to the file
if err := json.NewEncoder(file).Encode(data); err != nil {
    fmt.Printf("Error writing JSON data to file: %s", err)
    return
}
This code opens the JSON file for writing, creates it if it doesn't exist, and then uses the json.NewEncoder().Encode() method to write the JSON data to the file.
After running your Go code, you should see a new file at data.json containing the JSON data fetched from the ButterCMS API.
To run the Go program, run this:
go run main.goThis will compile and run the main.go script, which will fetch the data from the ButterCMS API and save it to a new file called data.json in your project directory. You should see a message in the terminal indicating that the data has been fetched and saved to the file.
Note that you will need to have the encoding/json and net/http packages imported in your Go script in order to make the HTTP request and parse the response data as JSON. You may also need to import other packages depending on the structure of your code.
You can then load this data into your Hugo templates using the getJSON function, like this:
{{ $myContent := getJSON "../../../data.json" }}This creates a new variable $myContent that contains the JSON data from the file. You can then access the data in your templates using dot notation or range loops, depending on the structure of your data.
Here is what our landing page looks like:
Final thoughts
In conclusion, integrating ButterCMS into Hugo is a powerful way to build landing pages quickly and easily. By using ButterCMS as a headless CMS, you can separate the content management from the presentation layer and build a fast and scalable website using Hugo.
With ButterCMS, you can manage your content in one place and make changes quickly, without having to worry about the underlying technology. Meanwhile, Hugo allows you to build fast and scalable websites that are optimized for performance.
By integrating these two powerful tools, you can create landing pages that look great and perform well, helping you to achieve your marketing and business goals with ease. So if you're looking for a way to build landing pages quickly and easily, consider using Hugo and ButterCMS together to get the job done.
To learn more about how you can use ButterCMS with Hugo, check out the following tutorials:

